
Ko-Fi orders get a signed copy of the book
Order it from your nearest Amazon store
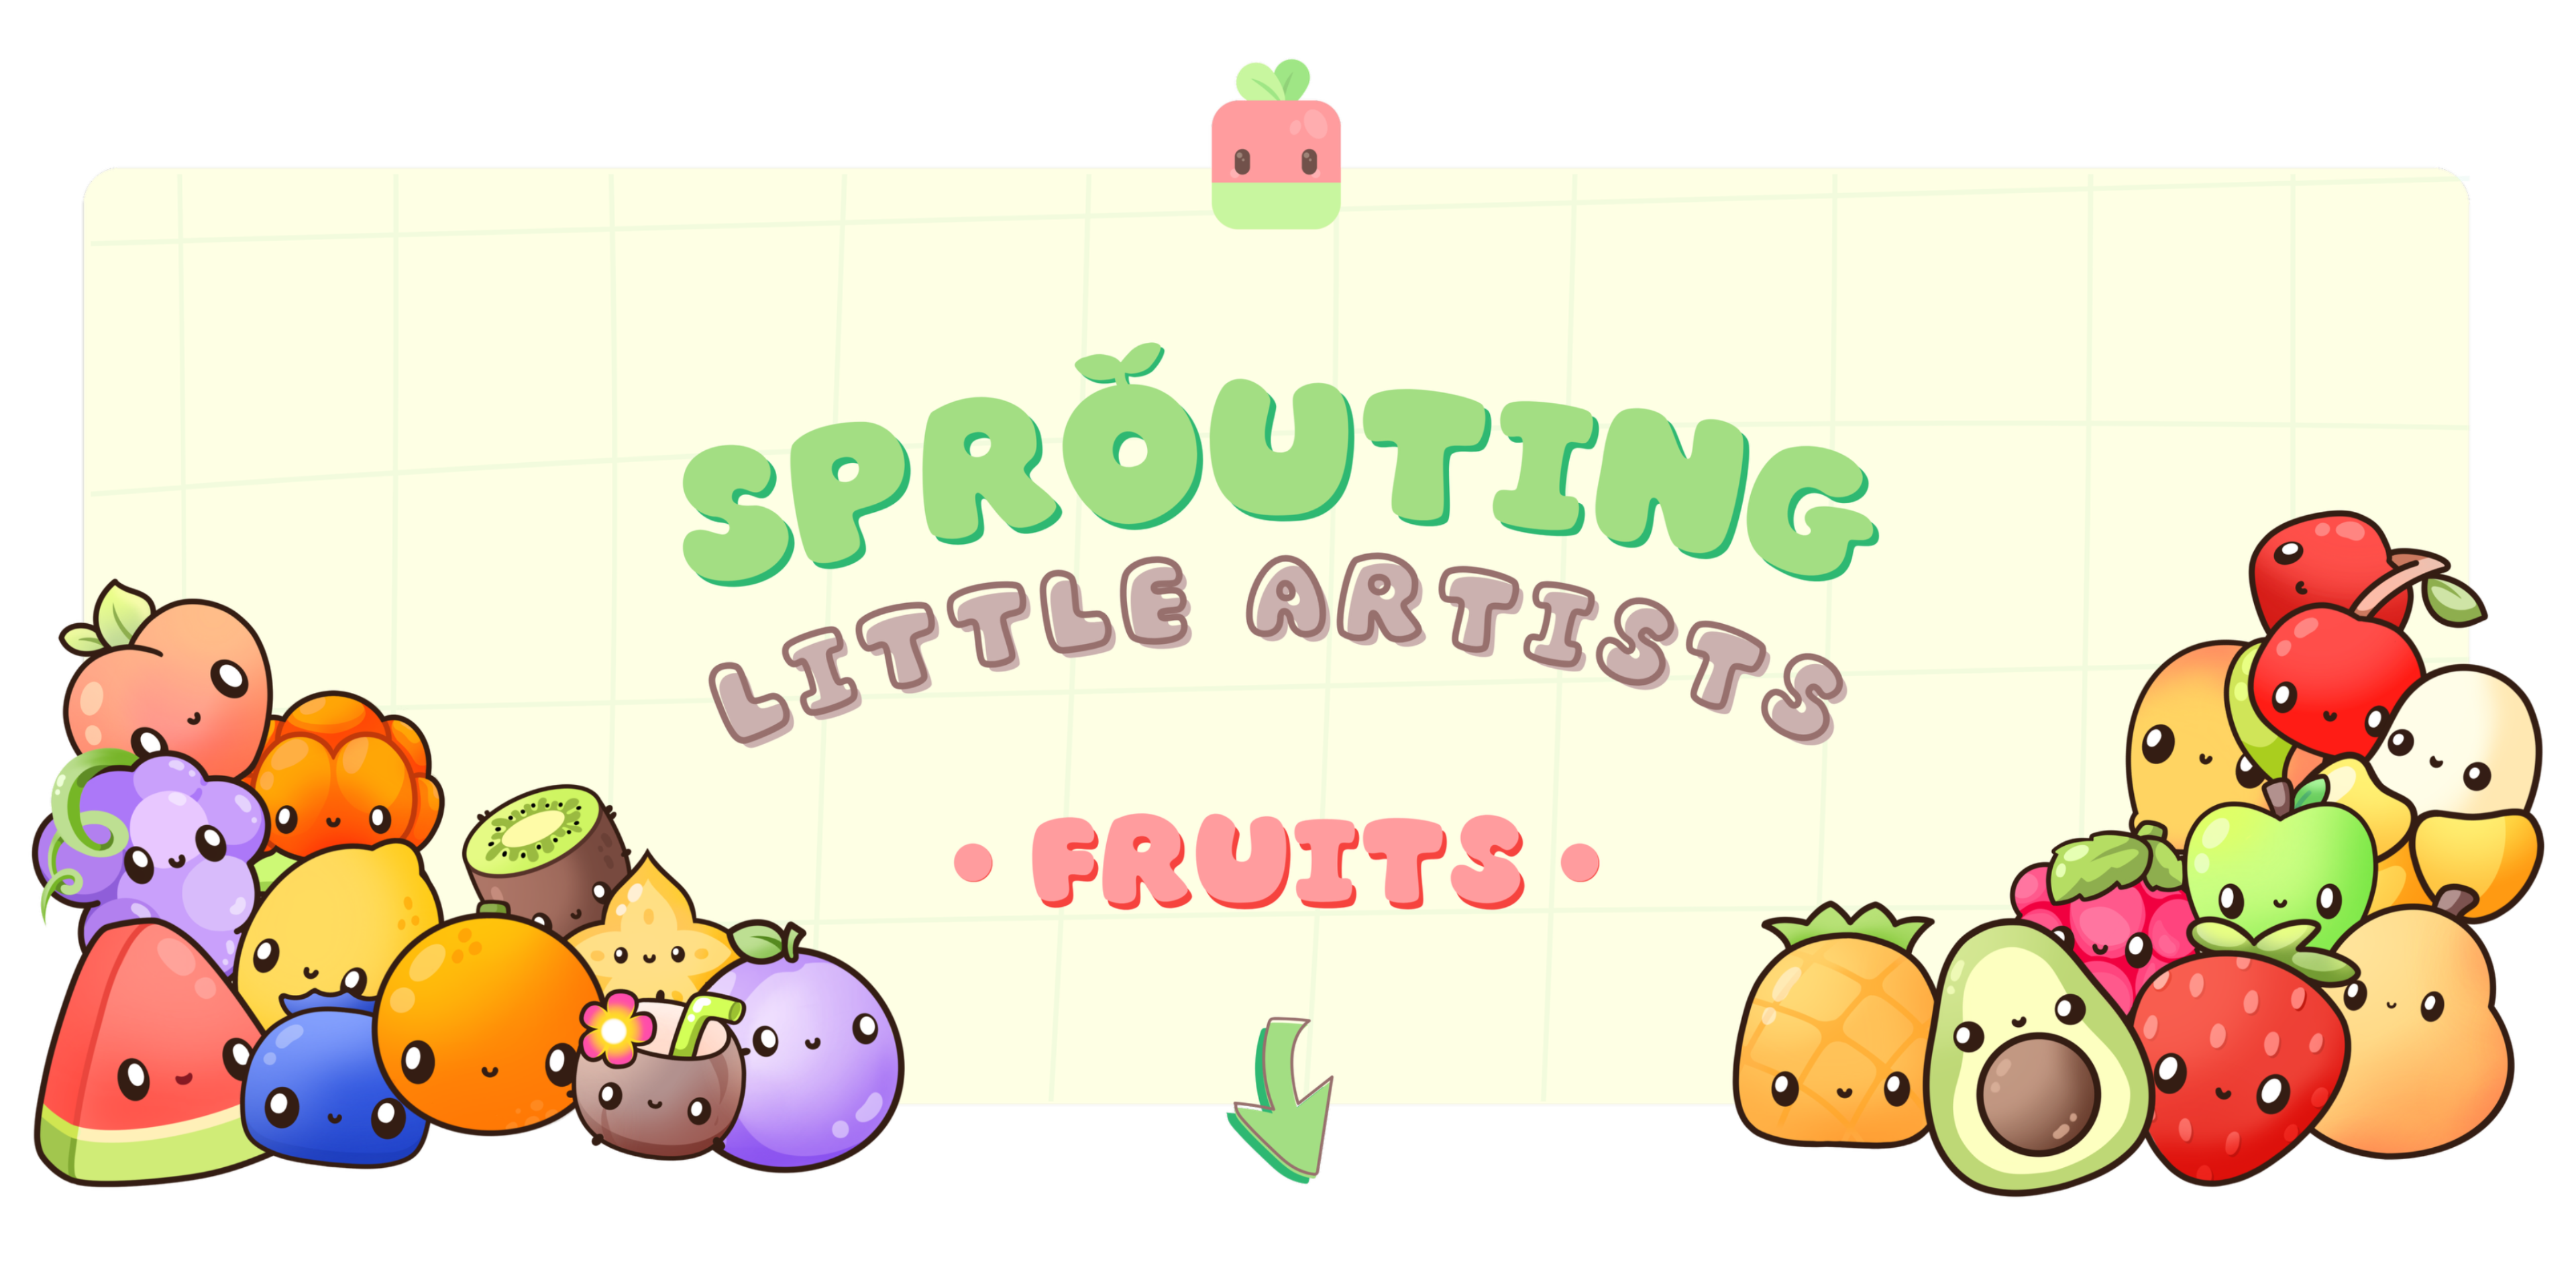
Sprouting Little Artists™ • Fruits is a creative activity book filled with hand-drawn kawaii-style fruit coloring pages and fun facts about the natural world.Each page is designed to help children explore fruit colors, while expressing their creativity in a playful way. This book was created to make learning fun through art and challenges."My goal was to help our little artists build confidence as they color and discover the wonders of the world around them."Inside you will find:• 20 hand-drawn fruit illustrations created by me
• color inspiration guides
• fun and educational fruit facts
• 20 questions quiz to recap
• Sprouting Fruit Artist Certificate




Do you want to show us your little one's work?Use #sproutinglittleartists and tag @wattymelo on instagram. We would love to see it and share it with the community!
Hi there!
I am Daiana Lates (@wattymelo), the creator behind
Sprouting Little Artists™










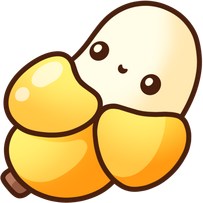
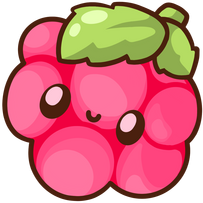

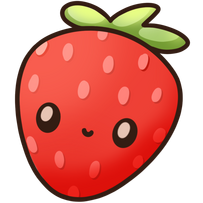
This project started as a series of subscriber badges created for my nature-themed Twitch channel. When I saw the way my daughter, Melissa, was looking at the drawings, that was the moment when I thought I can turn these kawaii cuties into something more.I didn’t want to make just another coloring book, so I began thinking about what I can add to give it more value, make it more fun, but not overwhelm the little ones at the same time. And that’s how the fruit facts section came to be. I think it’s a nice way to share bite-sized information with our children, without having to look it up on phone screens and break the connection we create with them through play.At the end, I also added a quiz for the bigger cookies to test their knowledge and a “Certificate of Completion”
because, no matter how big or small, we all love to see our progress recognised.I am very happy to share my work, now, with you and with the little ones all over the world. I hope you feel joy when you go through this activity book with your children!One last thing: I would love to see their work and to get your feedback, as parents, on what you loved and what can be improved so that I can make the next Sprouting Little Artists™ book in the series even better!If you made it this far, I appreciate you and I want to tell you that you’re doing great at making your little one’s world more beautiful every day- with love, from one parent to another
KAWAII TUTORIALS

Here you’ll find step-by-step guides to help you create adorable illustrations. Each tutorial is designed to be easy to follow, perfect for beginners or anyone who loves cute art. If you love what you see, join the mailing list to get notified when a new tutorial is uploaded.
NAVIGATION TIPS
• hover over each image to reveal the full descriptions and tips on how to draw certain elements
• use the ← and → arrows to navigate between tutorials (if no more tutorials are available you will be brought back here)
• share your creations using #wattymeloclub and tag @sproutinglittleartists on instagram


Melo Club Newsletter
···· JOIN THE MELO CLUB ····Join the email list to be the first to know when a new guide is added.Sign up to get exclusive updates and tips straight to your inbox!Let’s grow together, one sketch at a time. Because just like a little sprout, your creativity has the potential to bloom into something extraordinary.

HOW TO DRAW
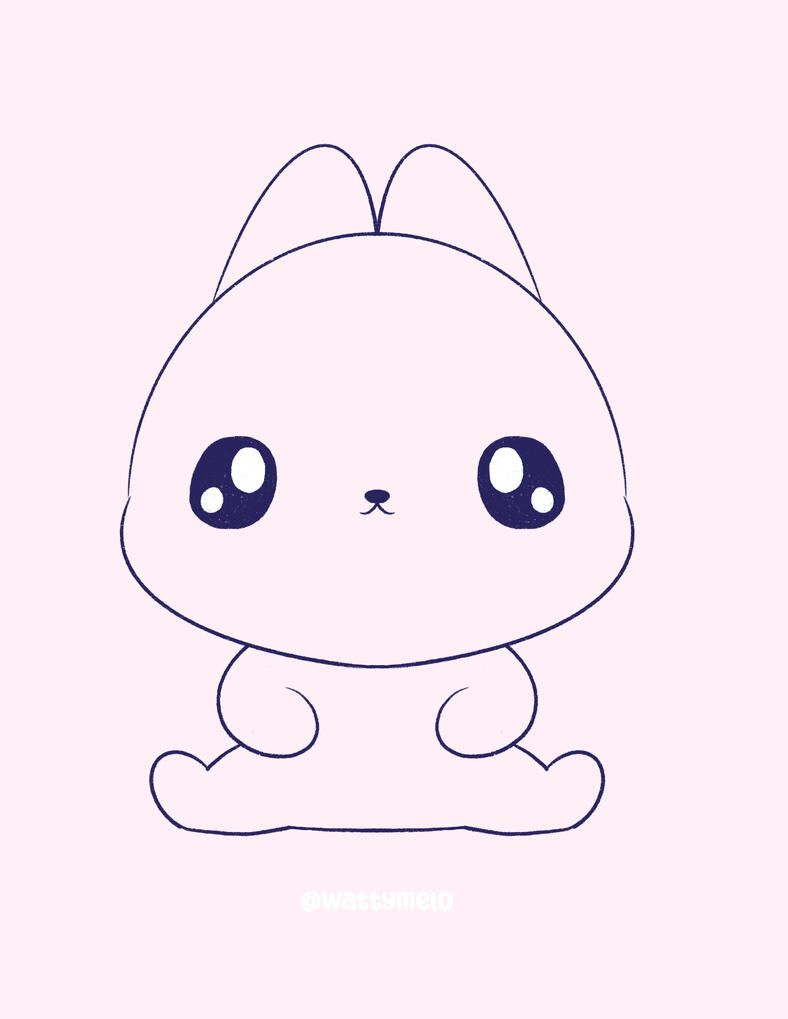
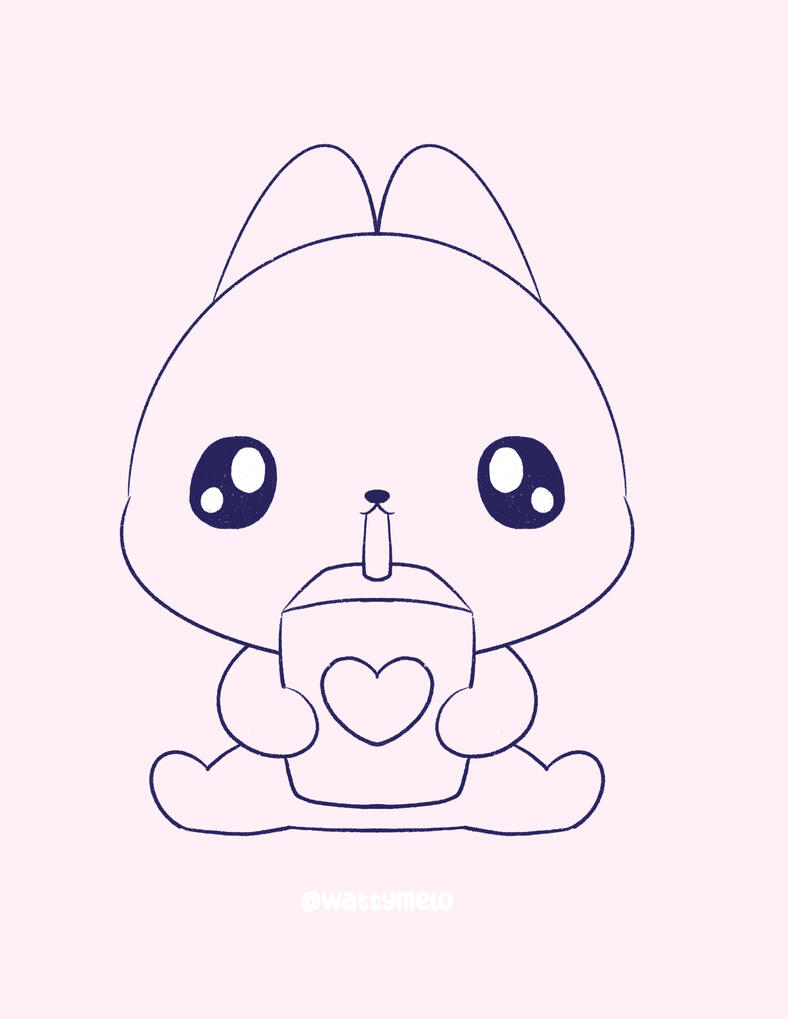
Adorable Bunny
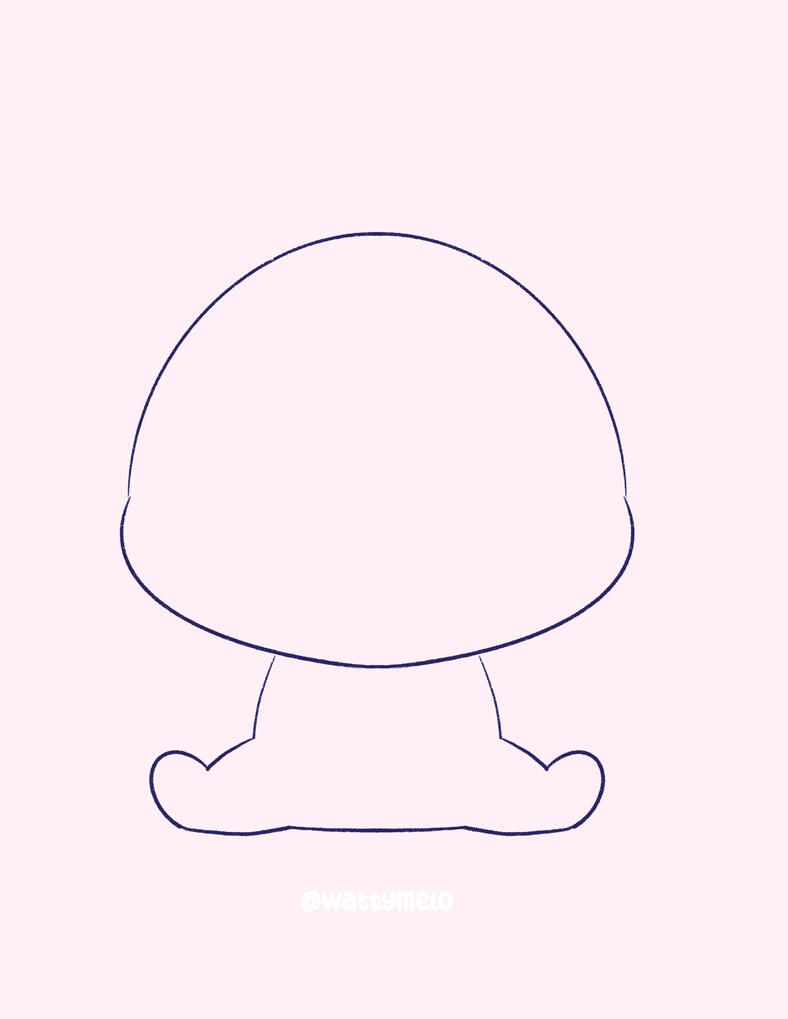
1. Outline the Head and Body ∙ Begin by sketching quick, basic shapes to outline the general placement and size of your bunny. Use a big squished circle for the head and a smaller U shape for the body to which you attach the legs.
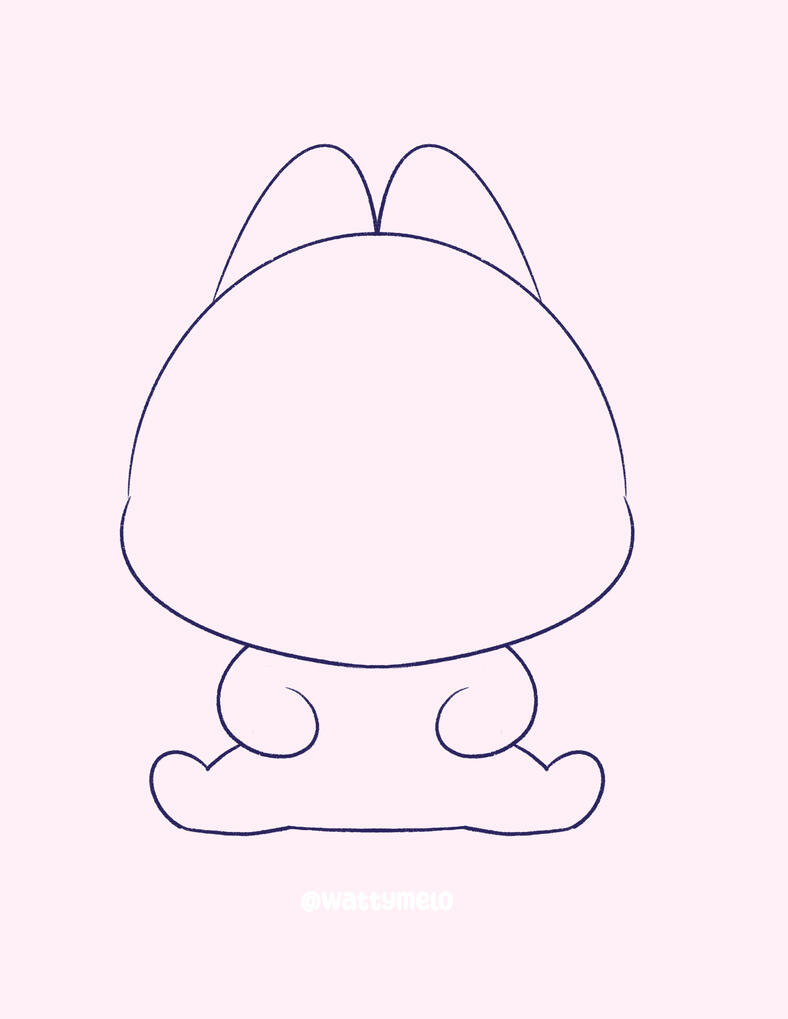
2. Define the Features ∙ Enhance the body by adding two long C shapes for the hands and a rounded M shape for the ears.

4. Draw the Eyes and Expression ∙ Add two large, circular eyes. You can make them shine with little white highlights. Then add a tiny nose and mouth.

6. Add the Juice Box ∙ Create a 3D rectangular shape with a symbol of your choice on it, and add a small straw sticking out from the top.

10. Base Linework ∙ Use a monoline brush or your favorite tool to create clean and precise lines as usual.

11. Add Base Color ∙ Use soft, pastel colors for a cute vibe. I used a white for the bunny's body (since Bubugum is white), and two different shades of purple for the box.

12. Add highlights and shadows ∙ To add depth to your bunny, apply light shading to areas like the underside of the body, face, and ears. Enhance the look with a soft blush on the cheeks, and small white lines bubbles on the heart.

CONGRATULATIONS! You just completed the "How to draw an adorable bunny tutorial"! I decided to add little stars floating around and some soft grass indications.




HOW TO DRAW
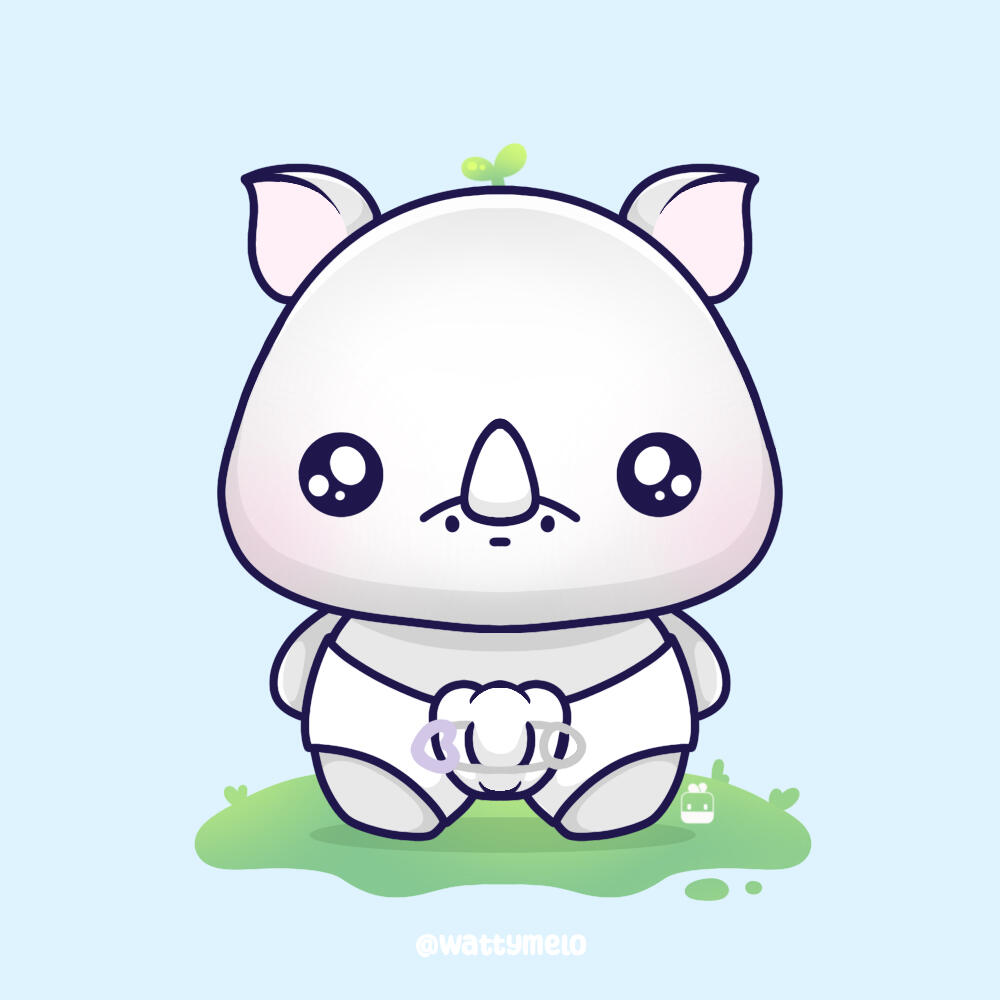
Baby Rhino
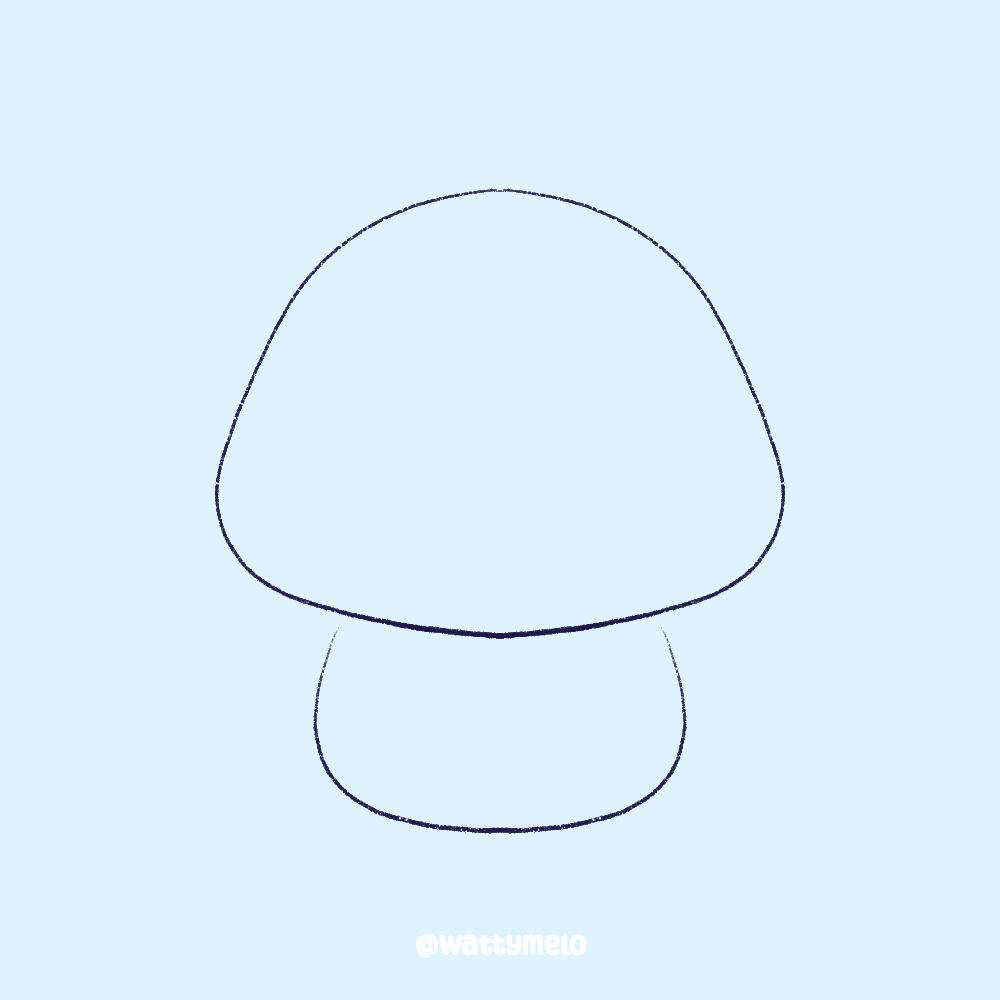
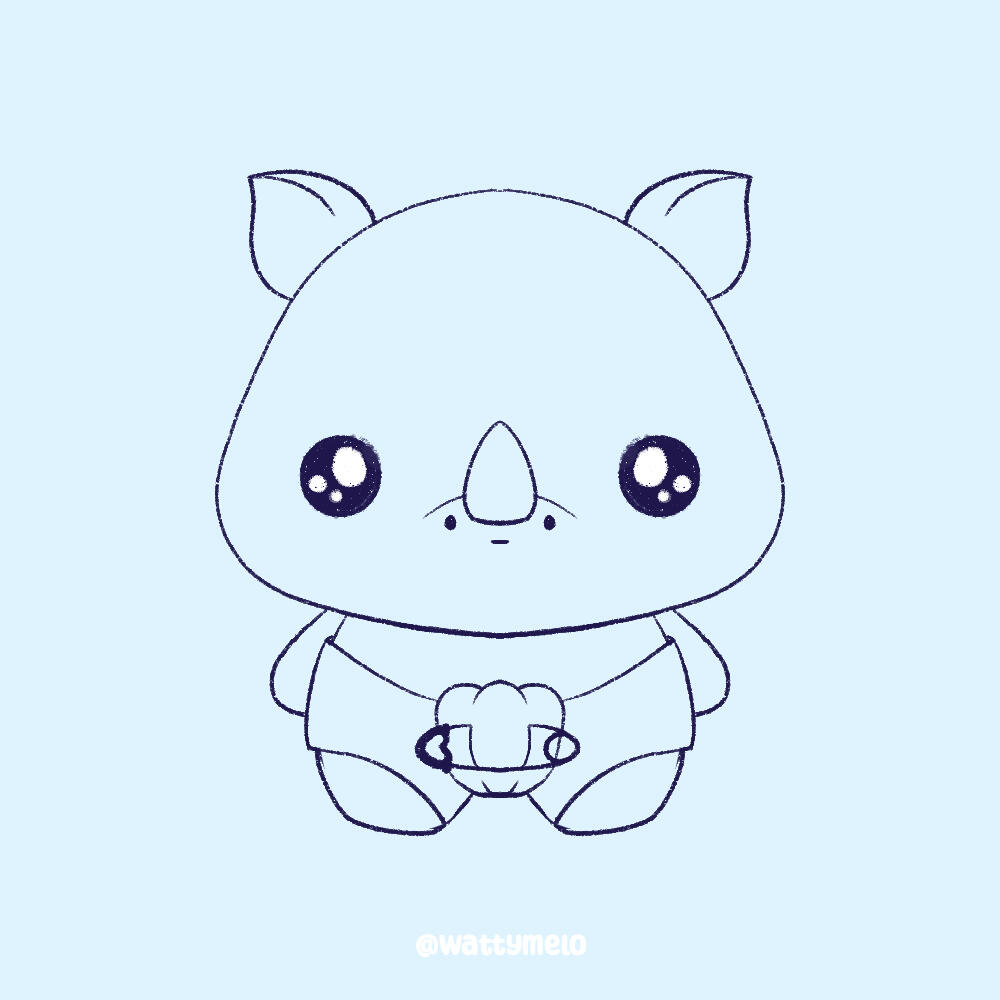
1. Outline the Head and Body ∙ Begin by sketching quick, basic shapes to outline the general placement and size of your rhino. Use a big squished circle for the head and a smaller U shape for the body.

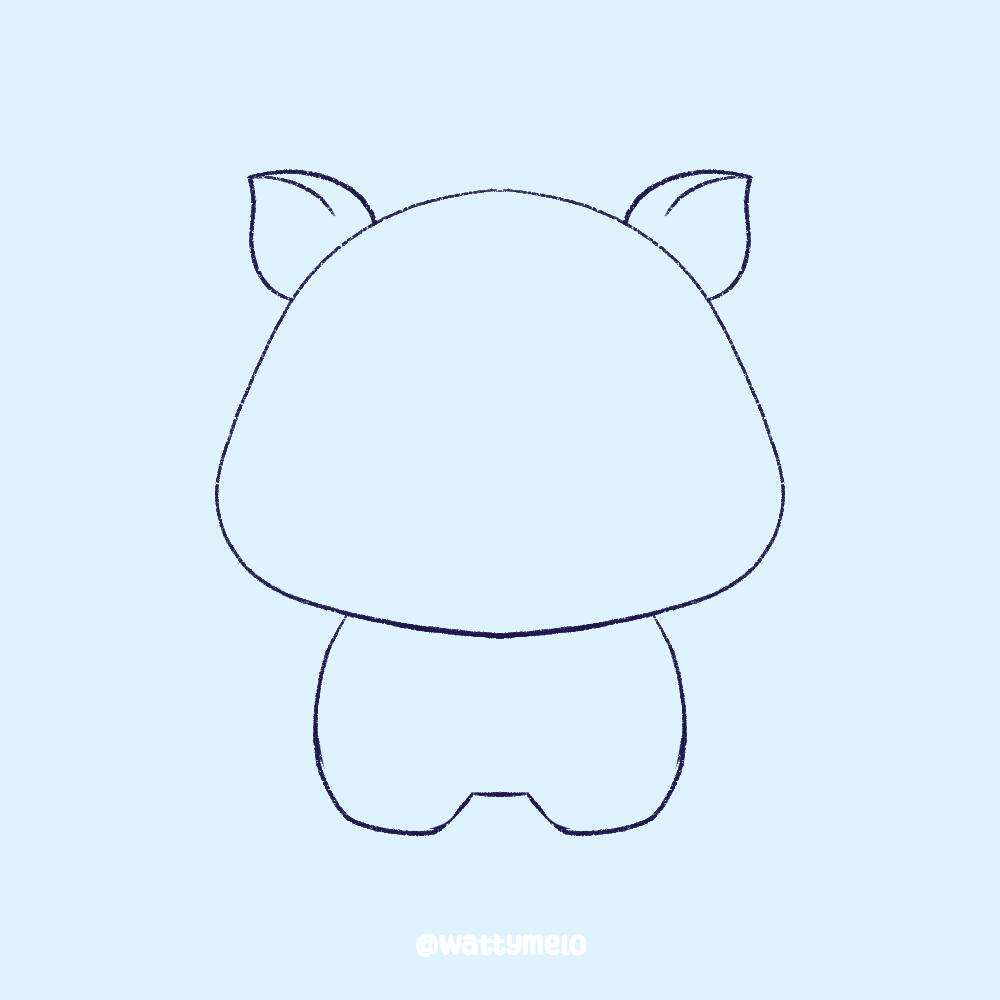
2. Define the Features ∙ Enhance the body by adding two square-ish C shapes on the bottom for the legs.

3. Add the Ears ∙ Add two curvy shaped for the happy little ears on top of the rhino's head.

4. Draw the Eyes and Expression ∙ Add two large, circular eyes. You can make them shine with little white highlights.
5. Draw the Nose ∙ Draw a wide semi-circle in the middle of the face to indicate the bump of the nose. Add two small dots under it for the nostrils, and a small line in the middle for the mouth.

6. Add the Horn ∙ Draw a rounded triangle shape for the horn in the middle of the line of the nose to give it a more 3D look.

7. The Diaper! ∙ Draw a shape resembling panties at first to outline the diaper. After that, add a small bump in the middle that indicates the fold.

8. Draw the Pin ∙ Add the pin to give the diaper a bit more details.
9. Add the Arms ∙ Finish up the sketch by giving your baby rhino a set of chunky little arms.

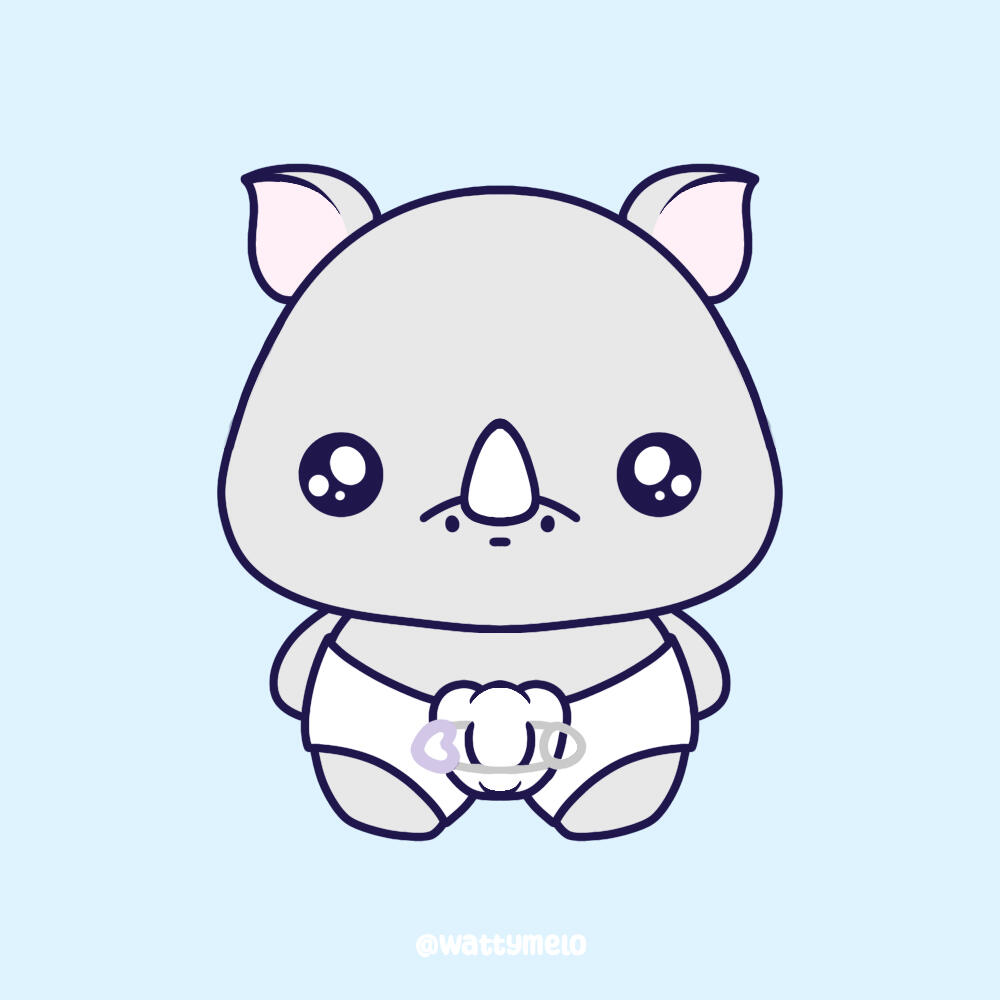
10. Base Linework ∙ Use a monoline brush or your favorite tool to create clean and precise lines as usual.

11. Add Base Color ∙ Use soft, pastel colors for a gentle vibe. I used a light grey for the rhino's body, and the good ol' white for the rest.

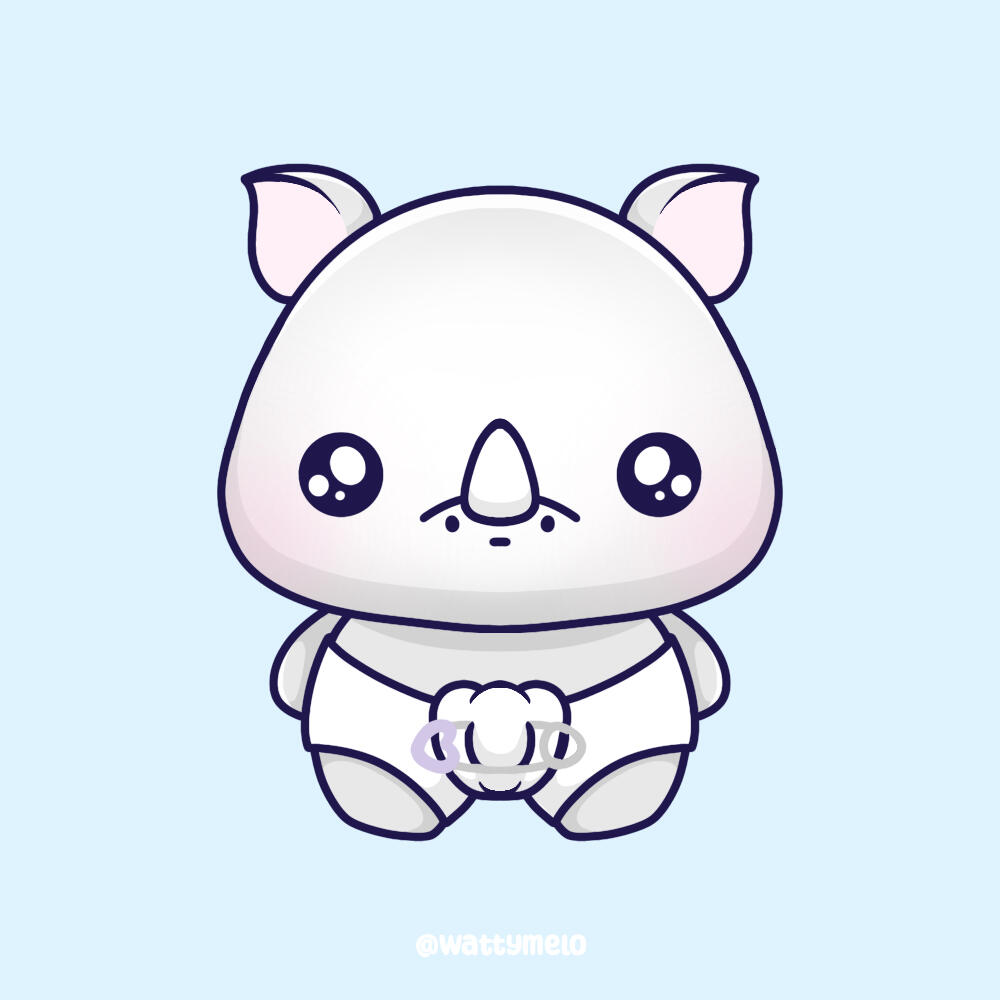
12. Add highlights and shadows ∙ To add depth to your rhino, apply light shading to areas like the underside of the body, face, and ears. Enhance the look with soft highlights on the center of the face, and small white lines on the top edges.

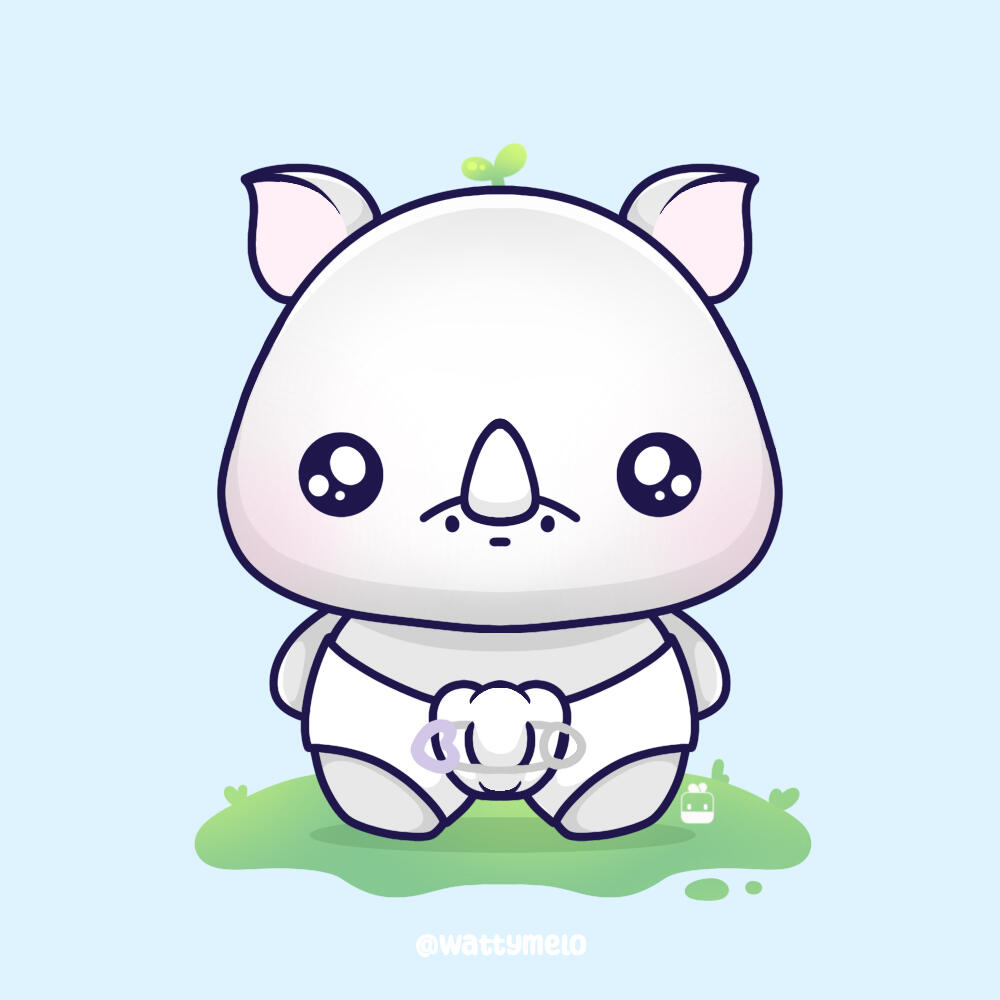
CONGRATULATIONS! You just completed the "How to draw a baby rhino tutorial"! I decided to add some grass under its feet, a soft shadow under the body and my tiny signature sprout to finish up the illustration.






HOW TO DRAW
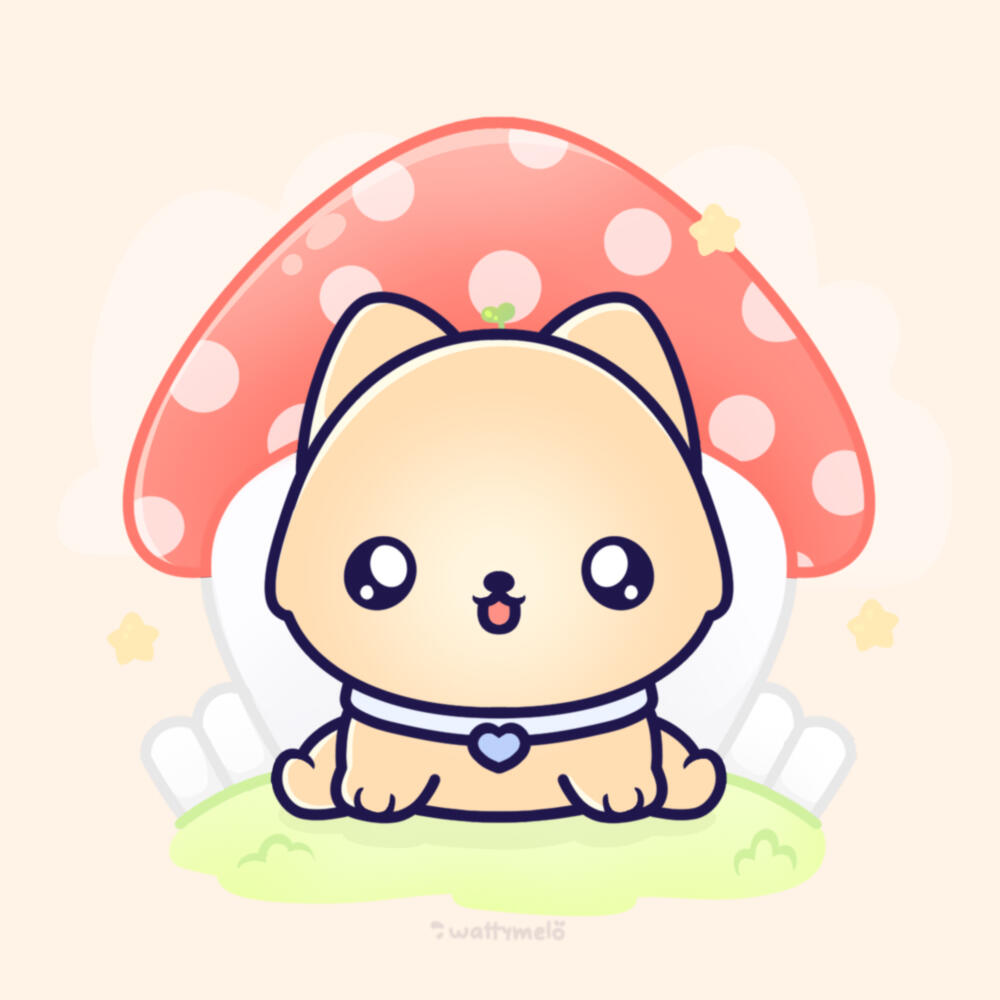
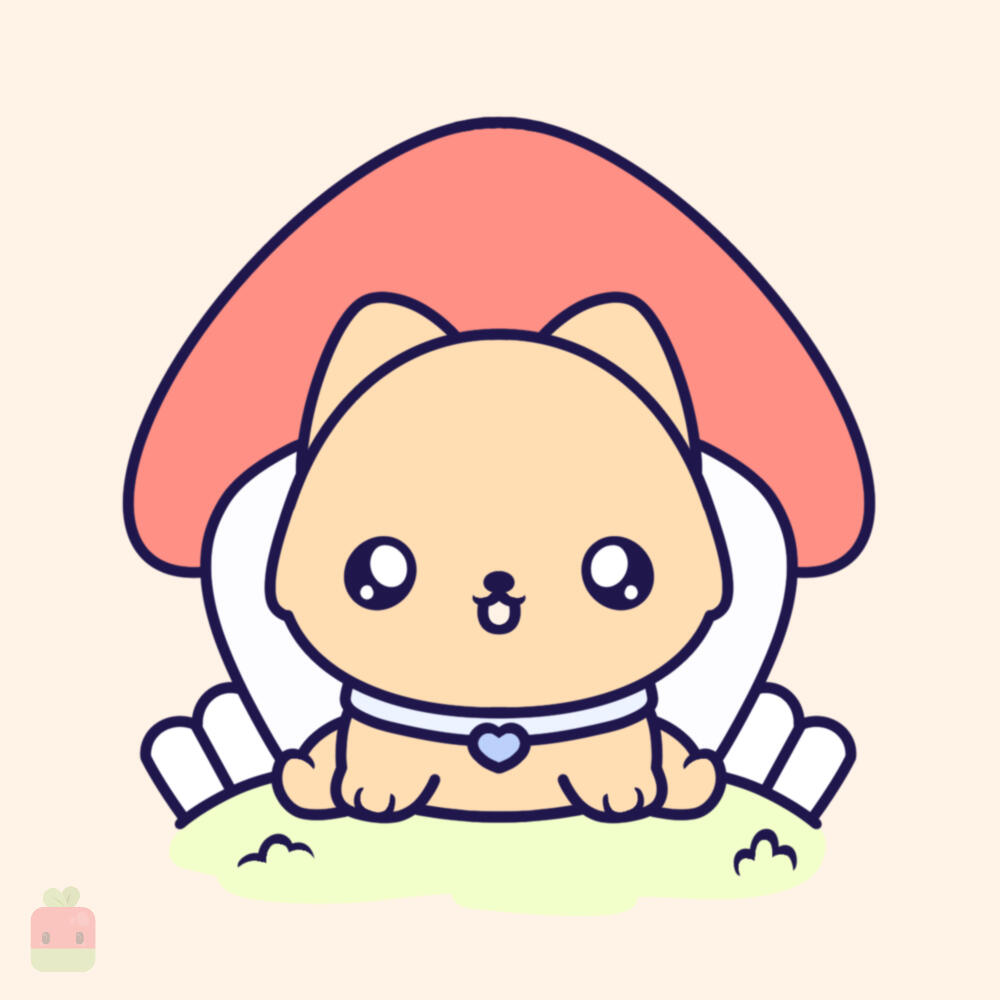
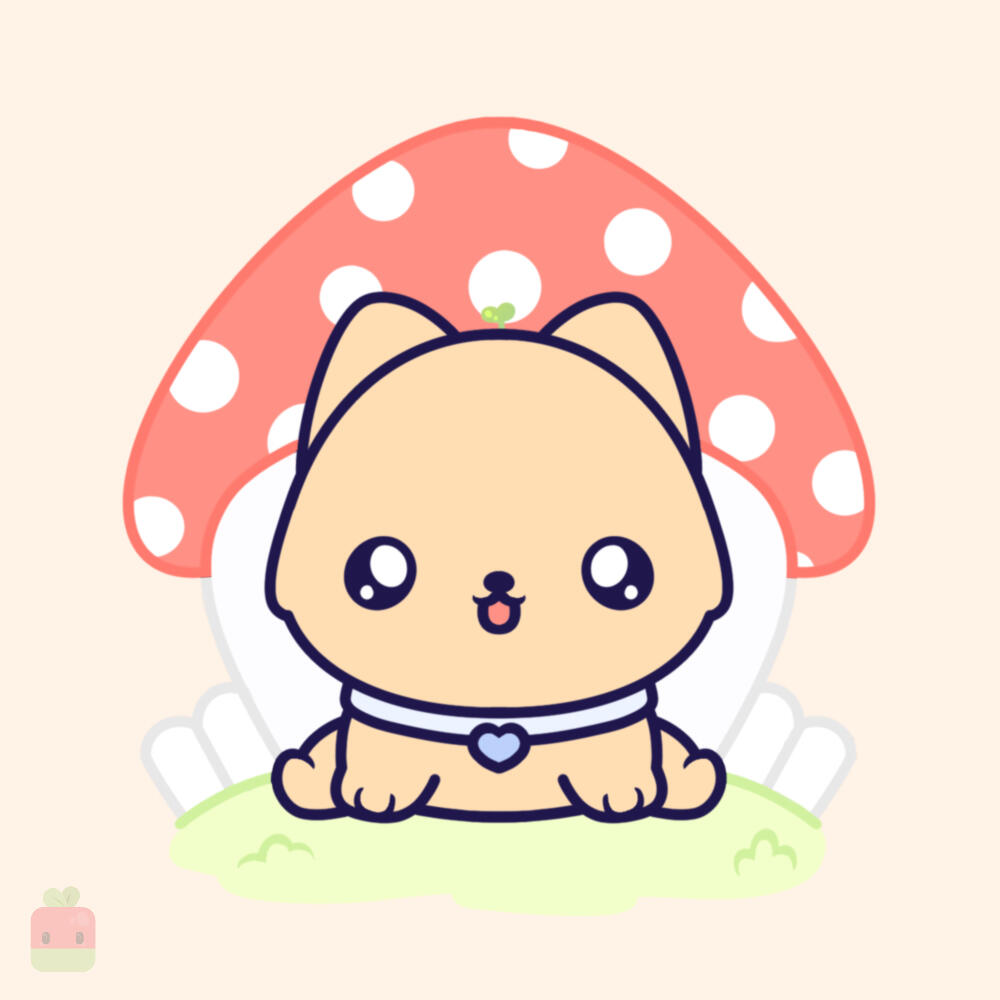
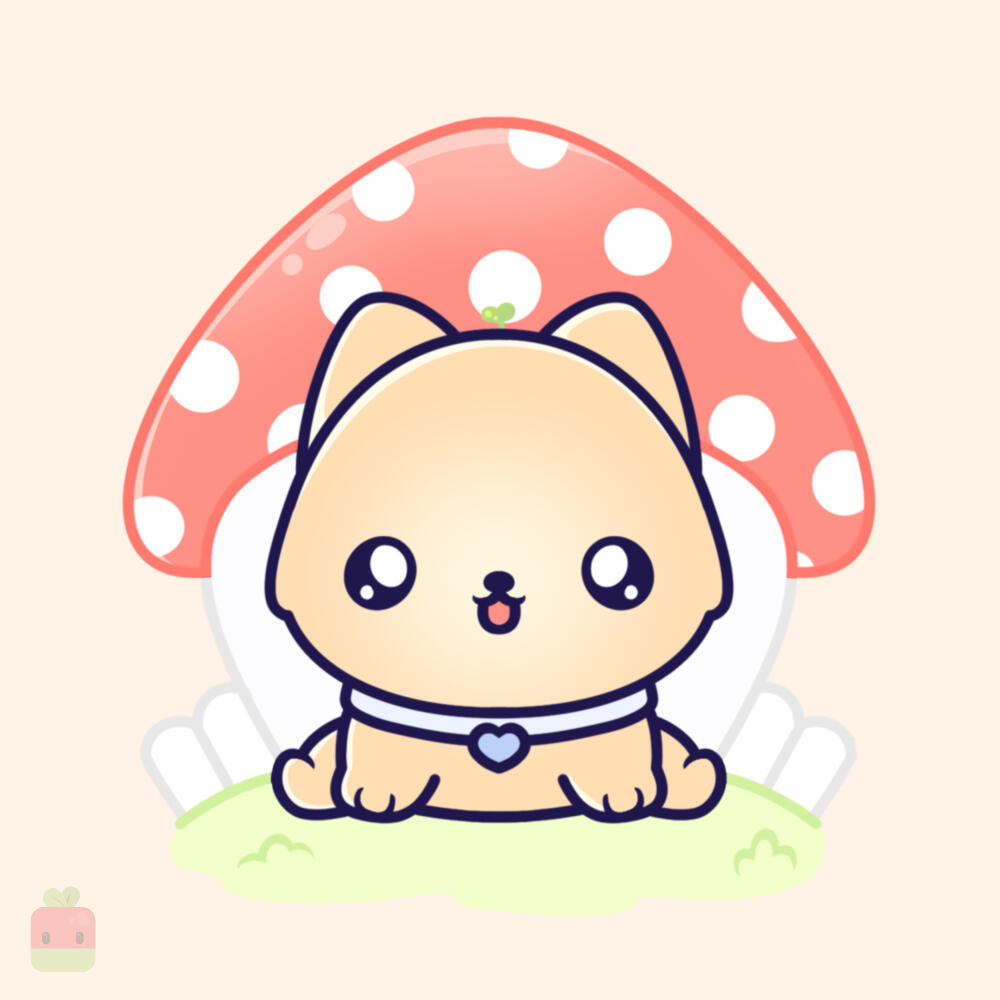
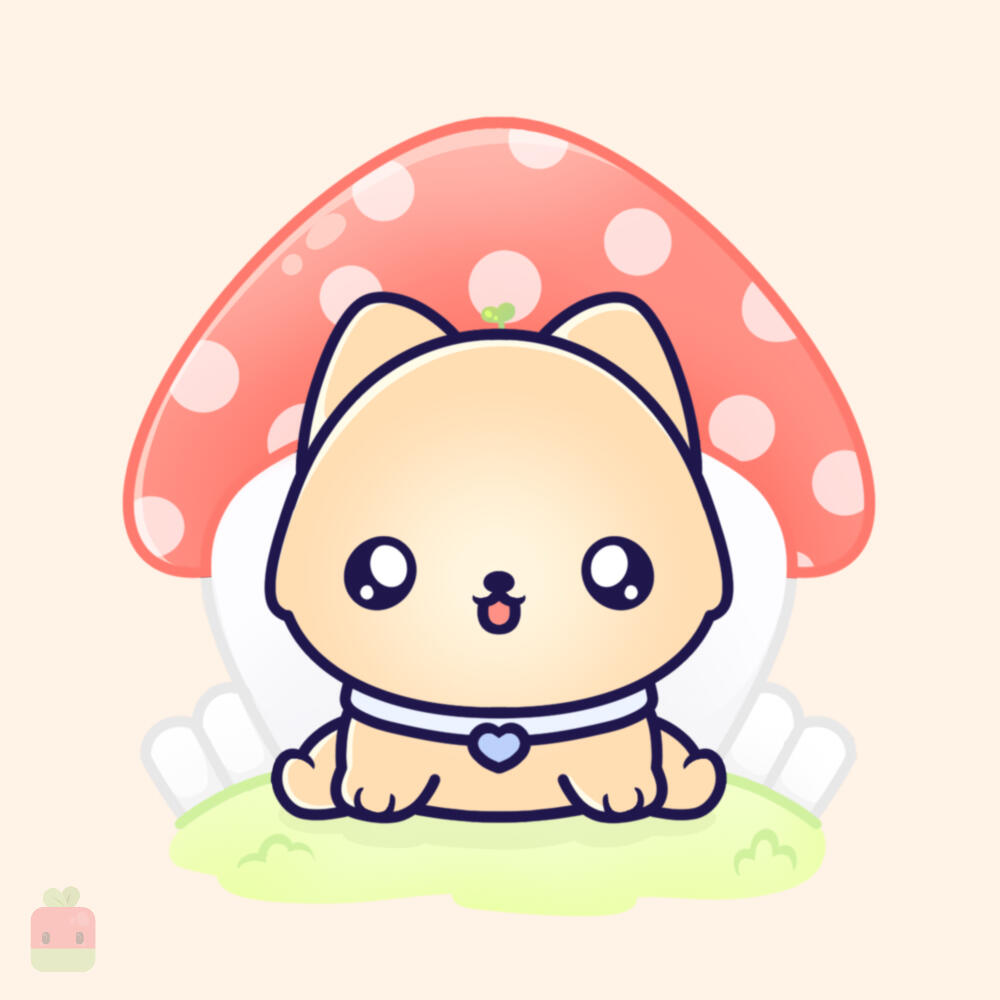
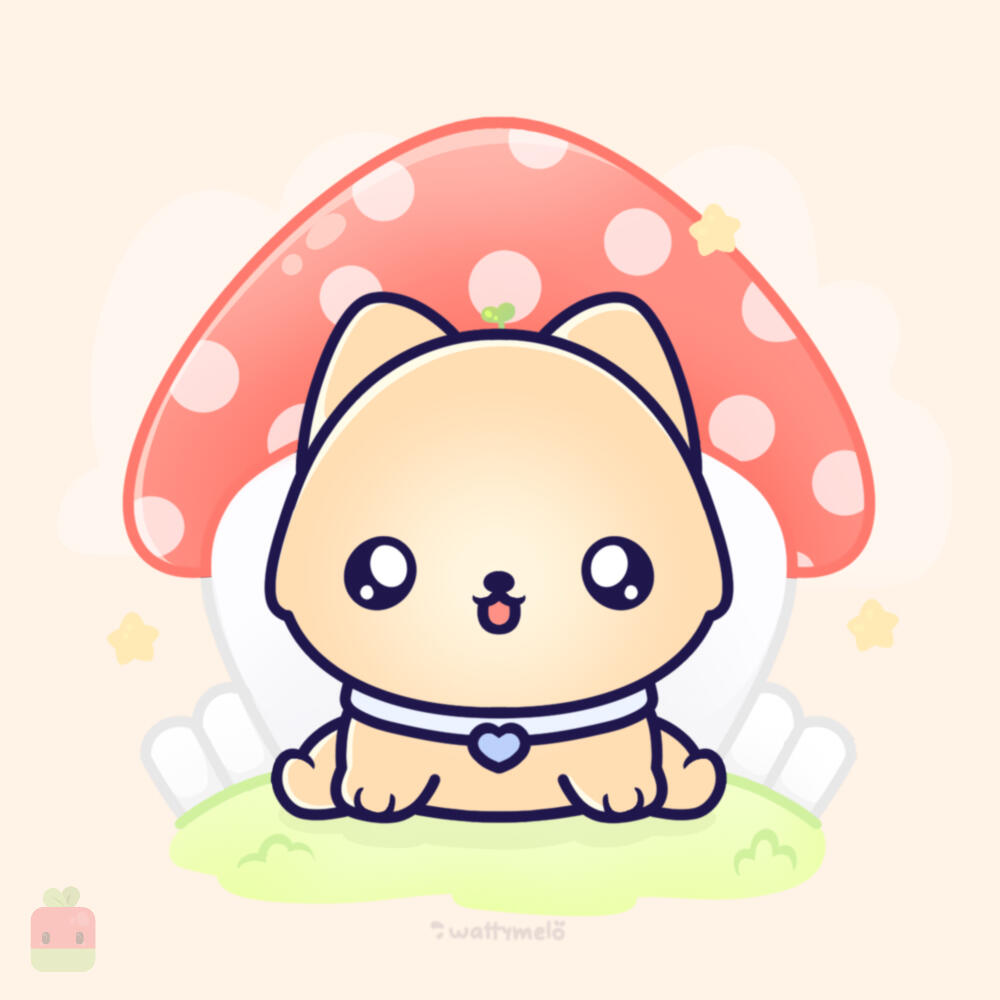
Cute Dog
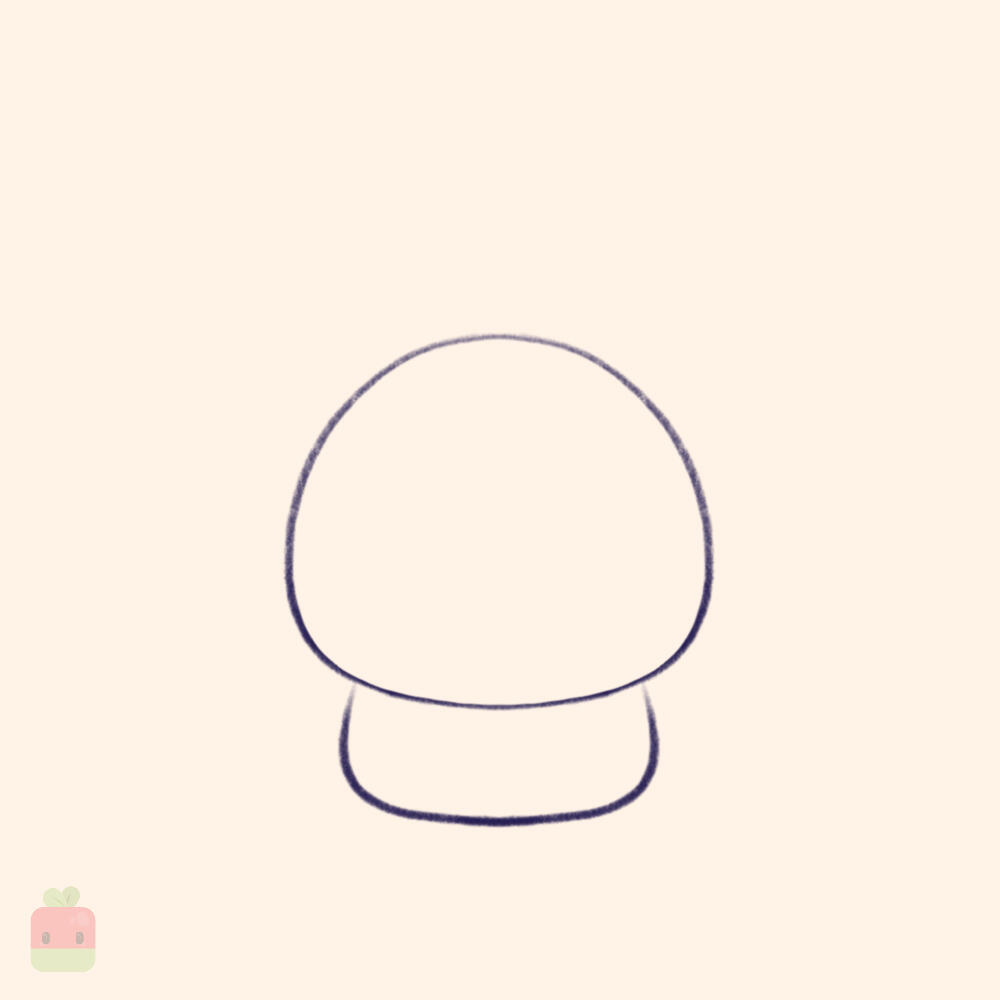
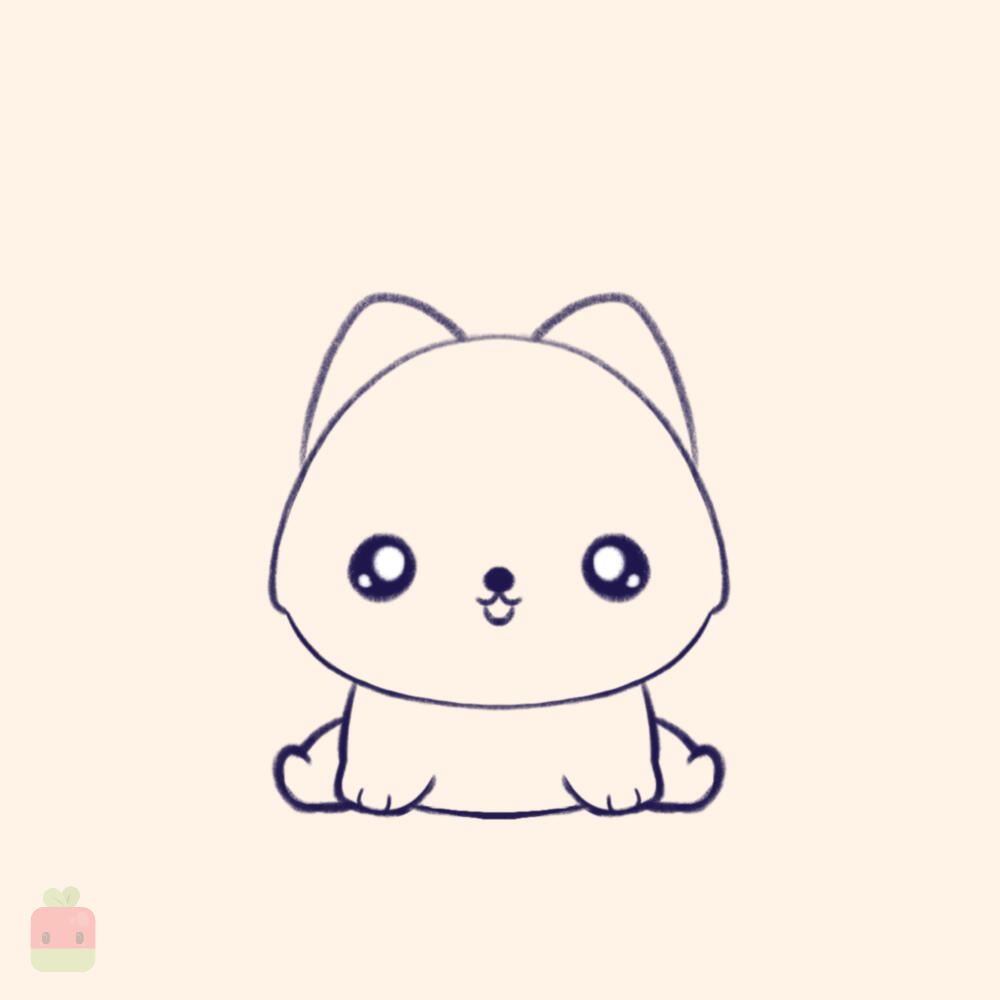
1. Outline the Head and Body ∙ Begin by sketching quick, basic shapes to outline the general placement and size of your dog. Use a big squished circle for the head and a smaller U shape for the body.
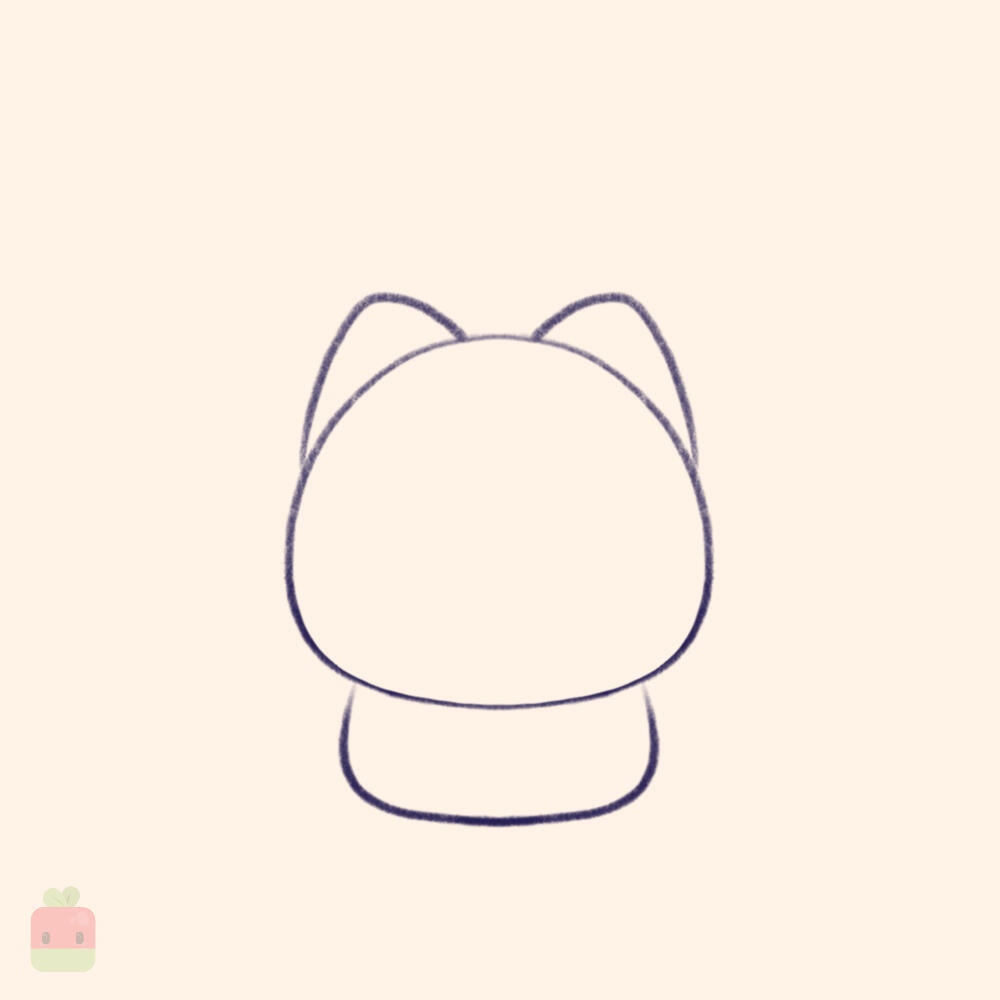
2. Add the Ears ∙ Add two happy little ears on top of the dog's head. You can make them any shape you wish. I went for the more pointy look.
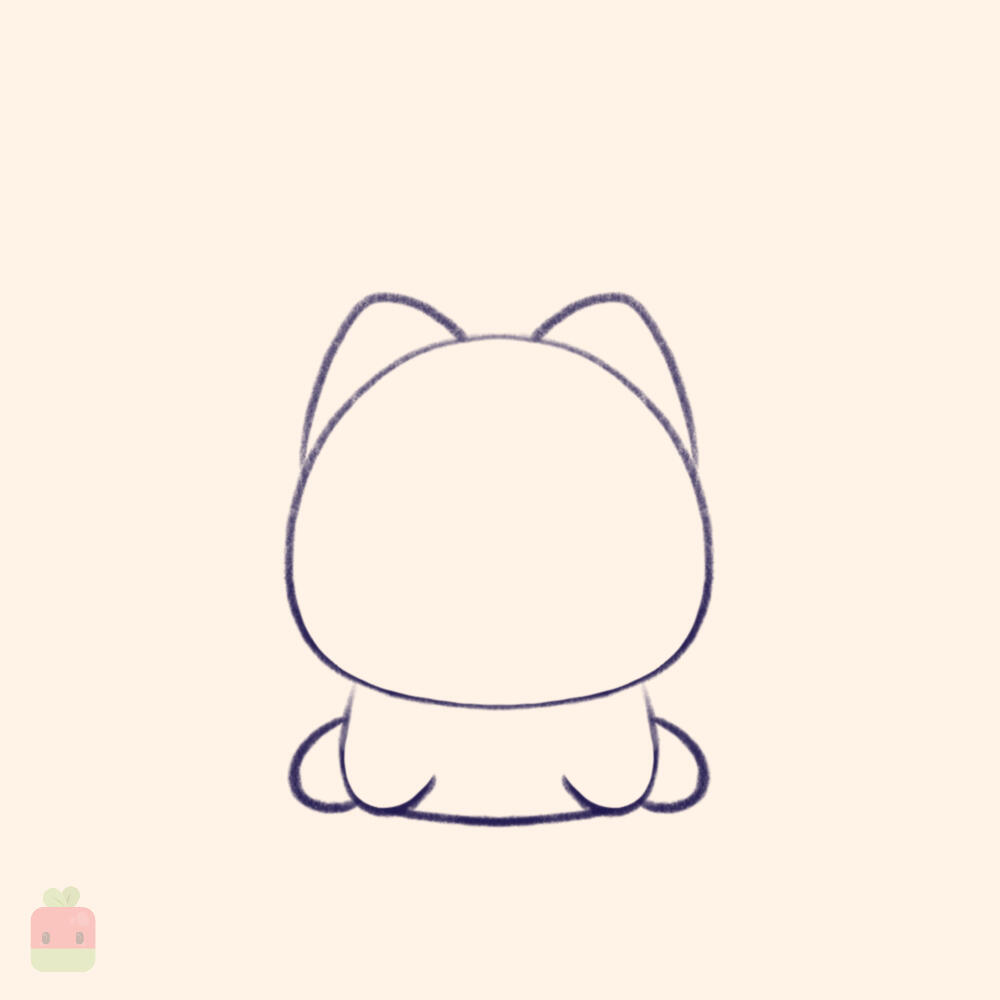
3. Draw the Limbs ∙ Add four U shapes to the body: two in the front, and two on the sides.
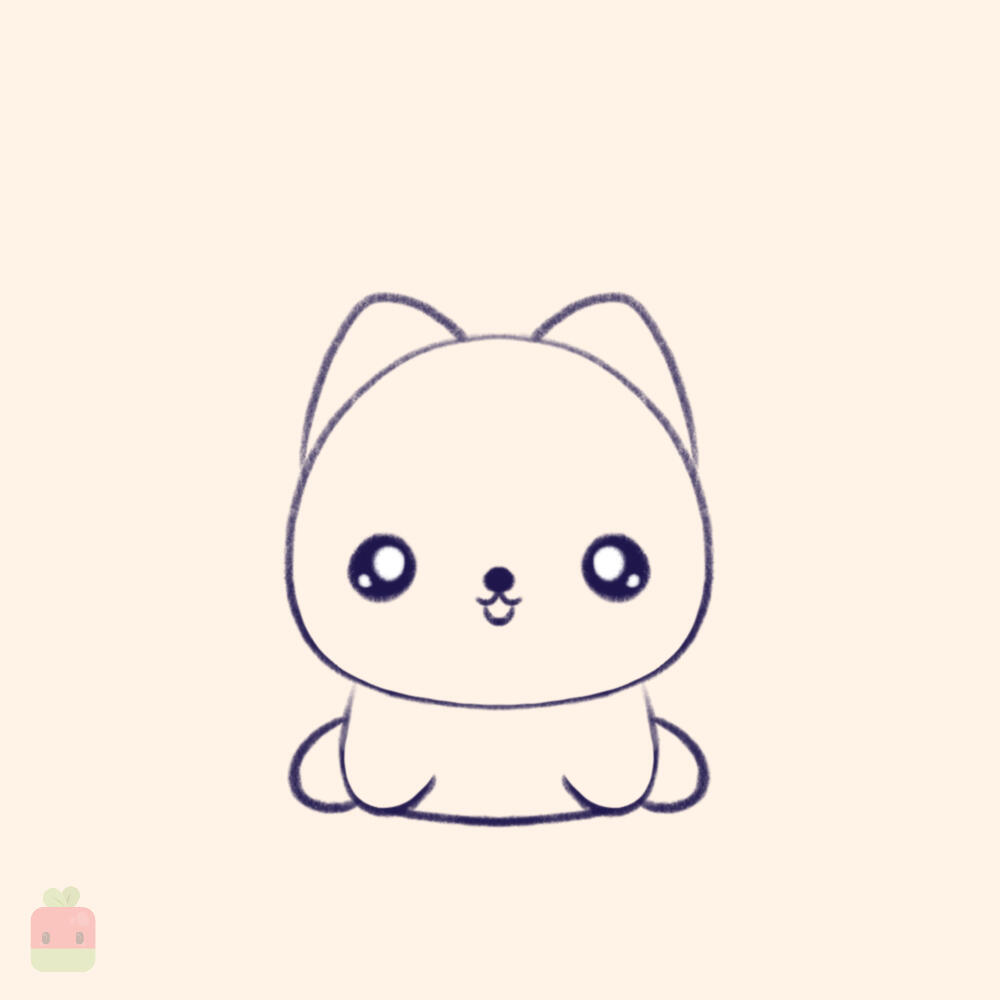
4. Draw the Eyes and Expression ∙ Add two large, circular eyes. You can make them shine with little white highlights. Include a sweet smile and a hanging tongue to enhance the kawaii look.

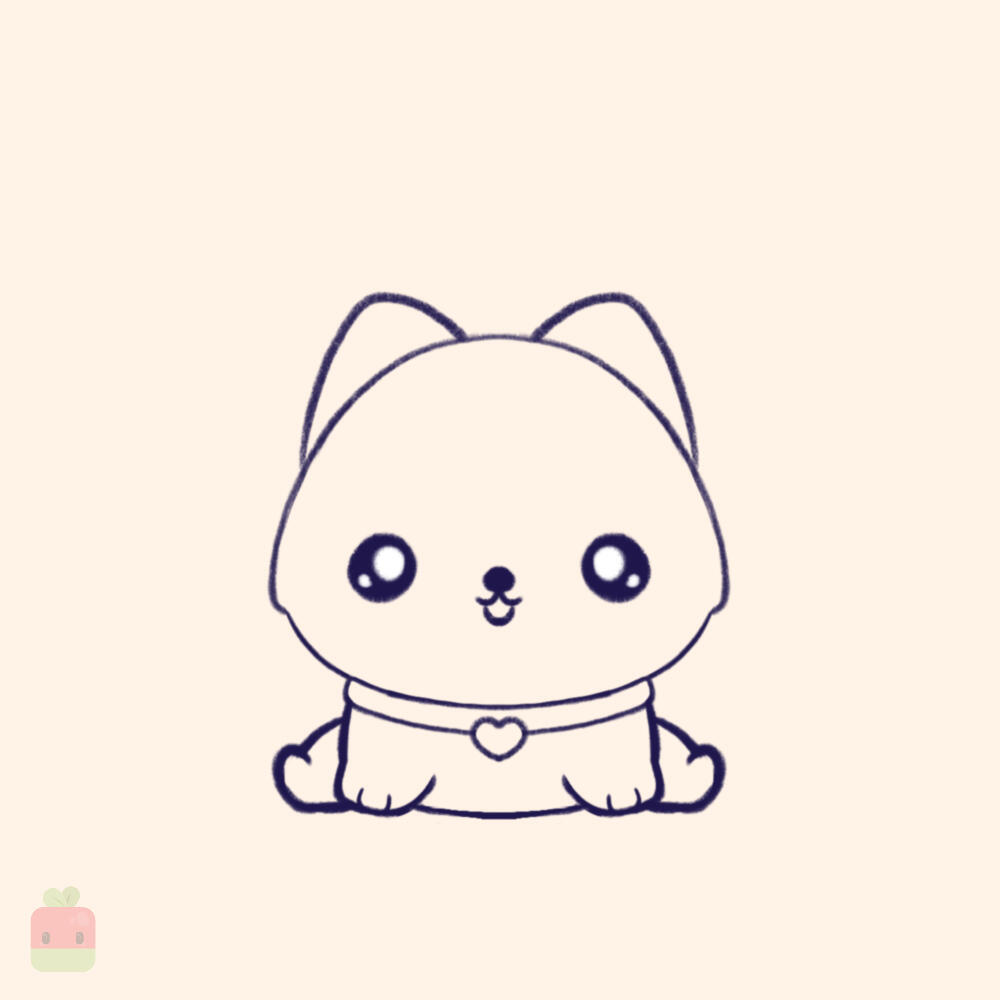
5. Define the Features ∙ Enhance the head by adding subtle hair details, and refine the limbs to resemble paws more accurately.

6. Add Cute Accessories ∙ I decided to give my little dog a cute heart collar to make it look more adorable. You can add other accessories like a tiny hat, bow, or even a bone.

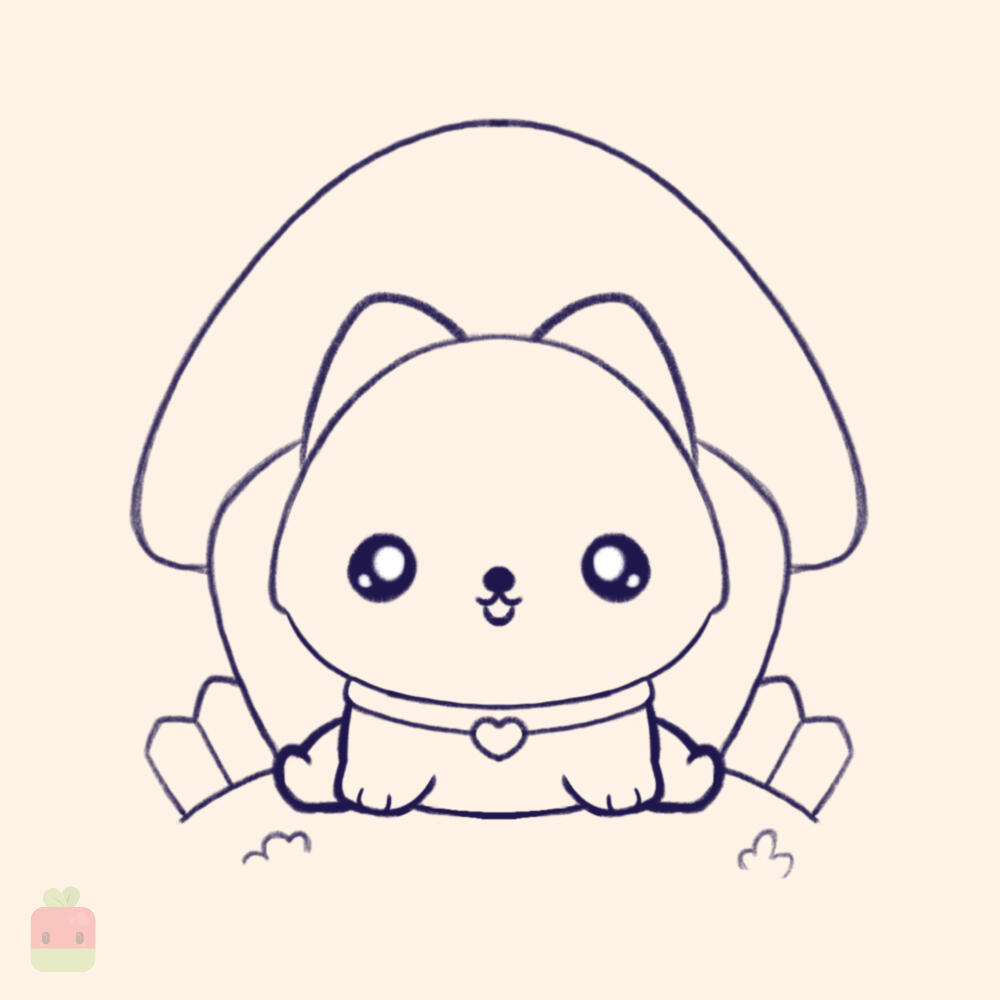
7. Add the House ∙ Draw a tiny dog house. I went for a mushroom shape and added a tiny fence. You can build anything you wish or skip this step altogether.

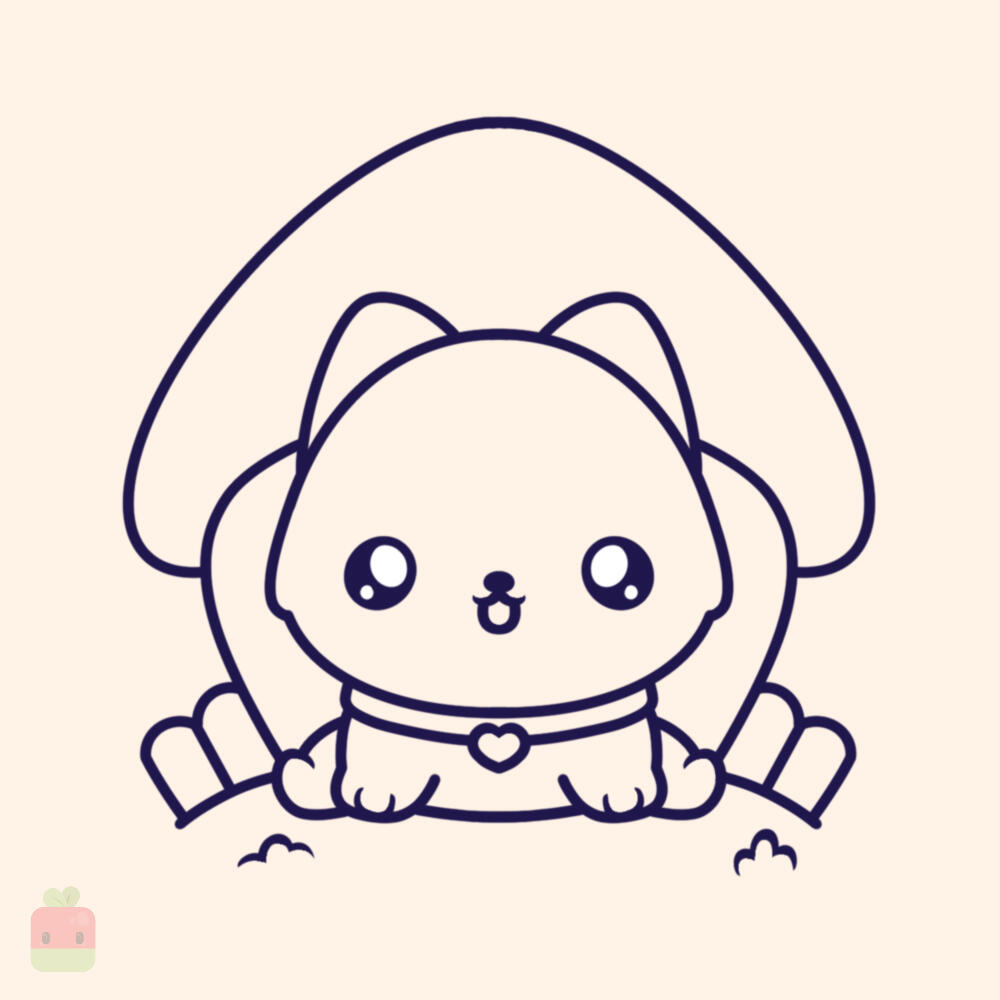
8. Base Linework ∙ Use a monoline brush or your favorite tool to create clean and precise lines as usual.

9. Add Base Color ∙ Use soft, pastel colors for a gentle vibe. I used a light beige for the dog's coat, and white with a soft red for the mushroom house.

10. Color the Linework ∙ Use a darker shade to color the lines of the environment. This way, your cute dog will pop more against the background.

11. Add highlights ∙ To give your illustration more depth, lightly shade areas like the top of the house and center of the dog's head. Add some sharp highlights on the sides where the light is coming from (left in this case).

12. Add shadows ∙ Shade areas like the bottom of the roof, house and fence to make it stand out more. I skipped shading the dog itself this time as I felt it popped beautifully just with the highlights.

CONGRATULATIONS! You just completed the "How to draw a cute dog tutorial"! I decided to add some soft clouds you can barely see behind the shroom house and some cute little stars to finish up the illustration.
HOW TO DRAW
Mama and Baby Seal
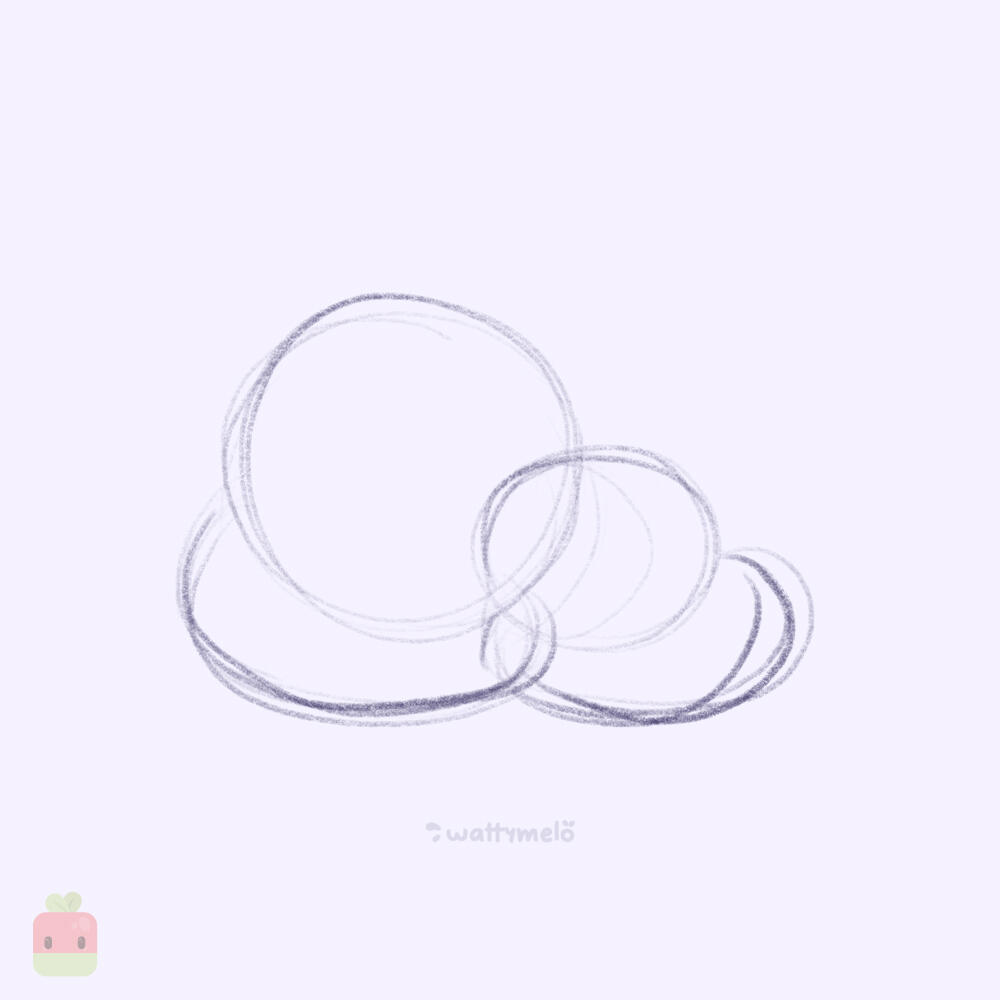
1. Start with Loose Shapes ∙ Begin by sketching quick, basic shapes to outline the general placement and size of your seal. Use a big oval for the body and a smaller circle for the head.

2. Define the Features ∙ Refine your shapes by adding details. Draw the face with soft curves, keeping the seal’s eyes wide and cute. Add the flippers and tail using simple lines and rounded shapes.

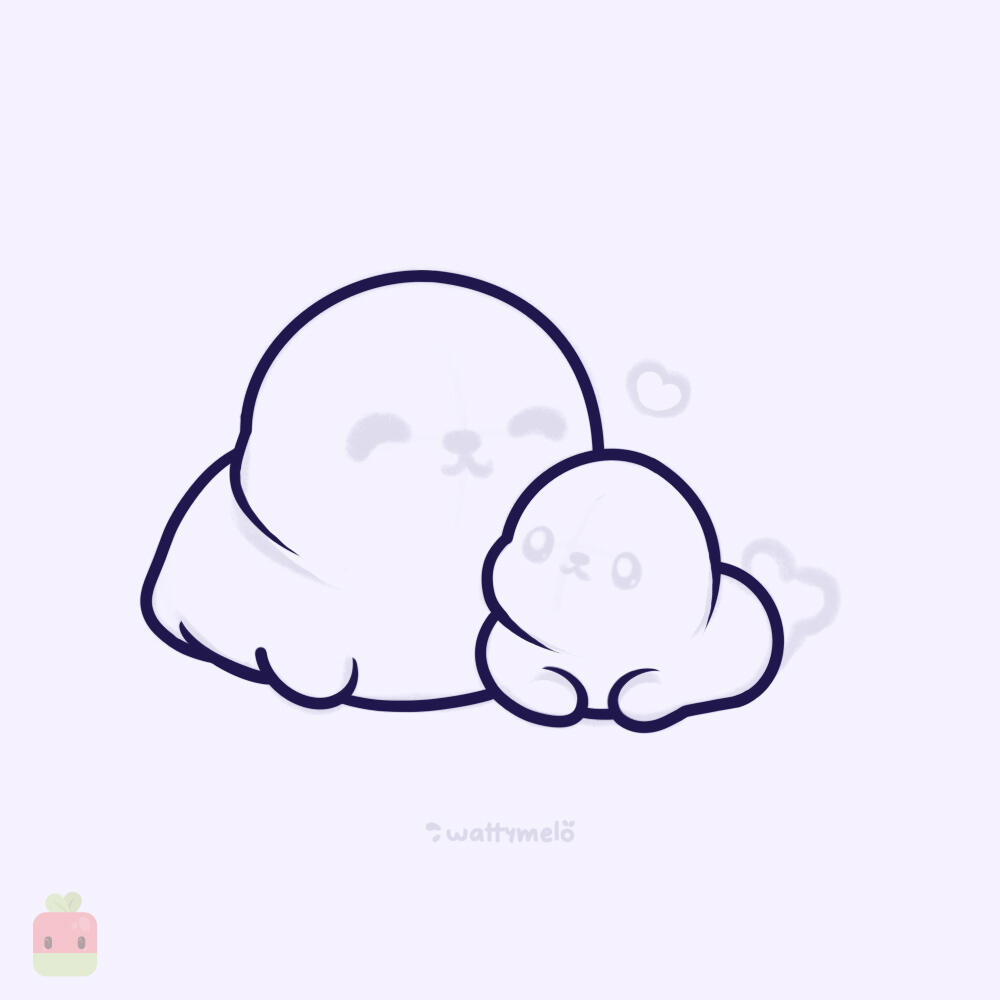
3. Outline the Body and Face ∙ Trace over the main shape with a cleaner, more defined line (I use the monoline brush in Procreate). Make the body slightly pudgy for a cute effect.

4. Draw the Eyes and Expression ∙ Add two large, circular eyes on the baby and two half-moon eyes on the mama seal. You can make them shine with little white highlights. Include a sweet smile to enhance the kawaii look.

5. Add the Tail ∙ Draw a small, rounded tail at the back of the baby. You can add a little curved line at the bottom to give it dimension.

6. Add Cute Décor ∙ Sprinkle hearts, stars, bubbles, or whatever makes you happy around your seals to enhance the cuteness and fill the space. These little extras add personality and charm!

7. Add Base Color ∙ Use soft, pastel colors for a gentle vibe. I used white for the body, but you can use any color you'd like. You can even add a blush of pink for the cheeks - they are perfect for a kawaii touch.
8. Add shadows and highlights ∙ To give your seals more depth, lightly shade areas like the bottom of the body and face, under the flippers tail. If you didn't use white, you can add soft highlights to the seal’s heads and body for a glossy finish.

9. Add environment and sparkles ∙ A small island, an ice patch or snow under your seals will make the illustration feel more complete and add more personality to the drawing. Use the previous steps to stylise it, and add some shiny sparkles.

10. Final Touches ∙ Add some fluffly clouds, a sun, or leave it as it was on step 9.

CONGRATULATIONS! You just completed the "How to draw a cute seal tutorial"! I decided to make the clouds less obvious so that the focus stays on mama seal and her baby.









HOW TO DRAW
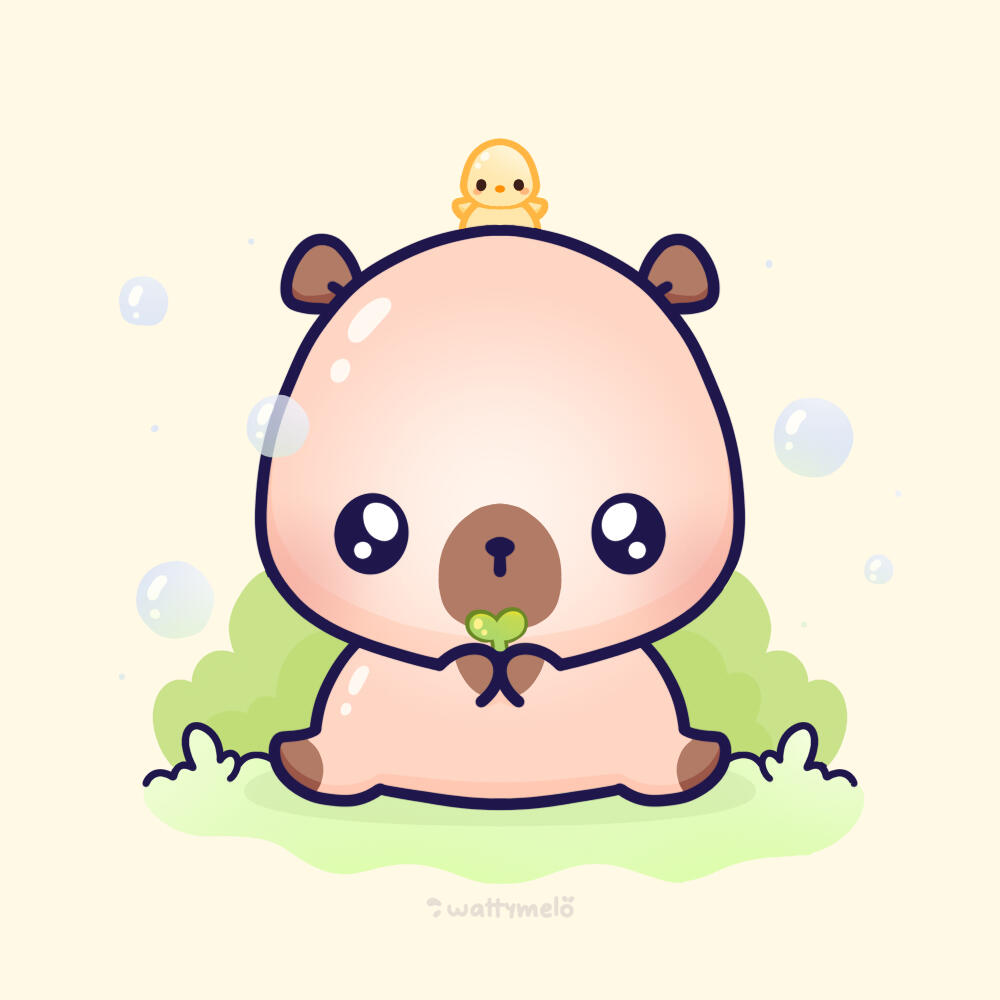
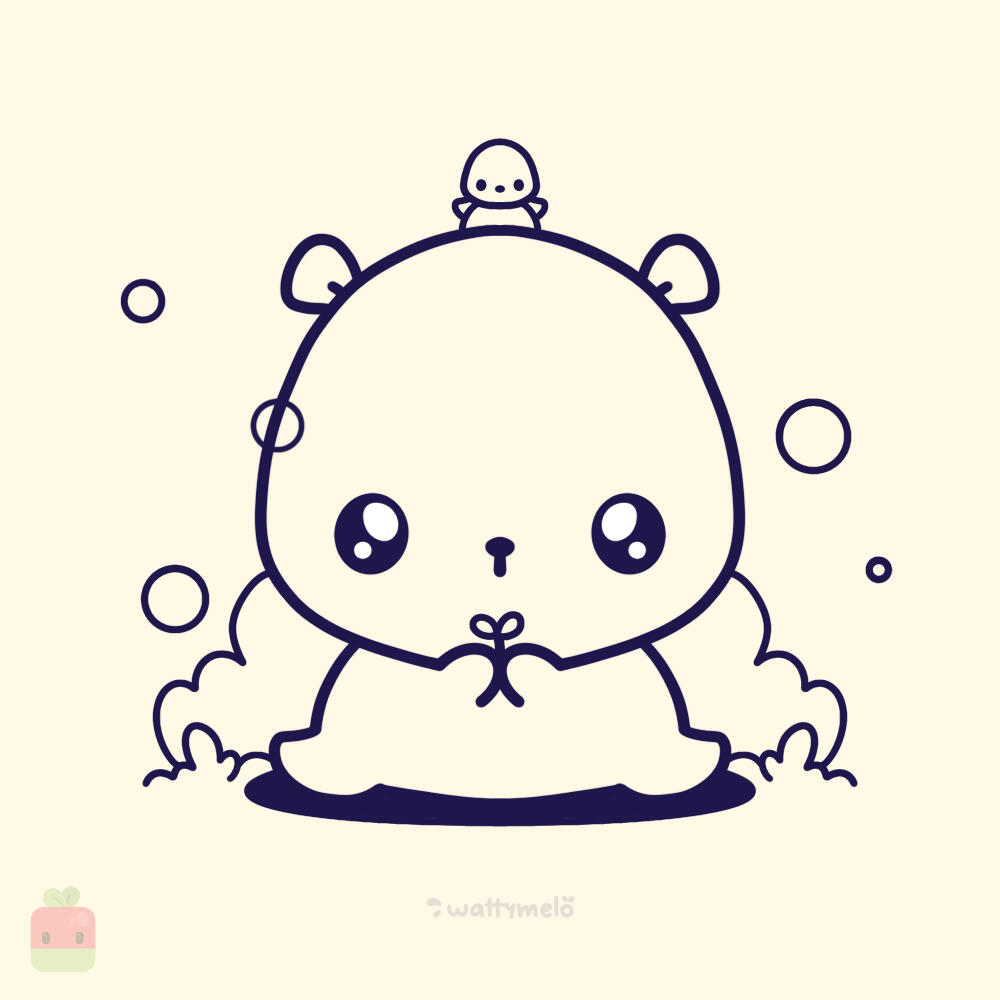
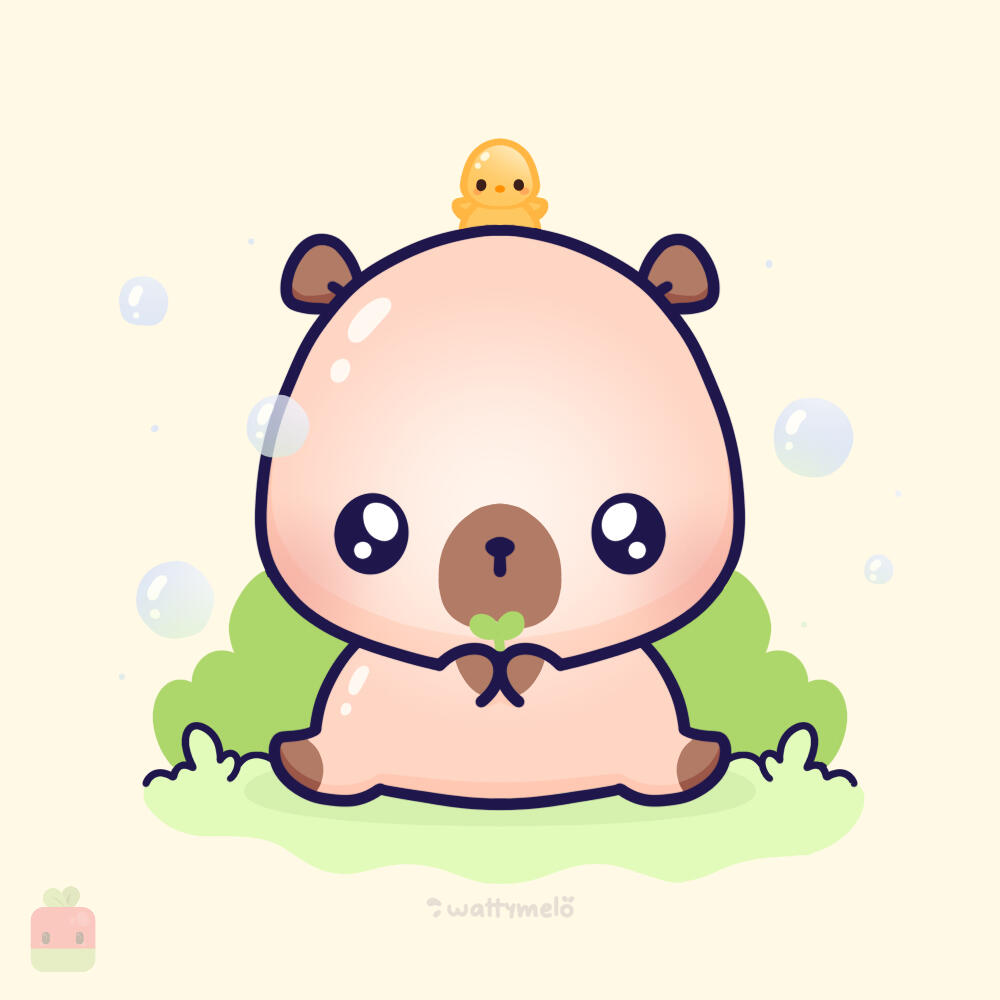
Cutie Capybara
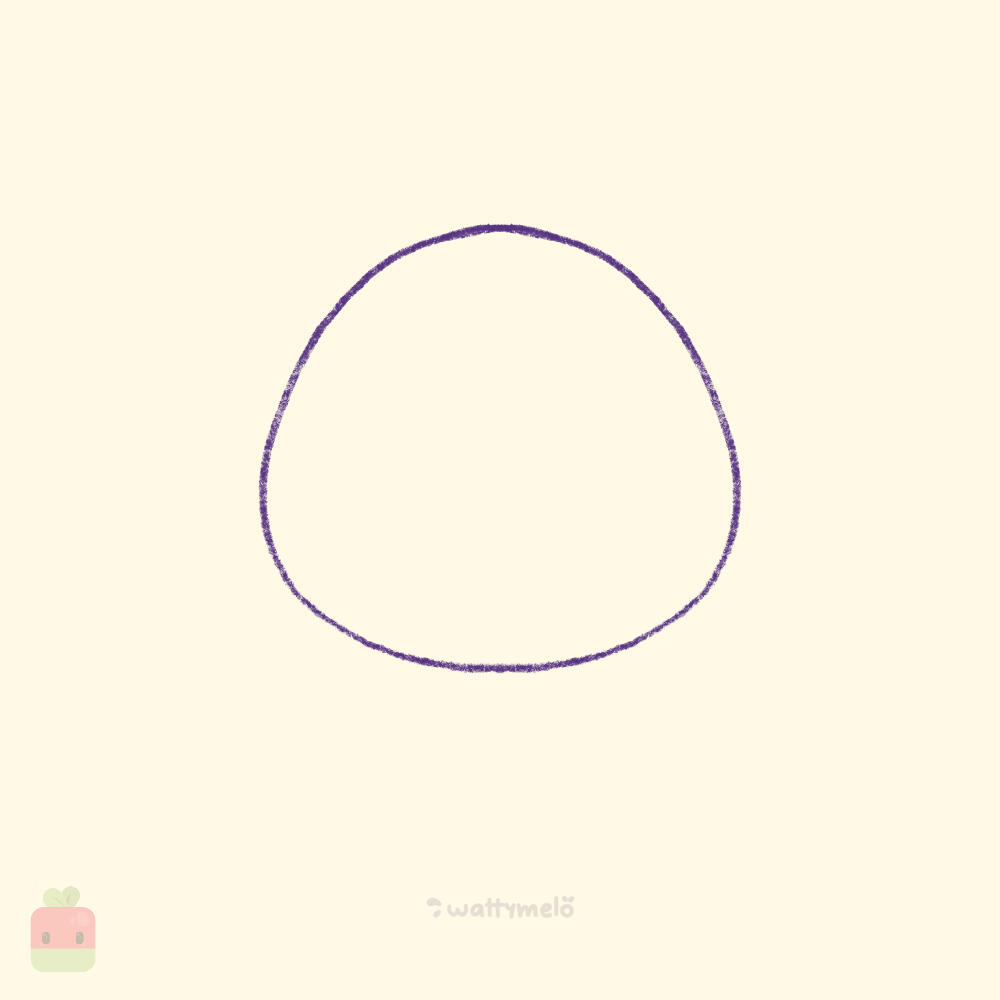
1. Draw the Head ∙ Begin by sketching a quick, basic oval shape to outline the size of your capybara's head.
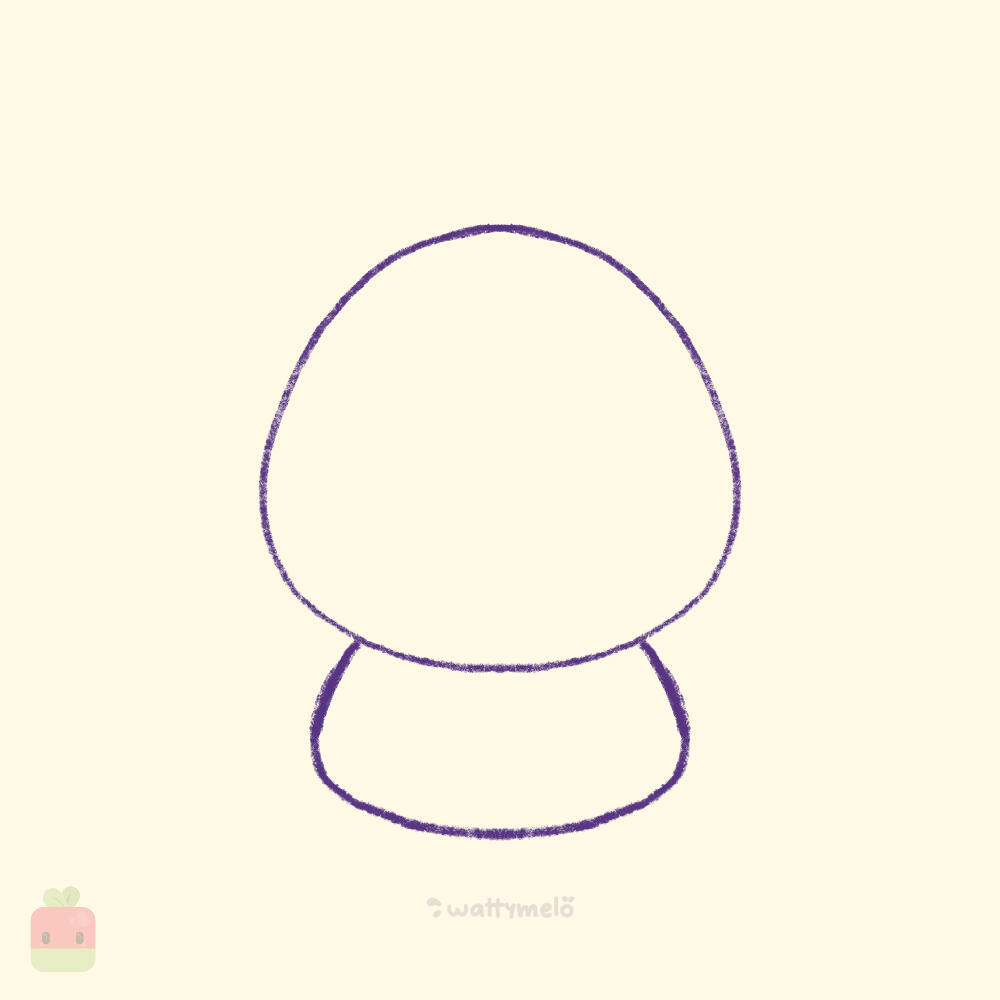
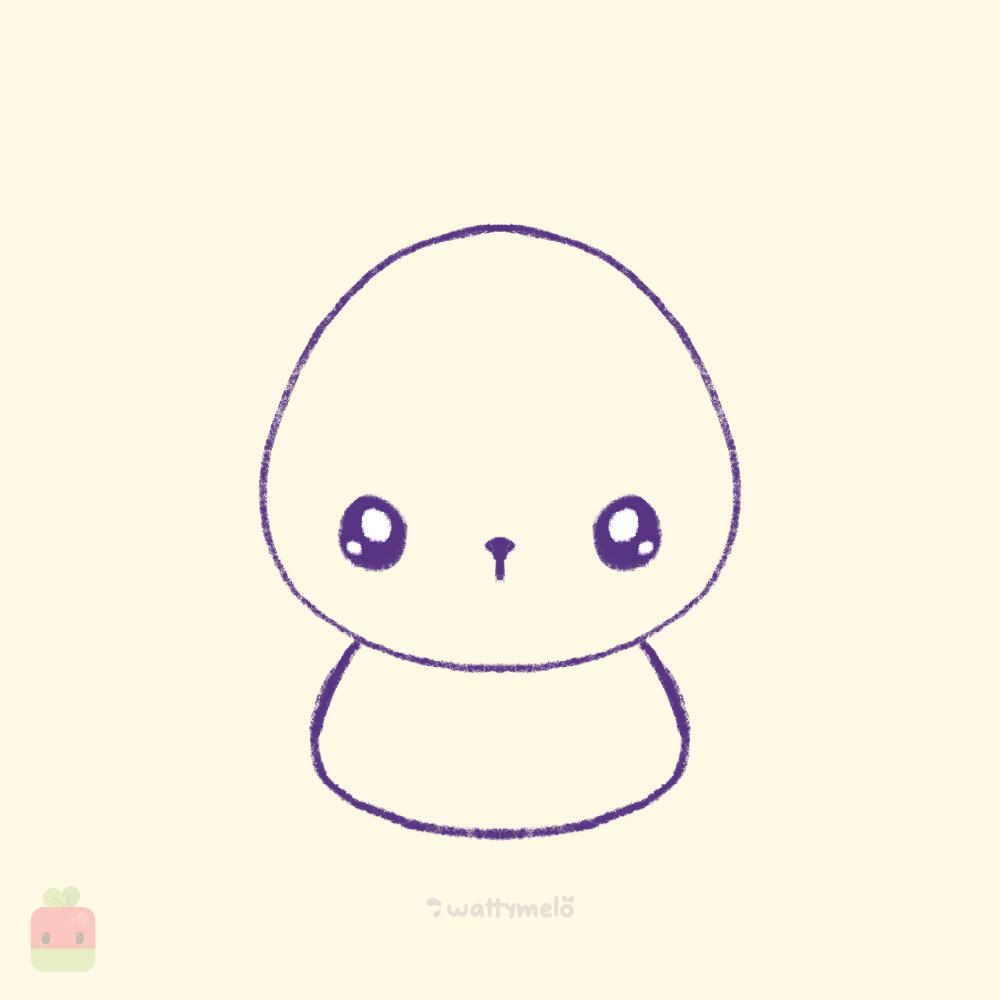
2. Draw the Body ∙ Create a horizontal C-shape beneath the head to form the capybara’s chibi body.

3. Add the Face ∙ Draw two big, round eyes with highlights. Place them closer to the bottom of the head for that chibi charm. Add a small nose near the center of the face and a simple downward line for the mouth.

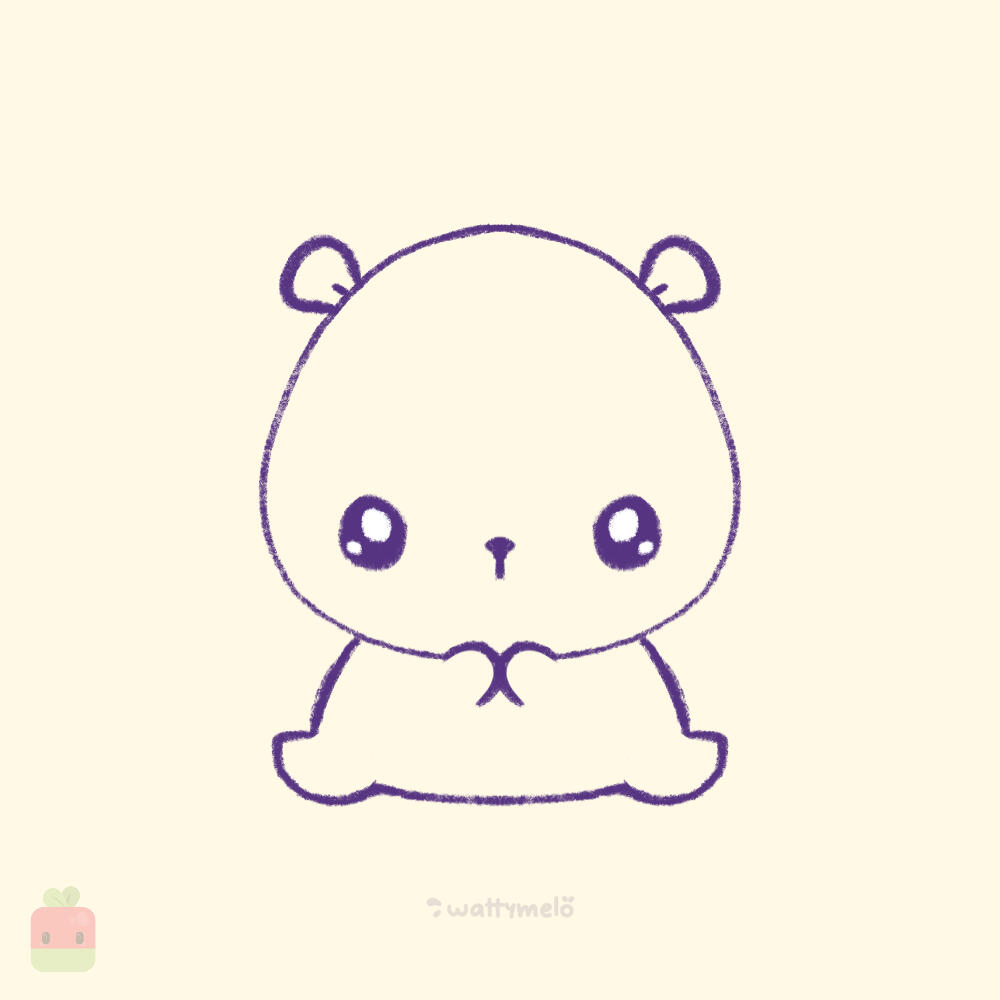
4. Draw the Ears and Limbs ∙ Add two tiny, rounded ears on top of the head. For the limbs, draw four small C-shaped ovals (two in front and two on the sides) connected to the body. Erase part of the lines to seamlessly attach the legs to the body.

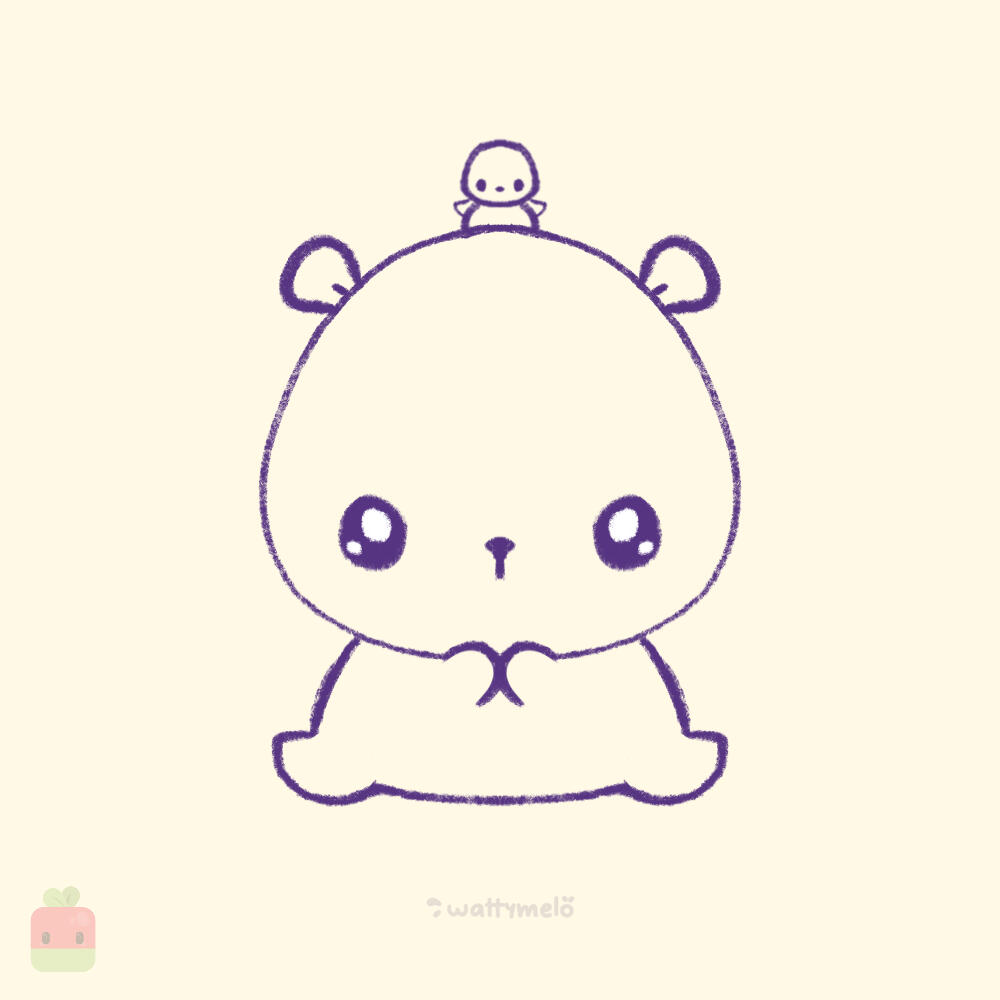
5. Add a Friend ∙ Draw a tiny flower crown, a bow, or even a little ducky on the capybara’s head. I chose to go with the ducky for extra cuteness. Apply the same steps to build its body and draw two tiny V-shaped wings to bring it to life.

6. Add Cute Décor ∙ Sprinkle bubbles, or whatever makes you happy around your capybara to enhance the cuteness and fill the space. Additionally, you can draw some of the environment and an object for it to hold.

7. Base Linework ∙ Use a monoline brush or your favorite tool to create clean and precise lines. While working on this step, I added some bushes behind my capybara to enhance its shape and make the composition more lively.

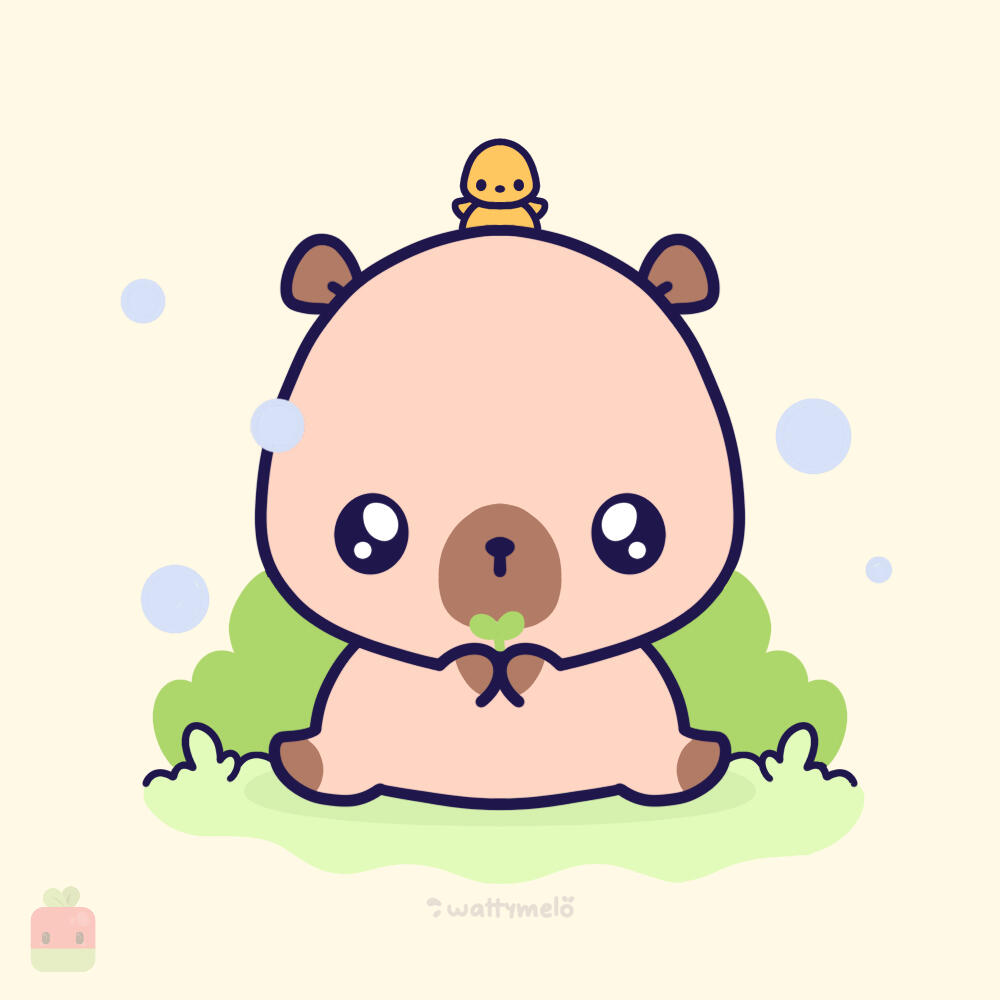
8. Base Color ∙ Use a warm brown as the base color. Use a darker brown for the ears, limbs, and nose area. Use different shades of green to build the foreground and background and a light shade of blue for the bubbles.

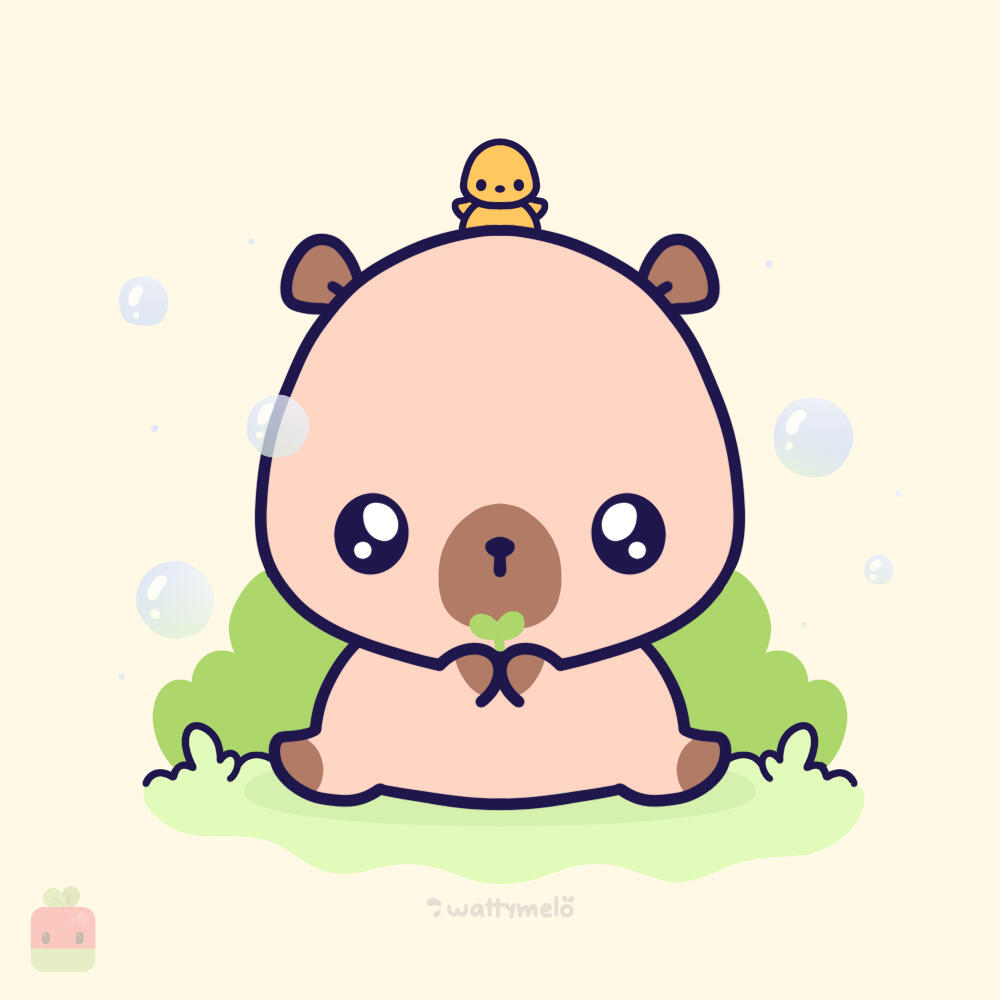
9. Bubbles Time! ∙ Lower the transparency of the bubbles layer for a realistic look. Shade the top with light blue and the bottom with green, then add white blobs for a glossy effect.

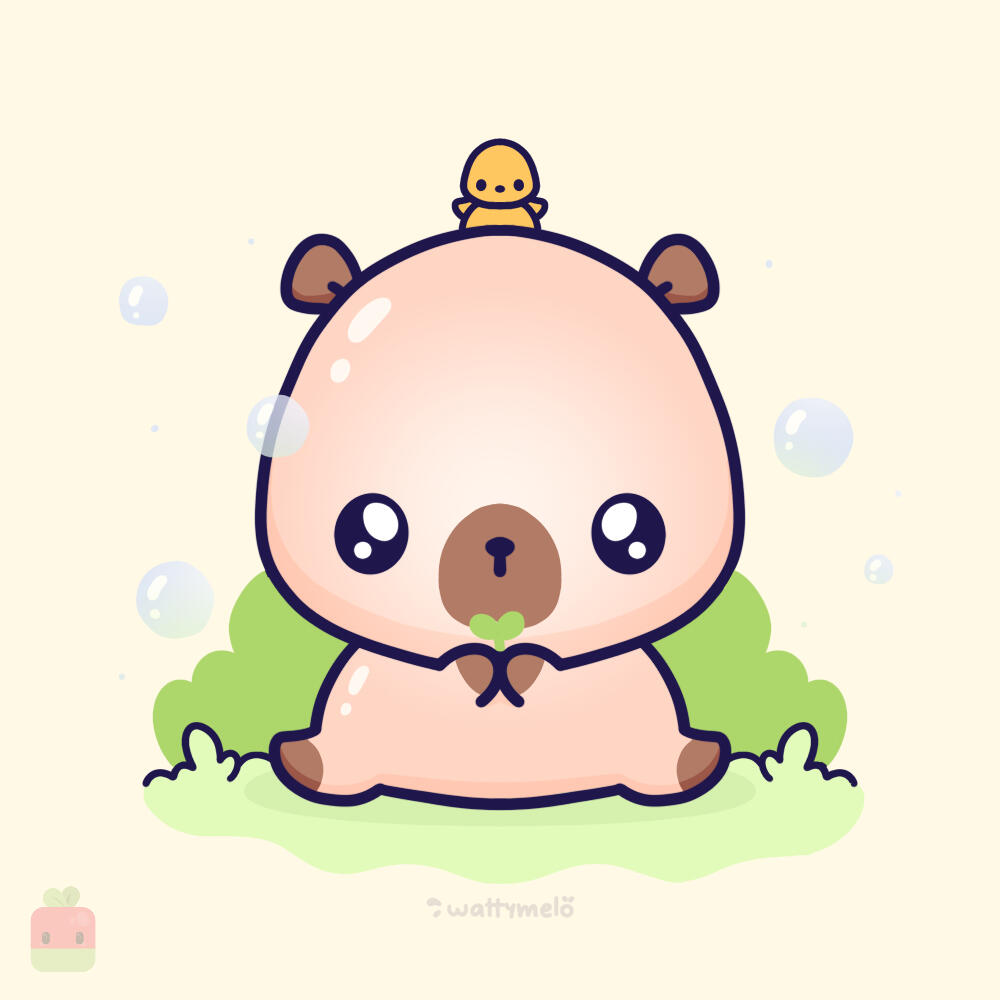
10. Add shadows and highlights ∙ To add depth to your capybara, apply light shading to areas like the underside of the body, face, and ears. Enhance the look with soft highlights on the center of the face, and add small white blobs for a glossy effect.

11. Ducky Time! ∙ Color the ducky’s linework and add shading to make it pop, while keeping the capybara the main subject. Use a lighter yellow for contrast, and feel free to experiment with colors as you go!

12. Final Touches ∙ Add darker green shapes to the bushes for depth and a few highlights to the grass in the foreground to make it stand out.

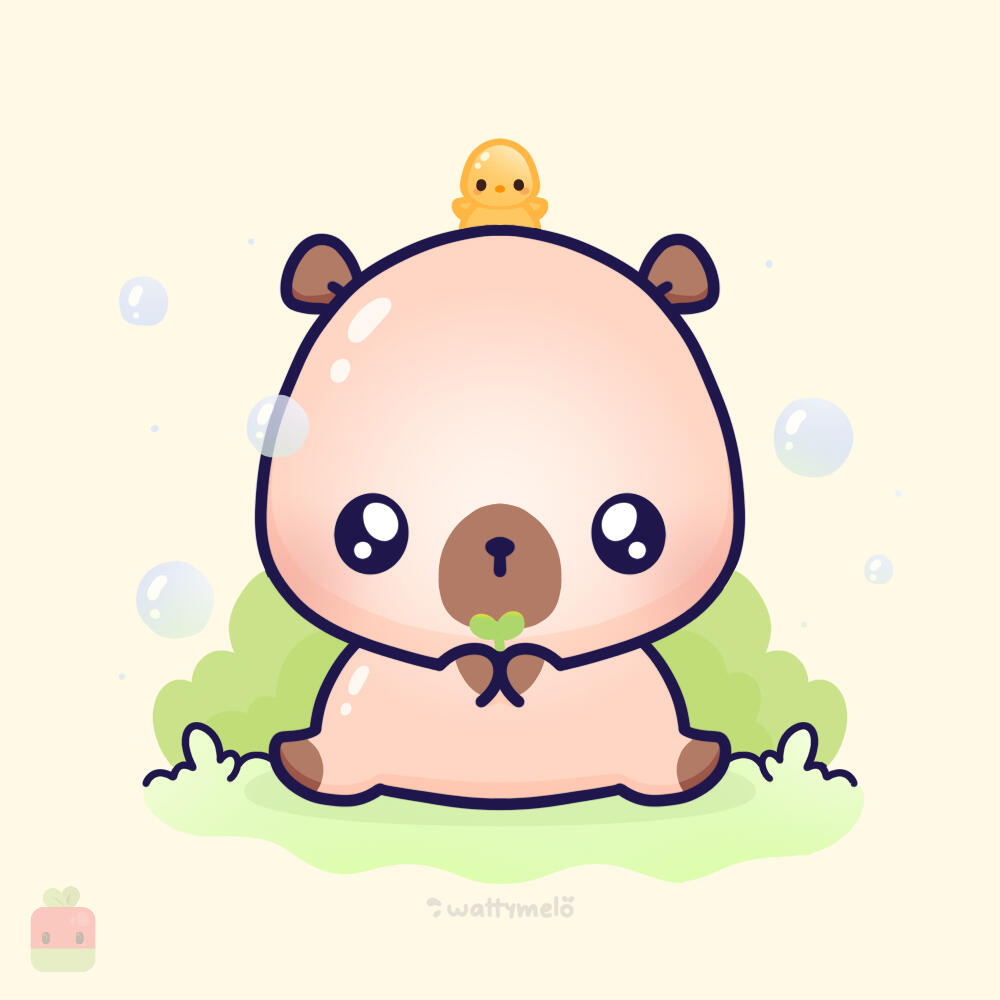
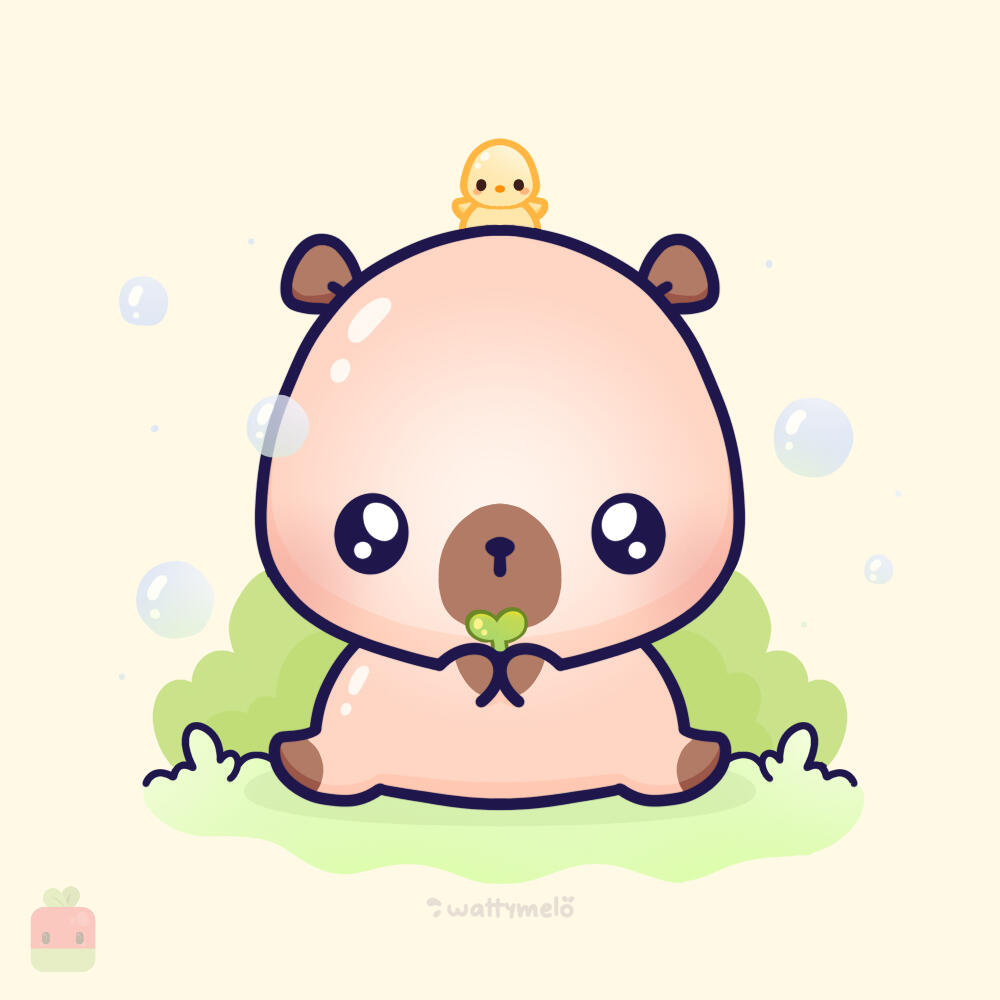
CONGRATULATIONS! You just completed the "How to draw a cute capybara tutorial"! I chose a lighter yellow for the ducky to make its linework stand out better.

HOW TO DRAW
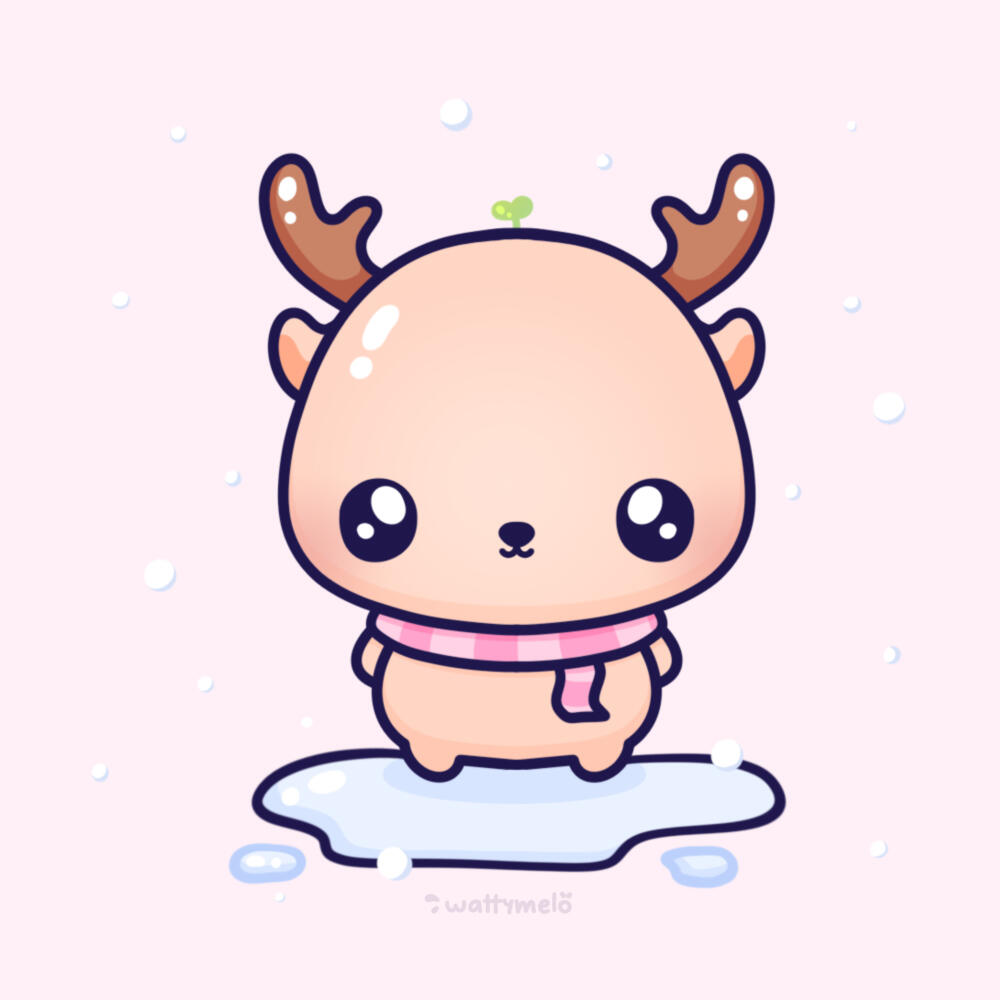
Cutesy Reindeer
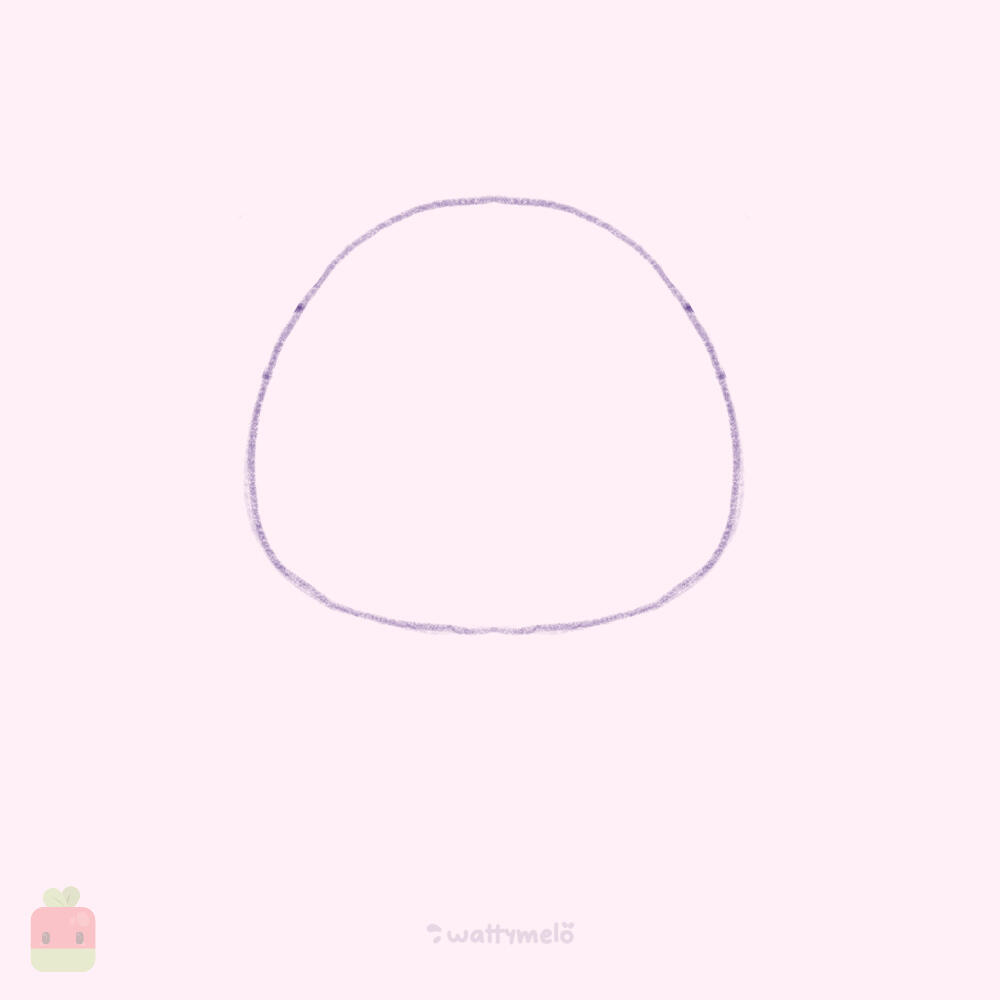
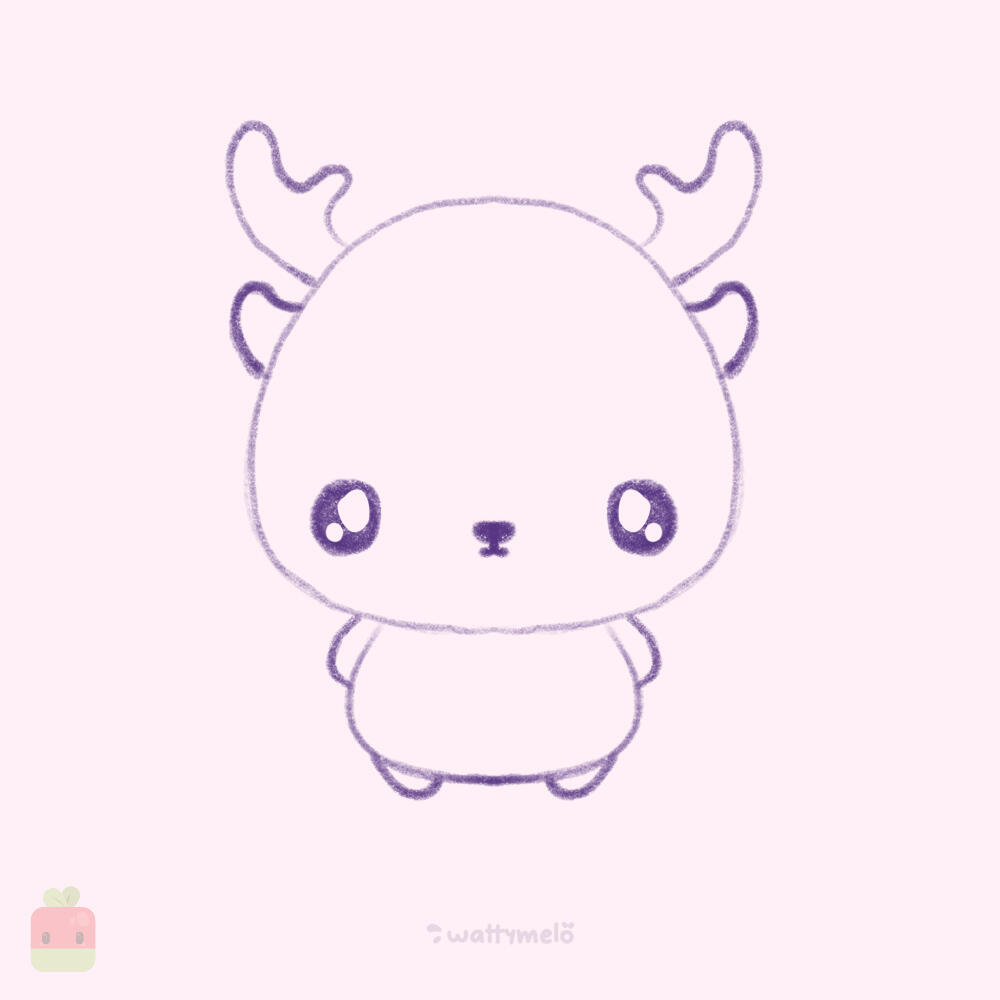
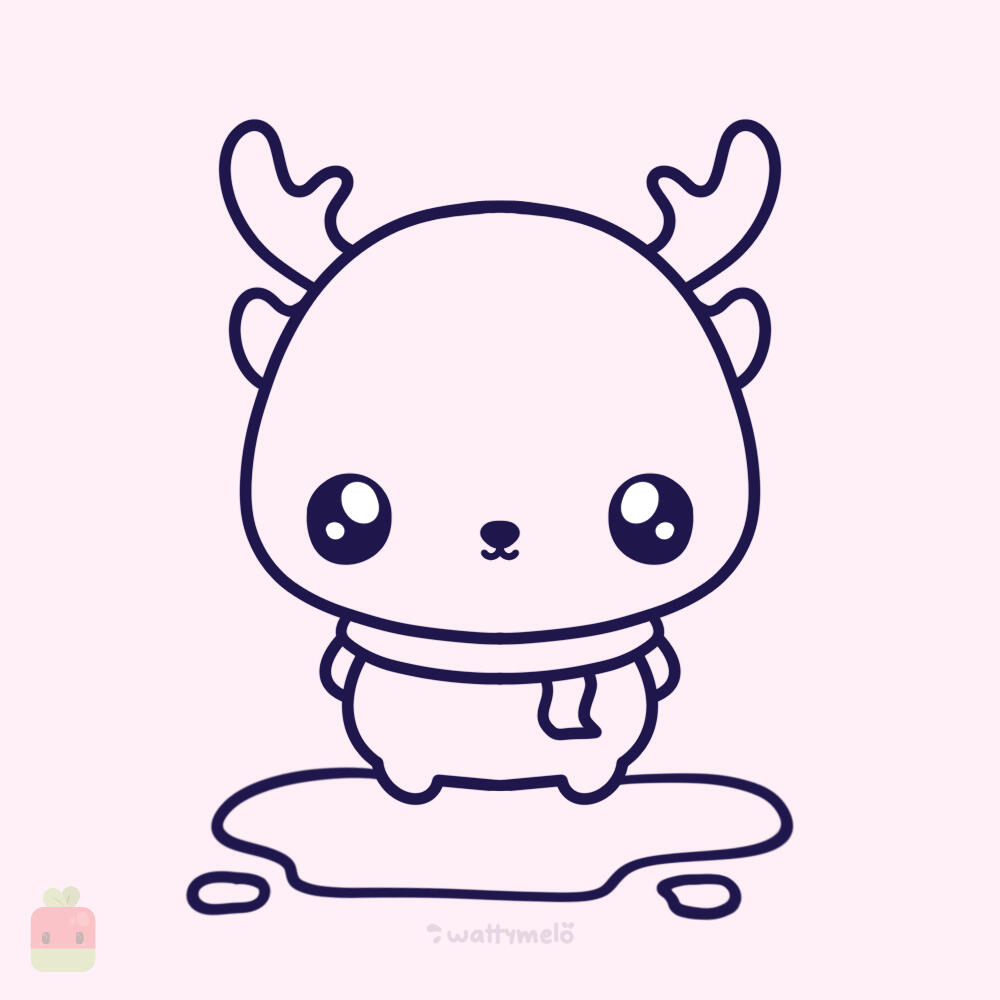
1. Draw the Head ∙ As always, begin by sketching a quick, basic squished oval shape to outline the size of your reindeer's head.
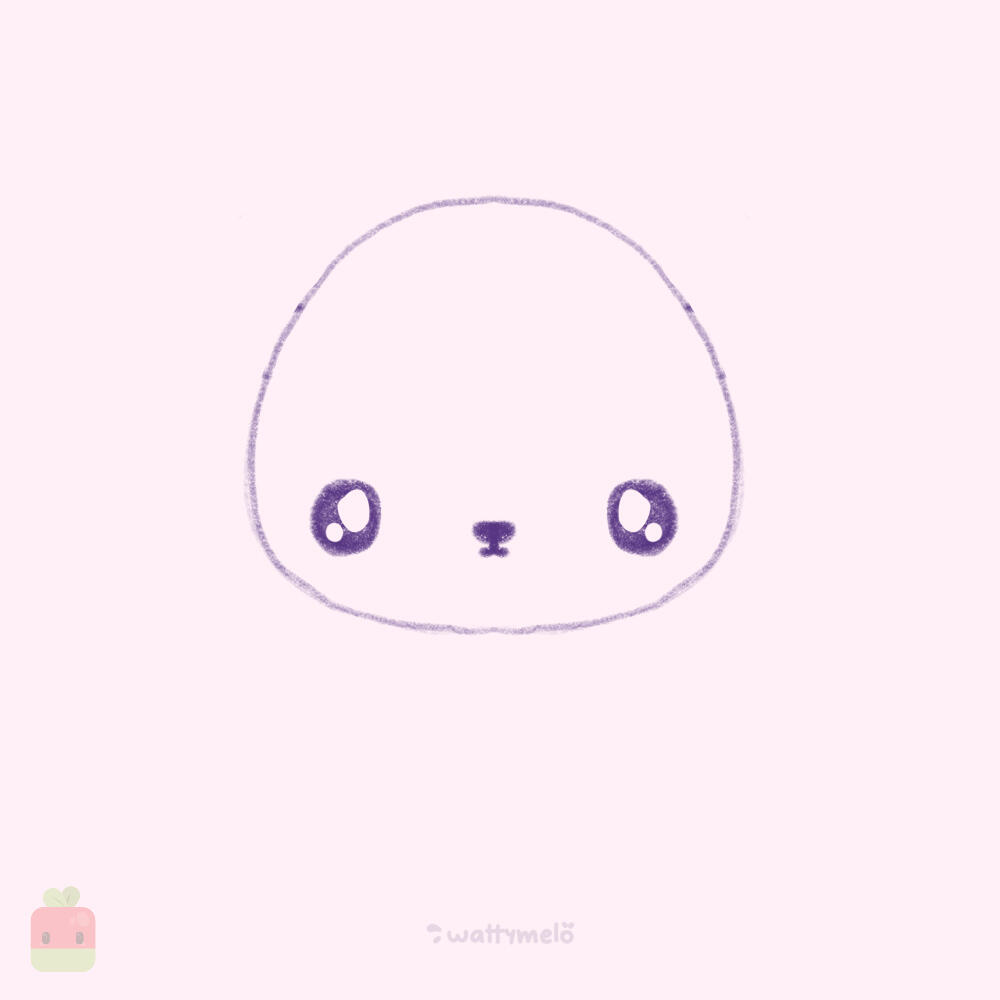
2. Add the Face ∙ Draw two big, round eyes with highlights. Place them closer to the bottom of the head for that chibi charm. Add a small nose near the center of the face and a simple, curved line for the smiley mouth.
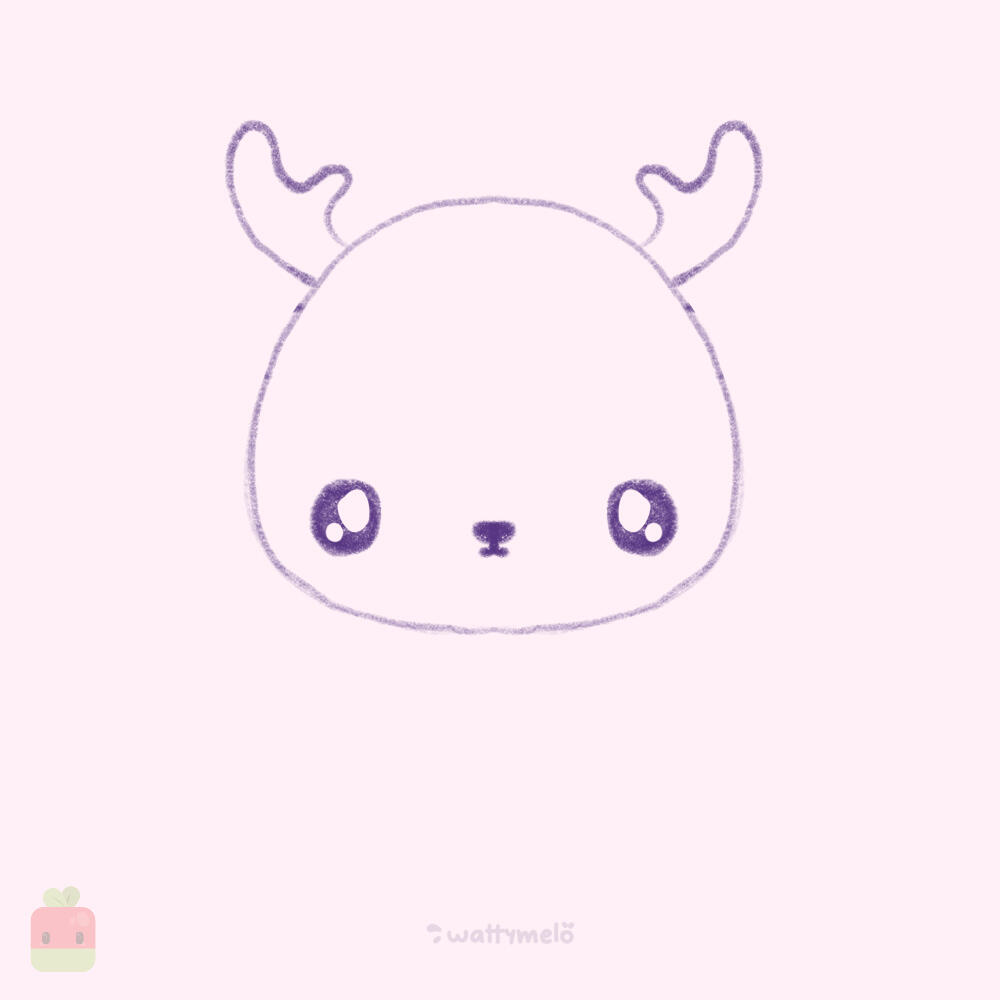
3. Draw the Antlers ∙ For this step, if you’re using Procreate, try the symmetry tool to ensure both antlers match perfectly. Alternatively, you can copy one antler, paste it, and flip it for the same effect.
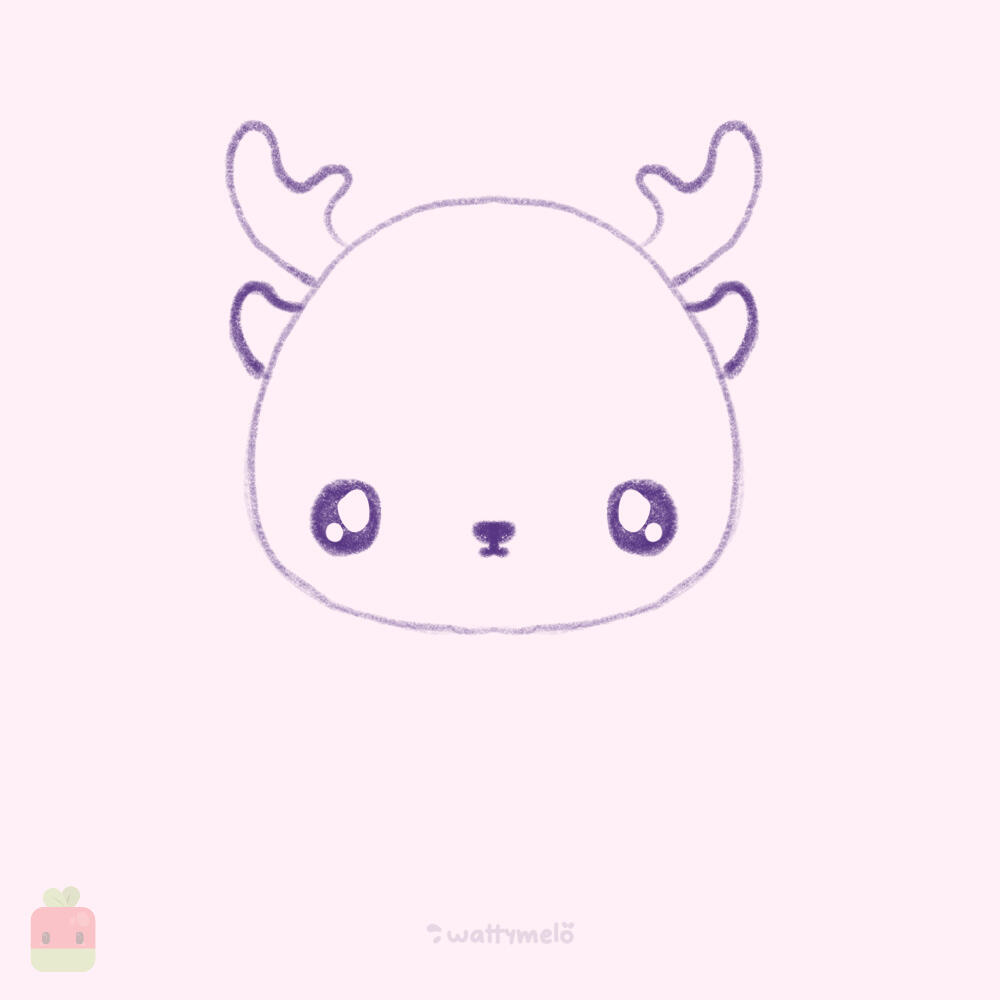
4. Add the Ears ∙ Add two small ears just below the base of the antlers to complete the head.

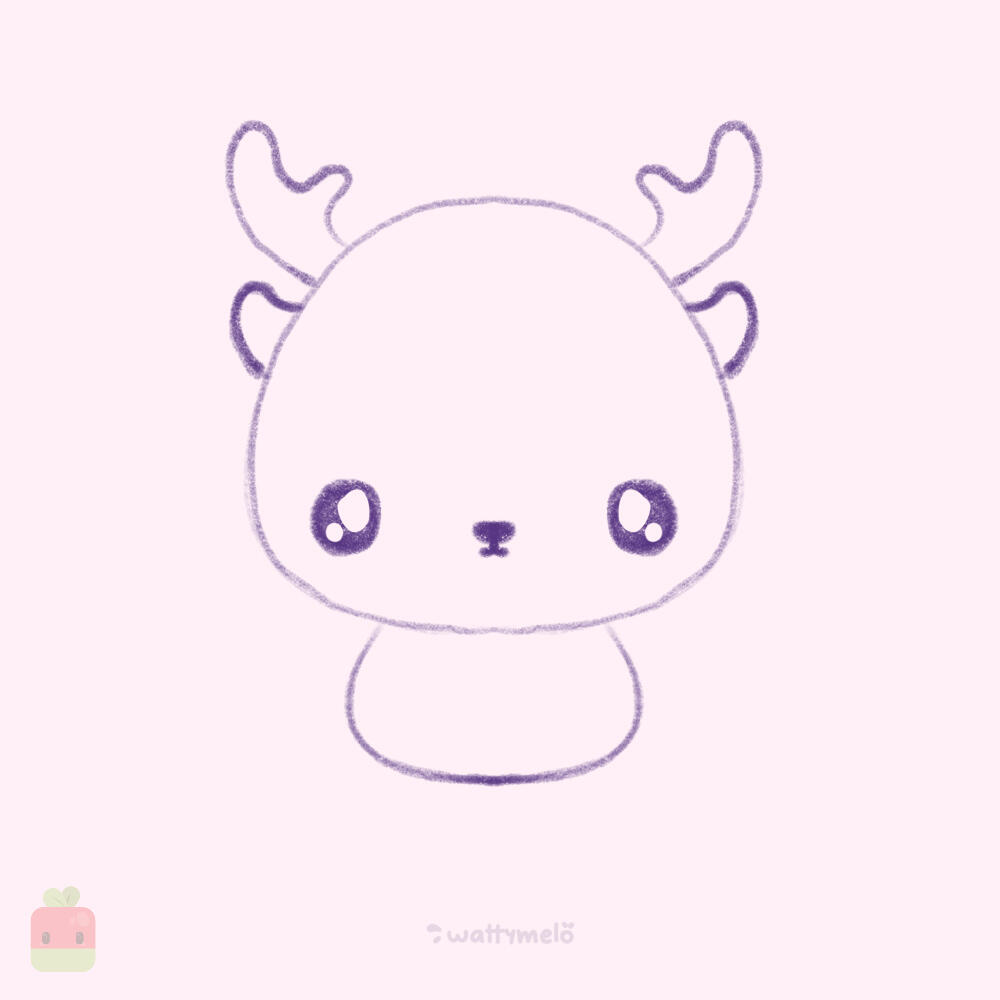
5. Draw the Body ∙ Create a horizontal C-shape beneath the head to form the reindeer’s chibi body.

6. Add the Limbs ∙ For the limbs, draw four small C-shaped ovals (two on the sides and two on the bottom) connected to the body.

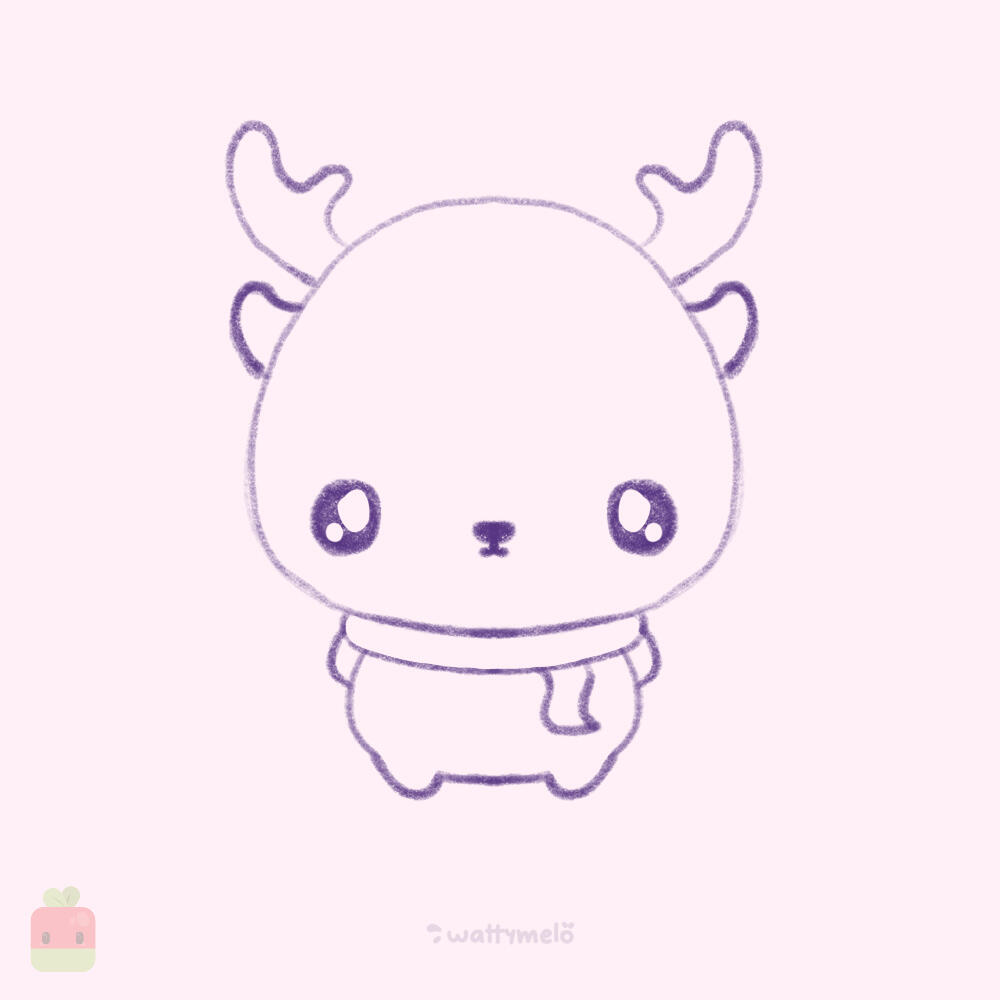
7. Accesorize ∙ Add a cute, tiny scarf to keep your reindeer warm. While on this step, you can also erase part of the lines to seamlessly attach the legs to the body.

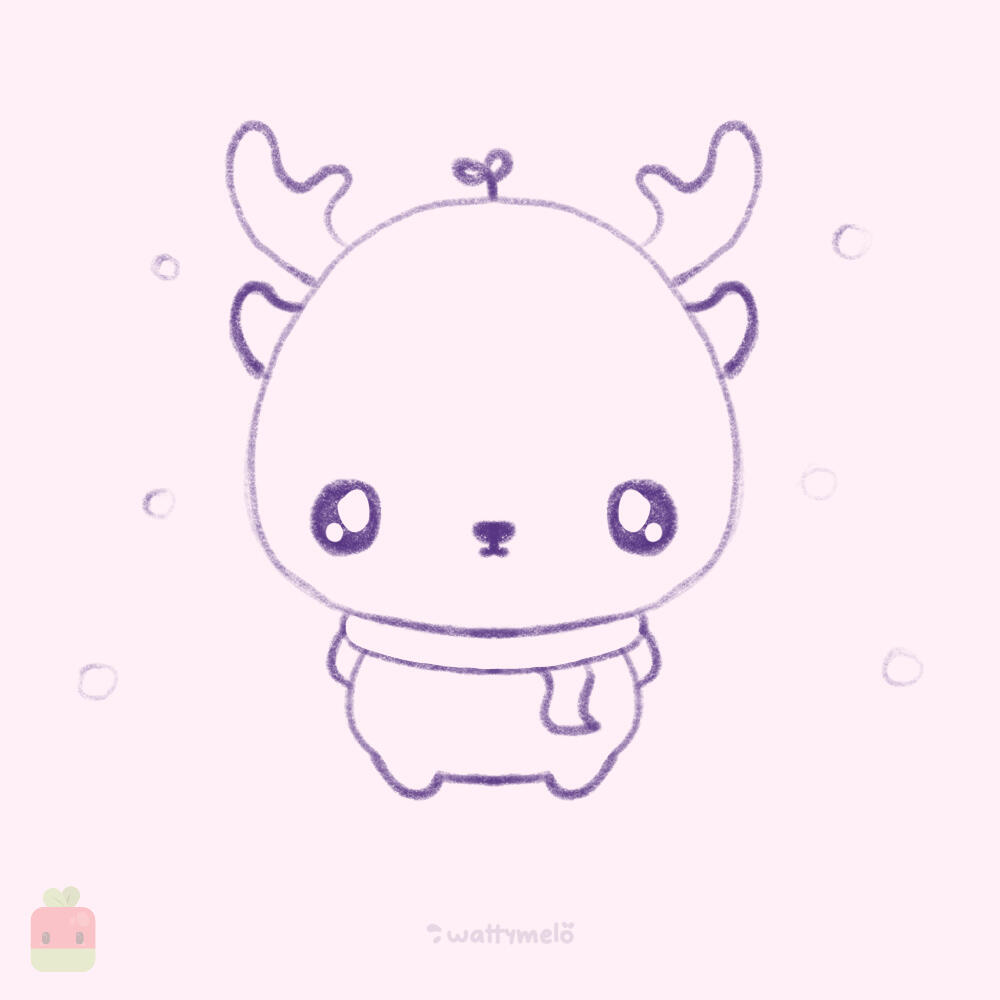
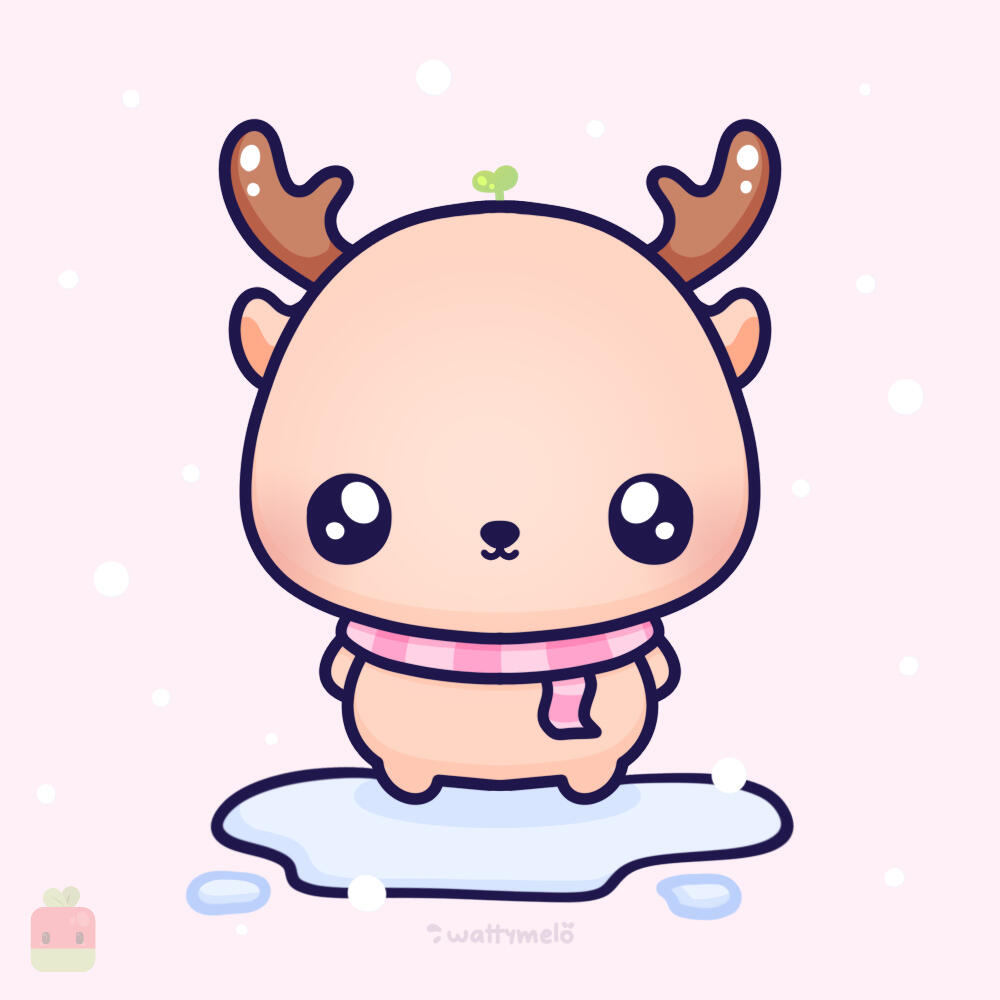
8. Add Cute Decor ∙ I added my signature sprout to the top of the reindeer’s head and sprinkled in some tiny snowflakes to complete the scene.

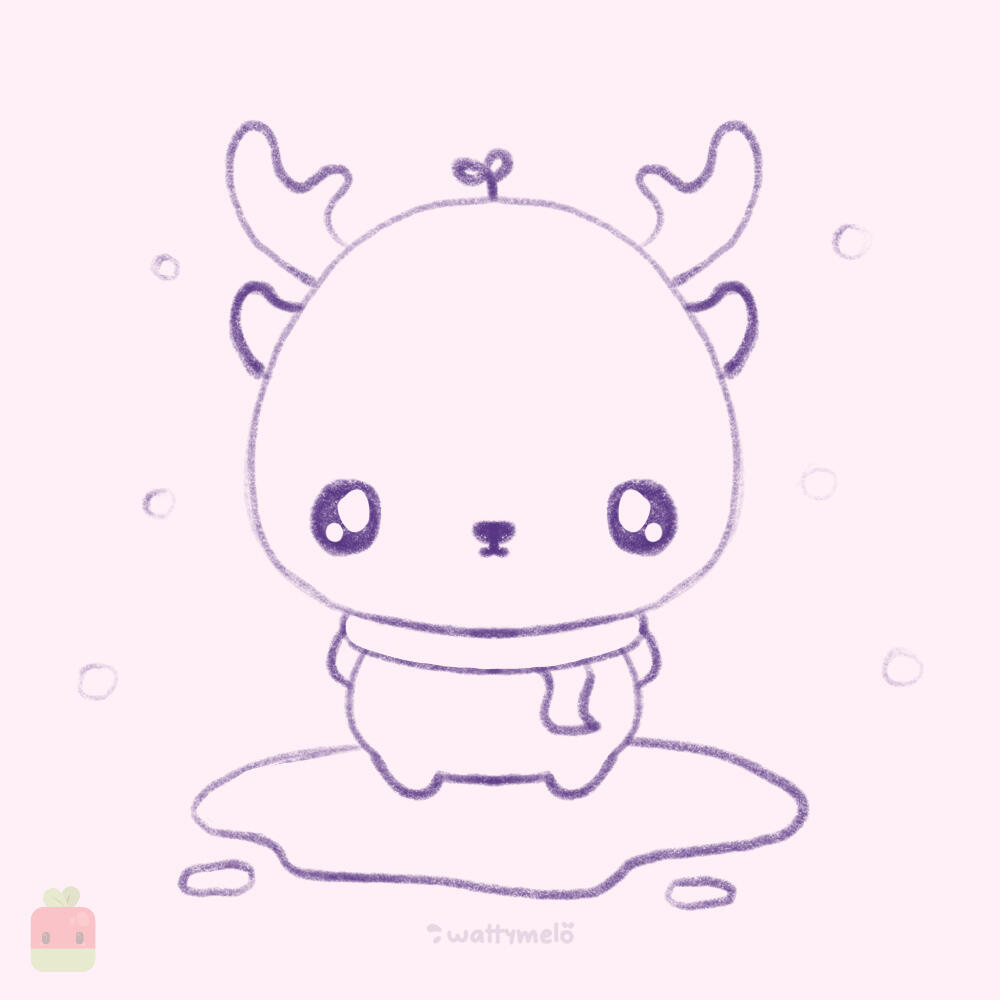
9. Draw the Floor ∙ The reindeer needs a base to stand on! I added a sheet of ice to ground the illustration, but feel free to add anything you like beneath the reindeer’s feet.

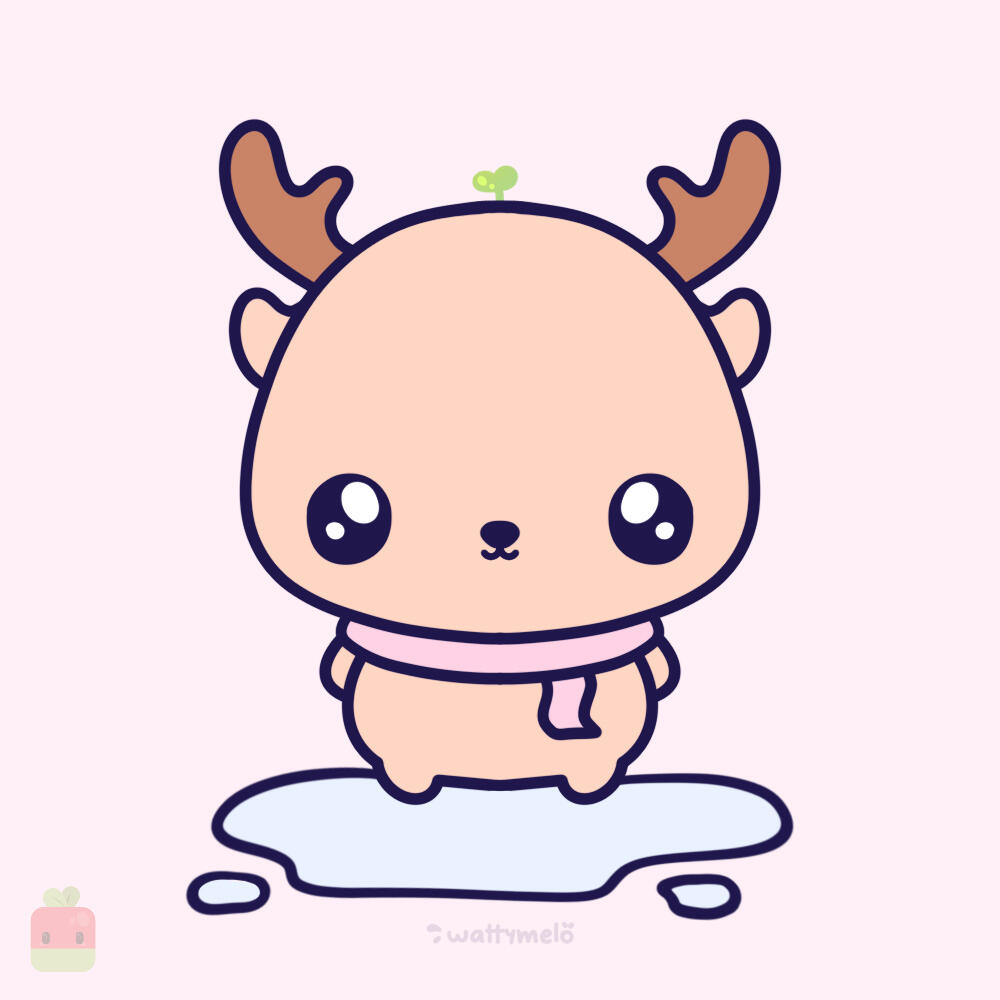
7. Base Linework ∙ Use a monoline brush or your favorite tool to create clean and precise lines. While working on this step, I chose to skip the linework for the snowflakes to ensure they wouldn’t take attention away from the main character.

8. Base Color ∙ Use a warm light brown as the base color. Use a darker brown for the antlers. Use a soft pastel shade of your choice for the scarf, and a light shade of blue for the ice underneath.

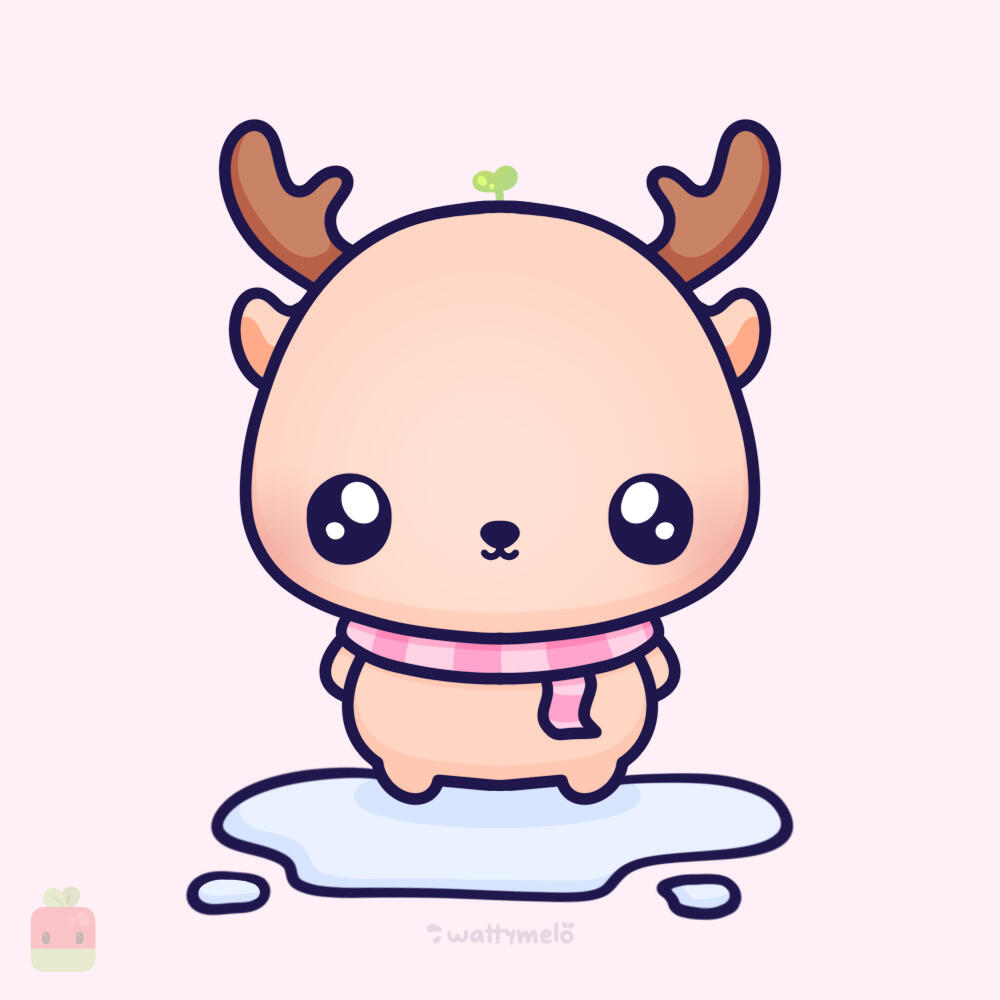
10. Add shadows and highlights ∙ To add depth to your reindeer, apply light shading to areas like the underside of the body, face, and ears. Enhance the look with soft highlights on the center of the face and some blushy cheeks. Decorate your scarf.

12. Final Touches ∙ Add the white snowflakes in different sizes and, as always, don’t forget to add those glossy white highlights for an extra touch of cuteness.
CONGRATULATIONS! You just completed the "How to draw a cute reindeer tutorial"! You can choose to add a touch of light blue shading to your snowflakes to make them stand out!
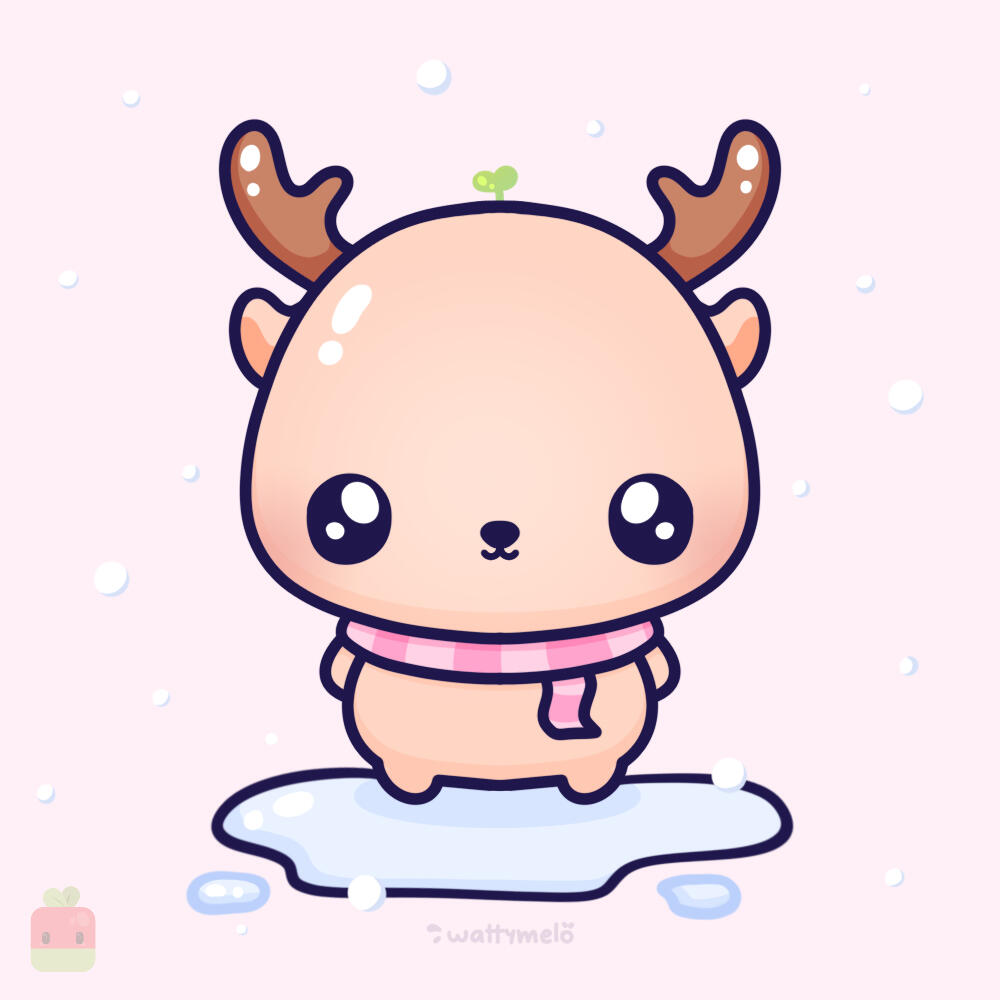
HOW TO DRAW
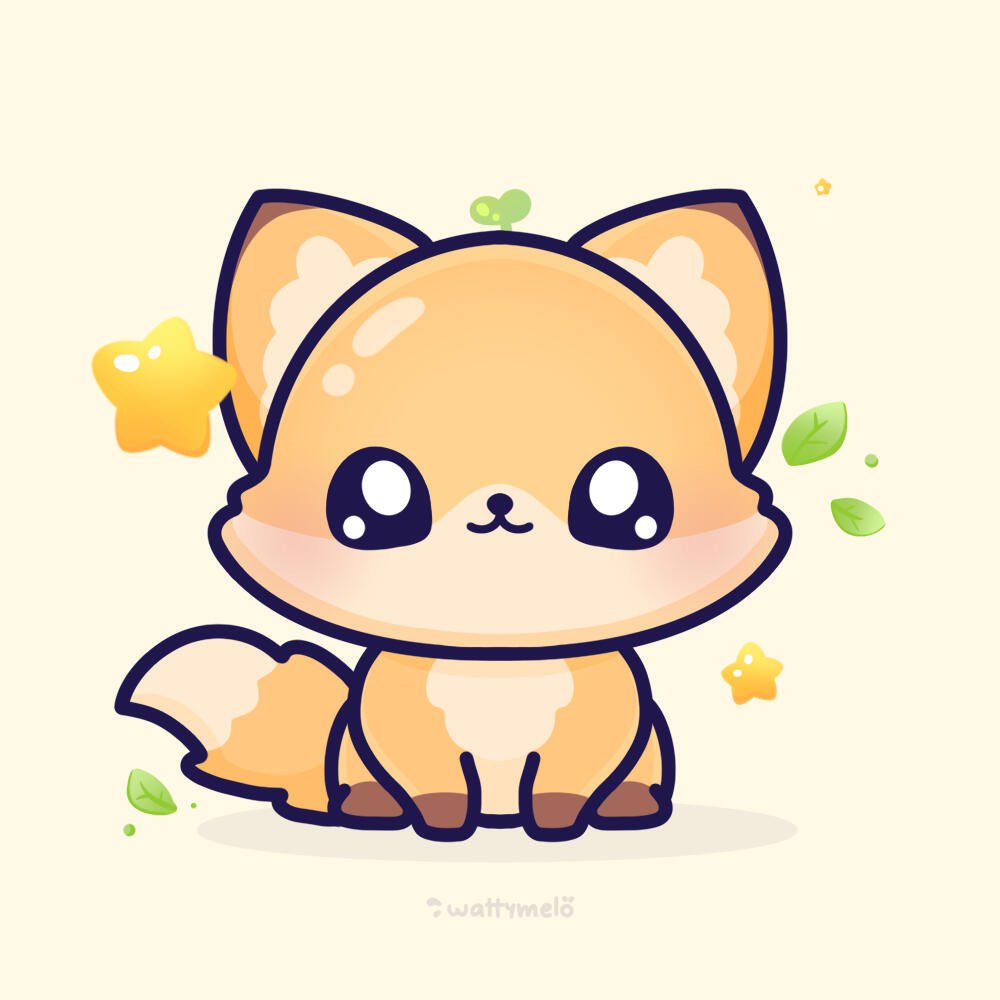
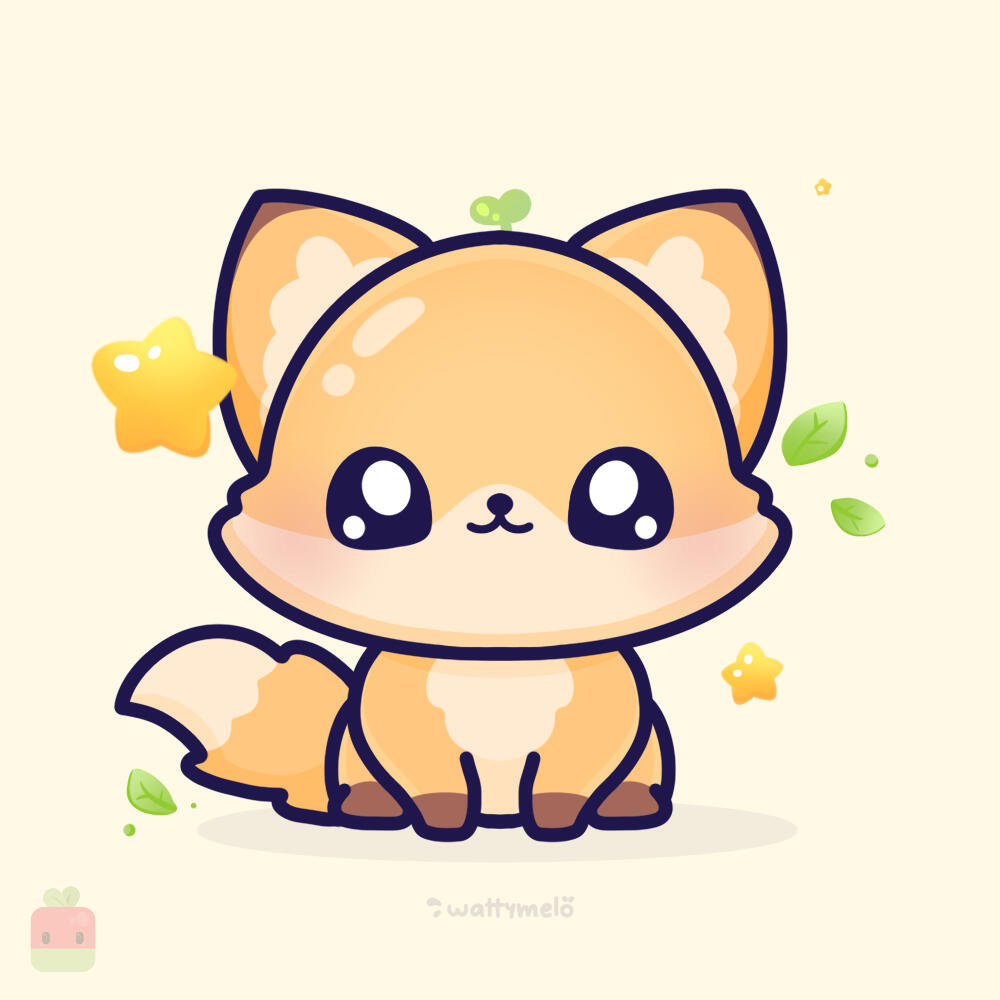
Adorable Fox
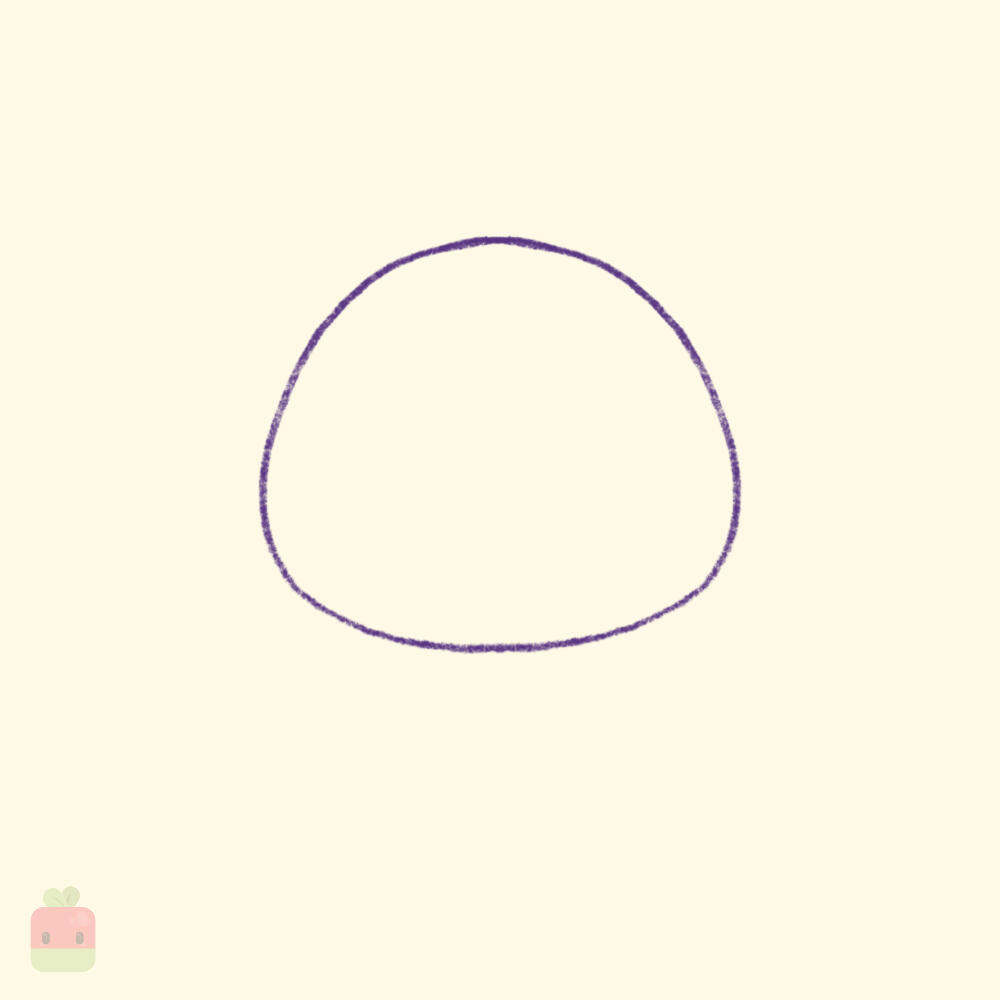
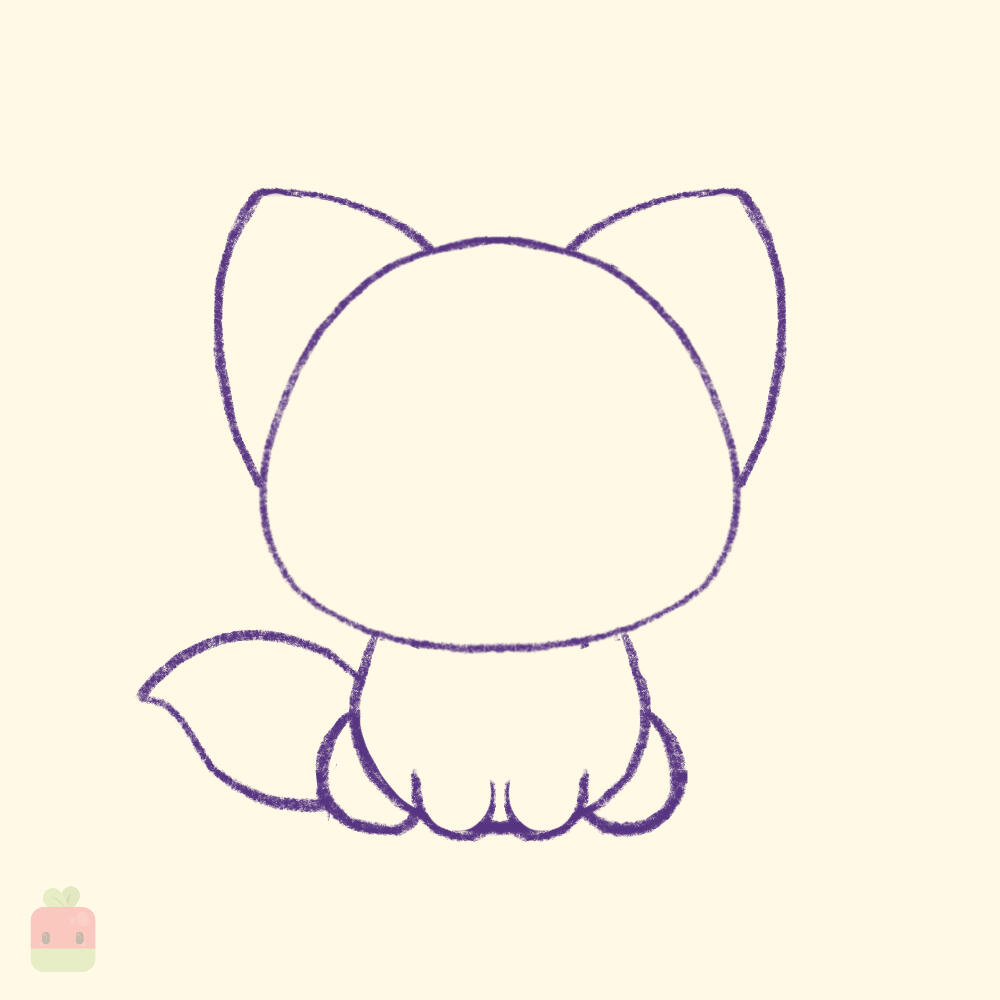
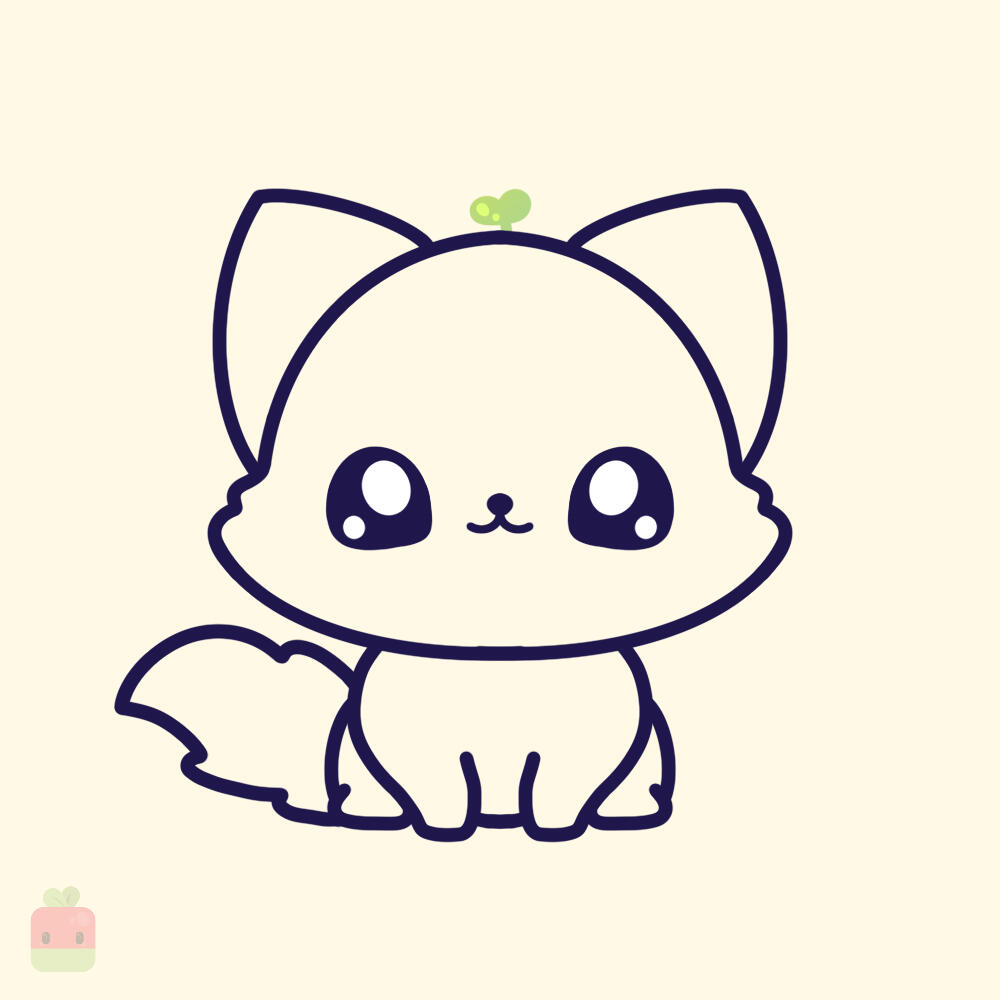
1. Draw the Head ∙ As always, begin by sketching a quick, basic squished oval shape to outline the size of your fox's head.
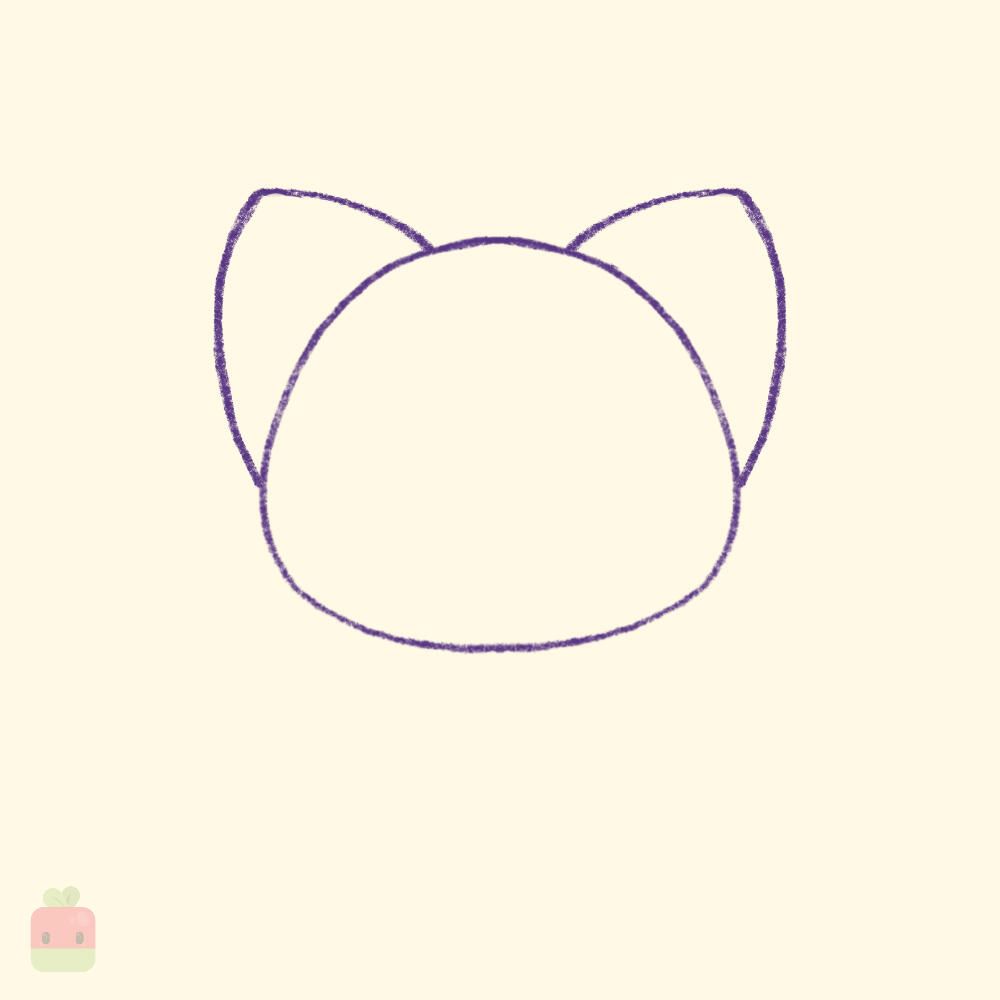
2. Draw the Ears ∙ Draw two big ears. For this step, if you’re using Procreate, try the symmetry tool to ensure both ears match if that is the look you are going for.

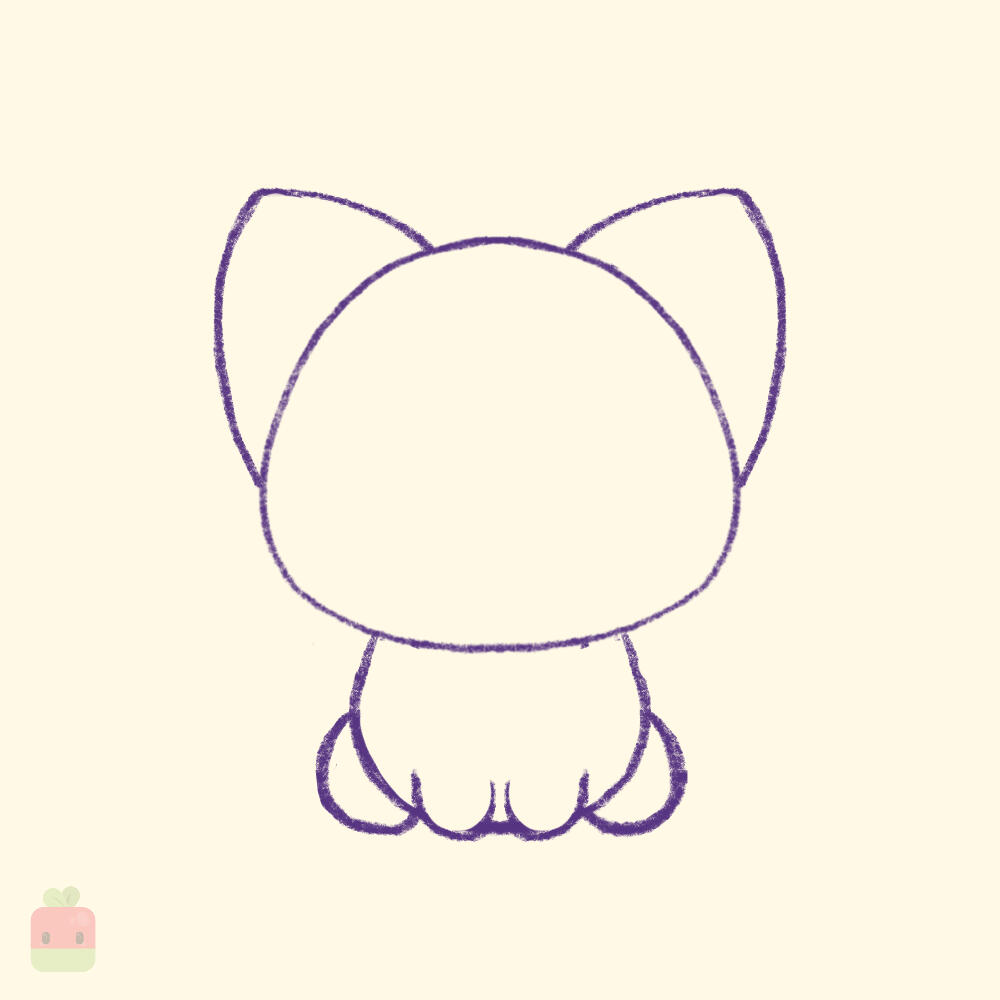
3. Draw the Rough Body ∙ Draw a large U shape below the head to create the fox’s chibi body. Then, add two smaller U shapes for the hands and two C shapes on each side of the body for the legs.
4. Add the Tail ∙ Add a curvy, triangle-like shape on either the left or right side to form the fox’s tail.

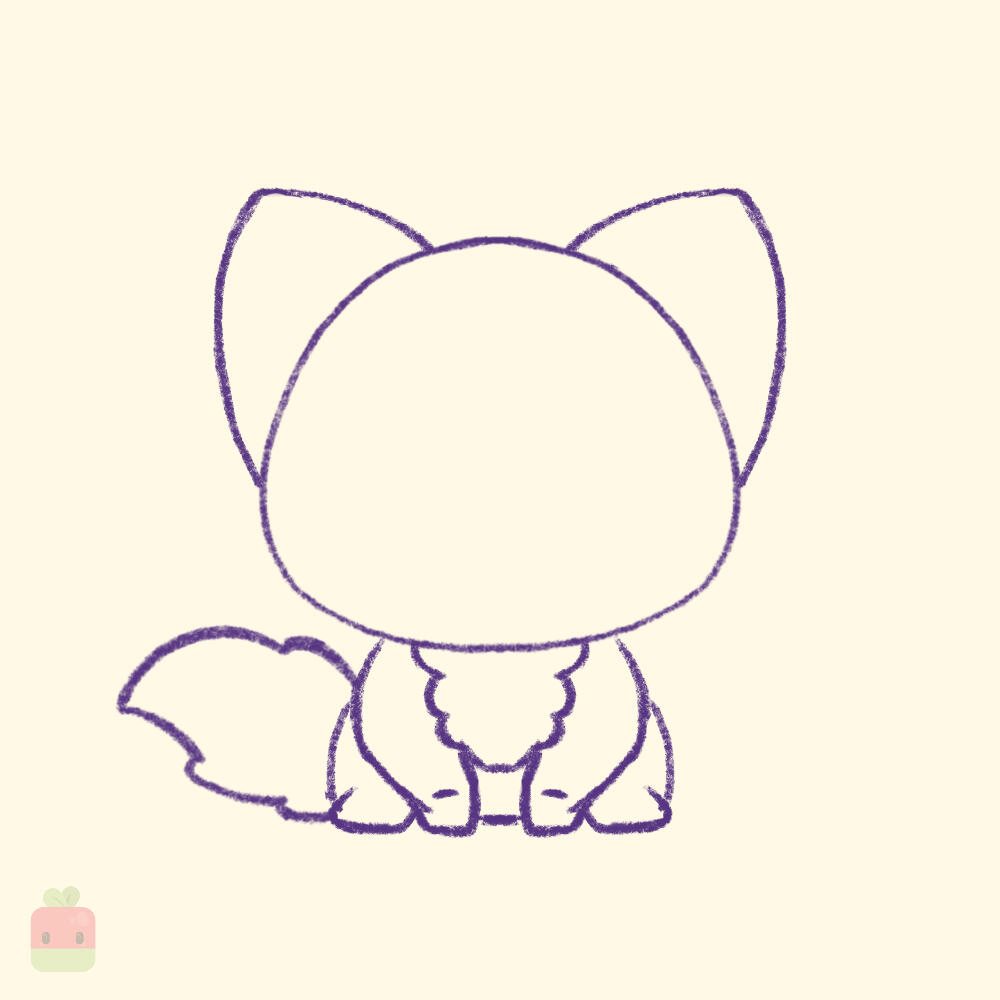
5. Draw the Detailed Body ∙ Refine the hands and legs by giving them more shape and definition. Add a fluffy chest with small, curved lines to enhance the softness. For the tail, include wavy or zigzag lines along the edges to indicate fluffiness.
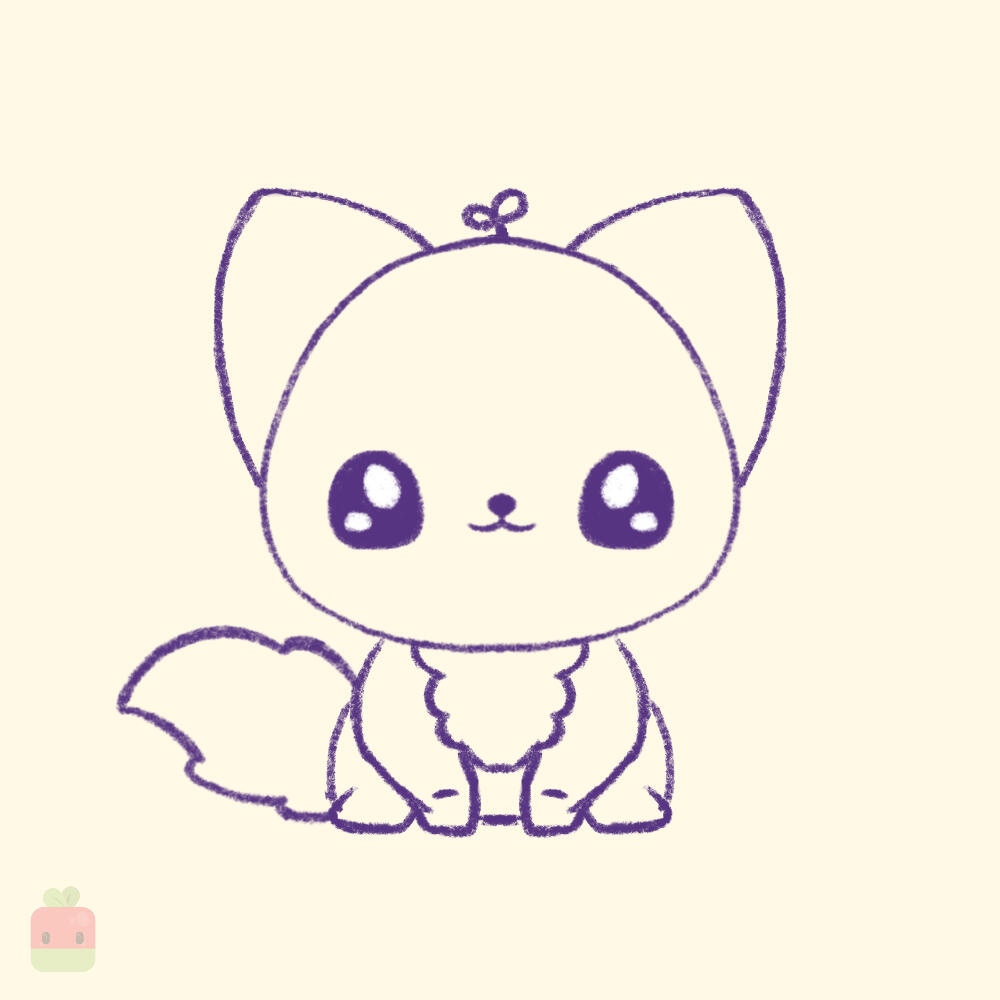
6. Add the Face ∙ Draw two big, round eyes with highlights. Add a small nose near the center of the face and a simple, wavy line for that uwu cute mouth.

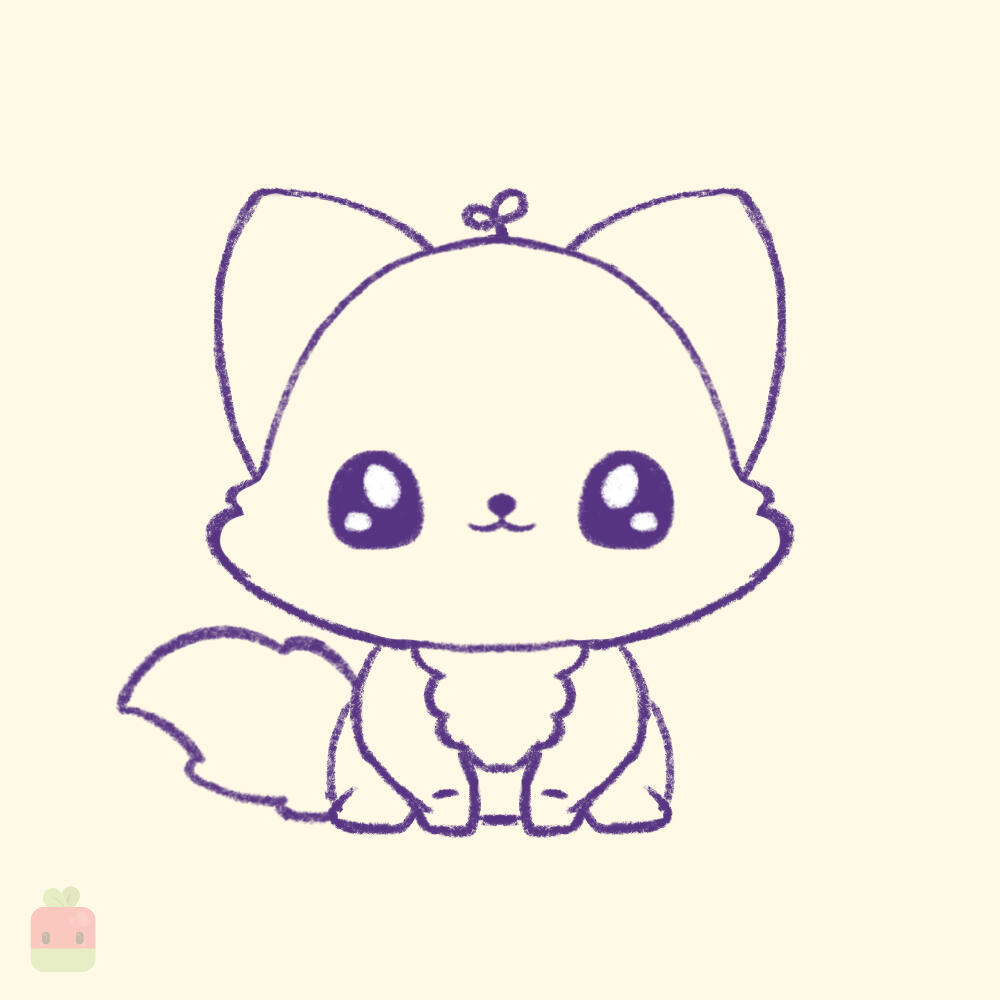
7. Adjust the Face and Add Final Touches ∙ Add your little go-to accessories (like my sprout), then draw some curvy lines on each side of the face to enhance its fluffiness and make it even cuter!

8. Base Linework ∙ Use a monoline brush or your favorite tool to create clean and precise lines.

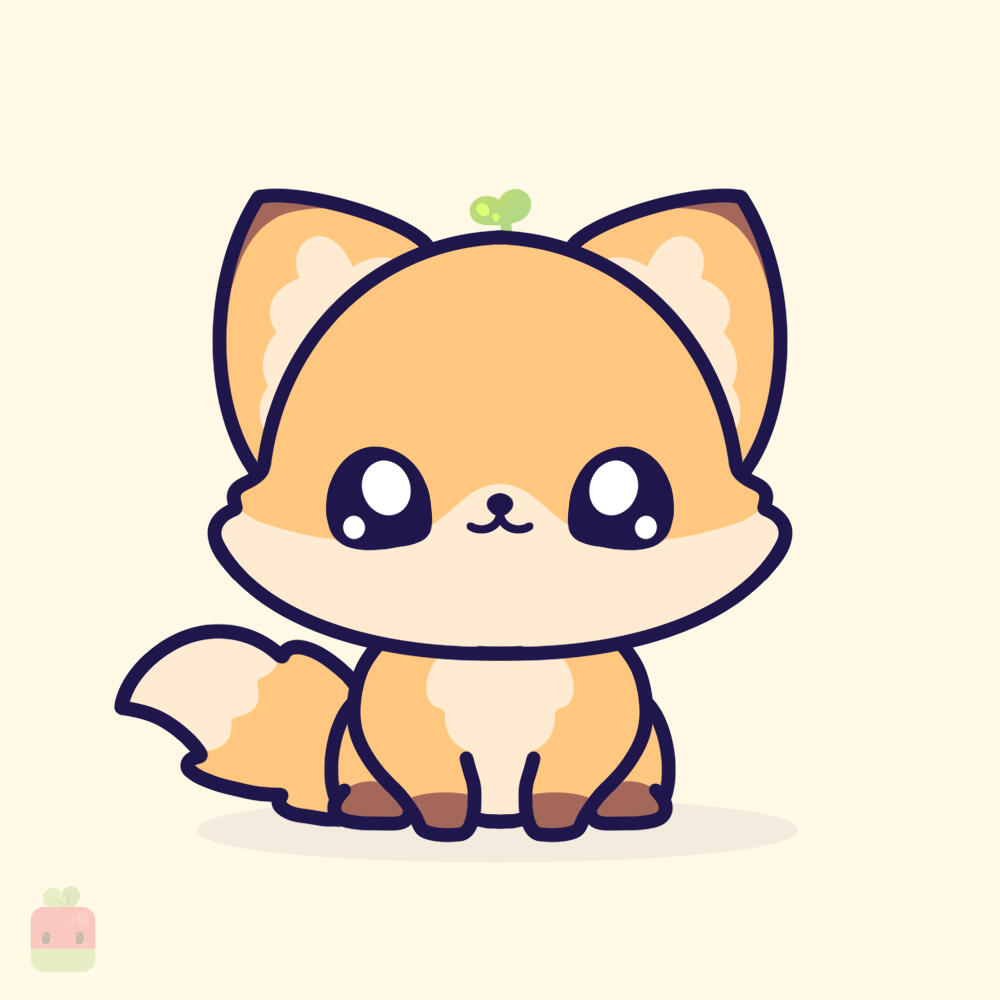
9. Base Color ∙ Use a warm light orange as the base color. Use a darker brown for the top of the ears and paws. Add a soft, light beige to highlight the face, chest, the tip of the tail, and the inside of the ears. Add the shadow.

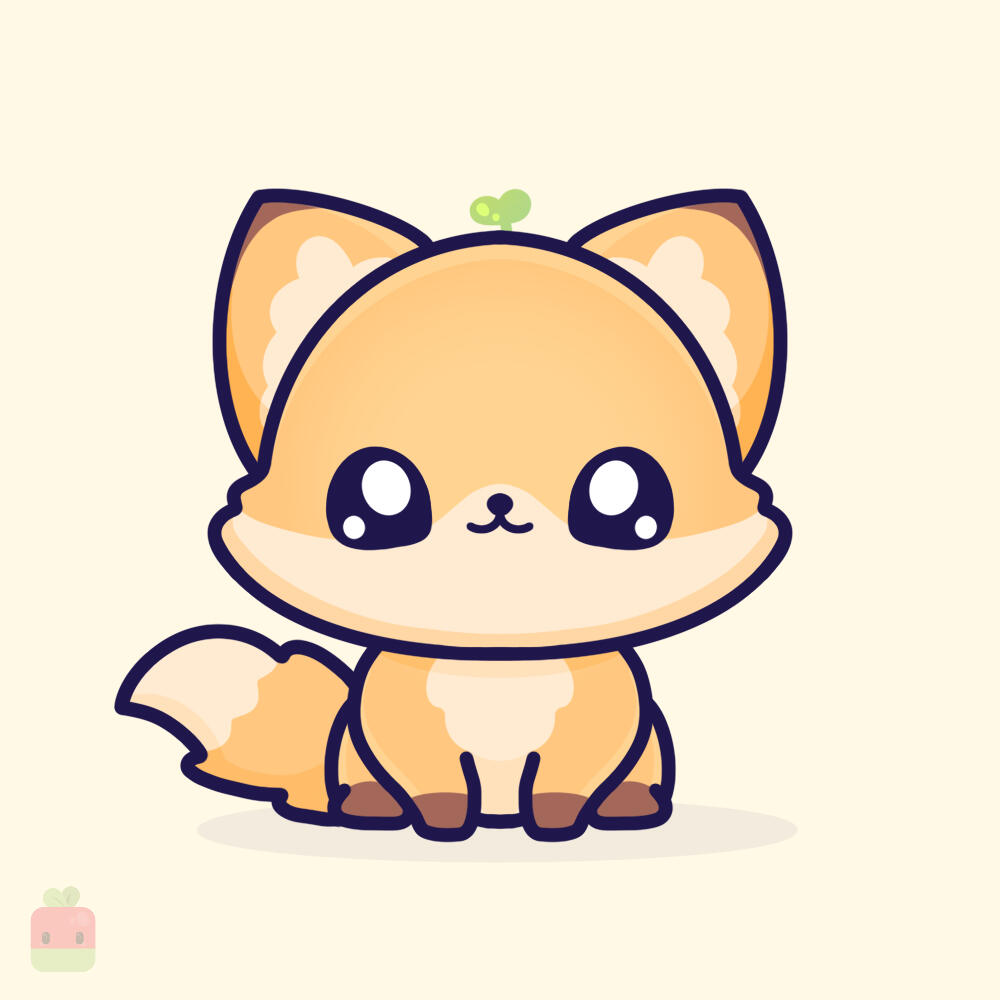
10. Add shadows and highlights ∙ To add depth to your fox, apply light shading to areas like the underside of the body, face, and ears. Enhance the look with soft highlights on the center of the face.

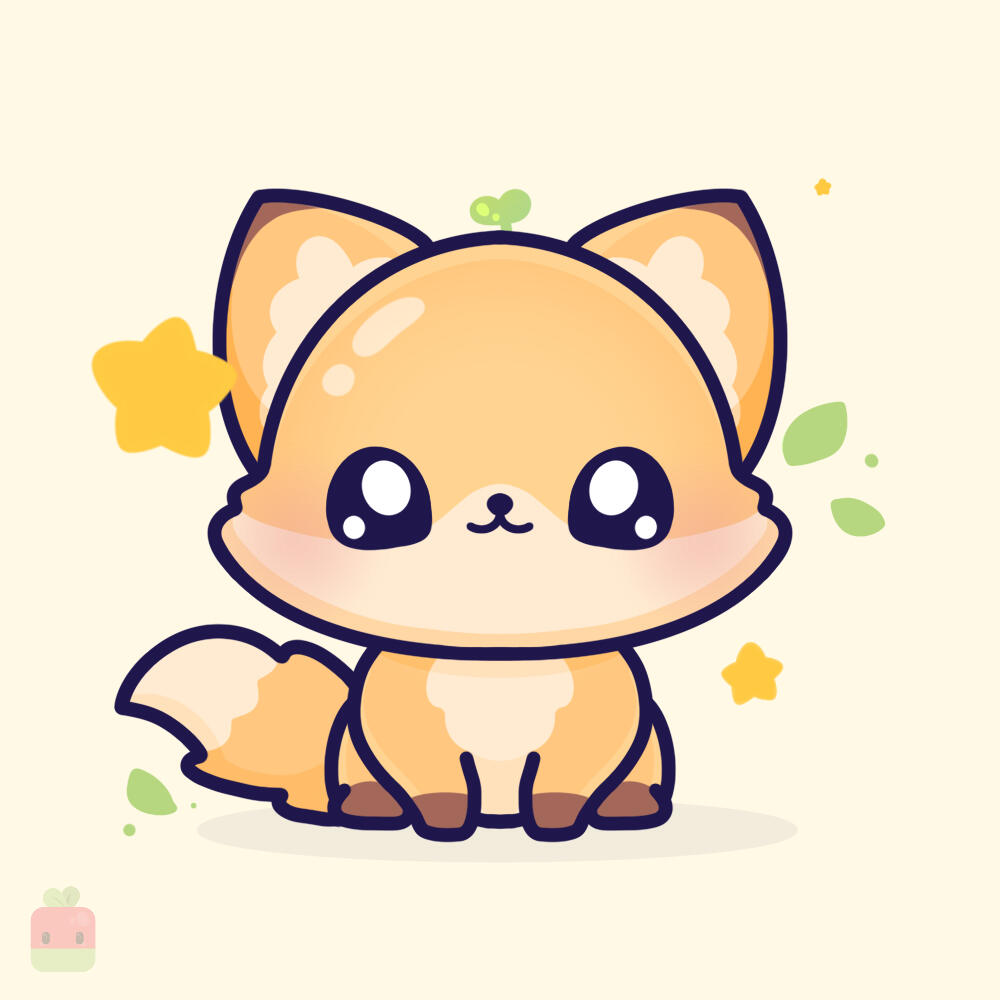
12. Final Touches ∙ Add small decorative elements like tiny stars and leaves around the fox to give it a magical touch. Don’t forget to include soft, blushy cheeks and little highlight blobs on the face to enhance its cuteness and charm!
CONGRATULATIONS! You just completed the "How to draw a cute fox tutorial"! To finish up, add some soft shading and highlights to the decorative stars and leaves to make them pop. This will give your illustration extra depth and a polished, magical look
HOW TO DRAW
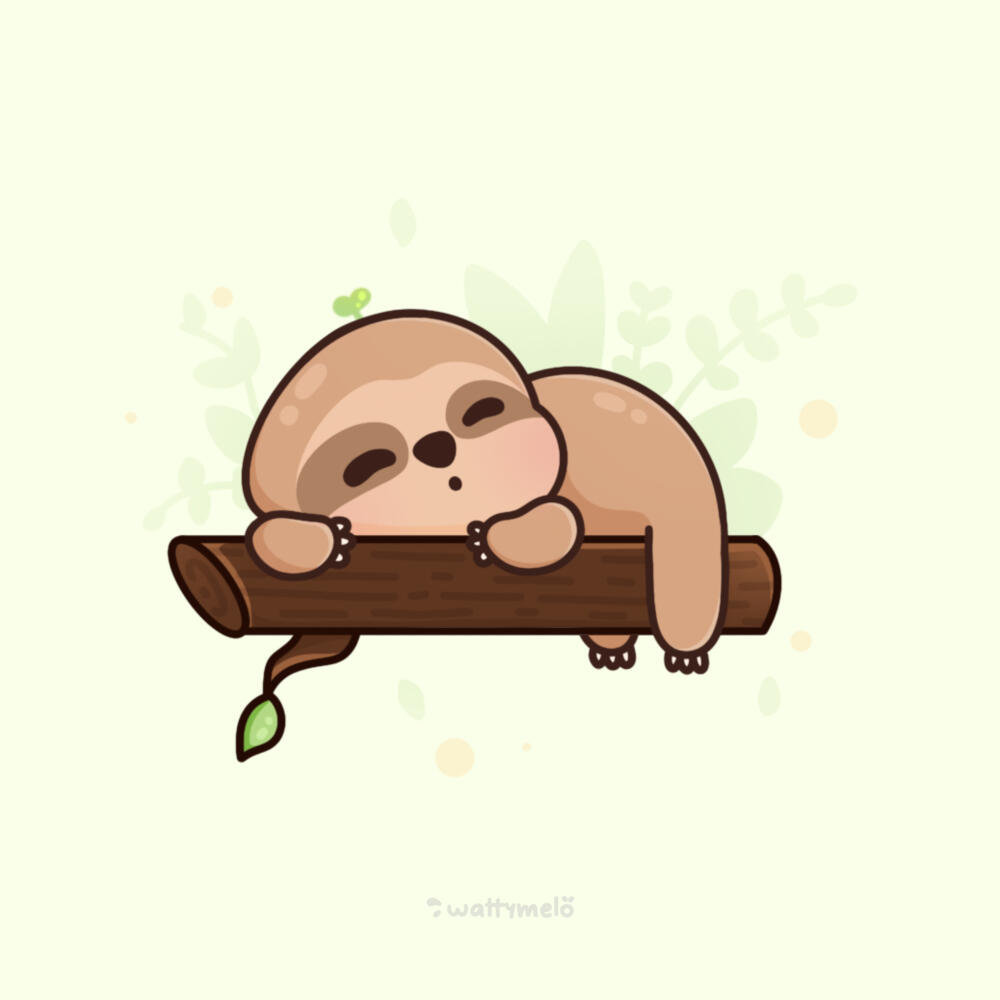
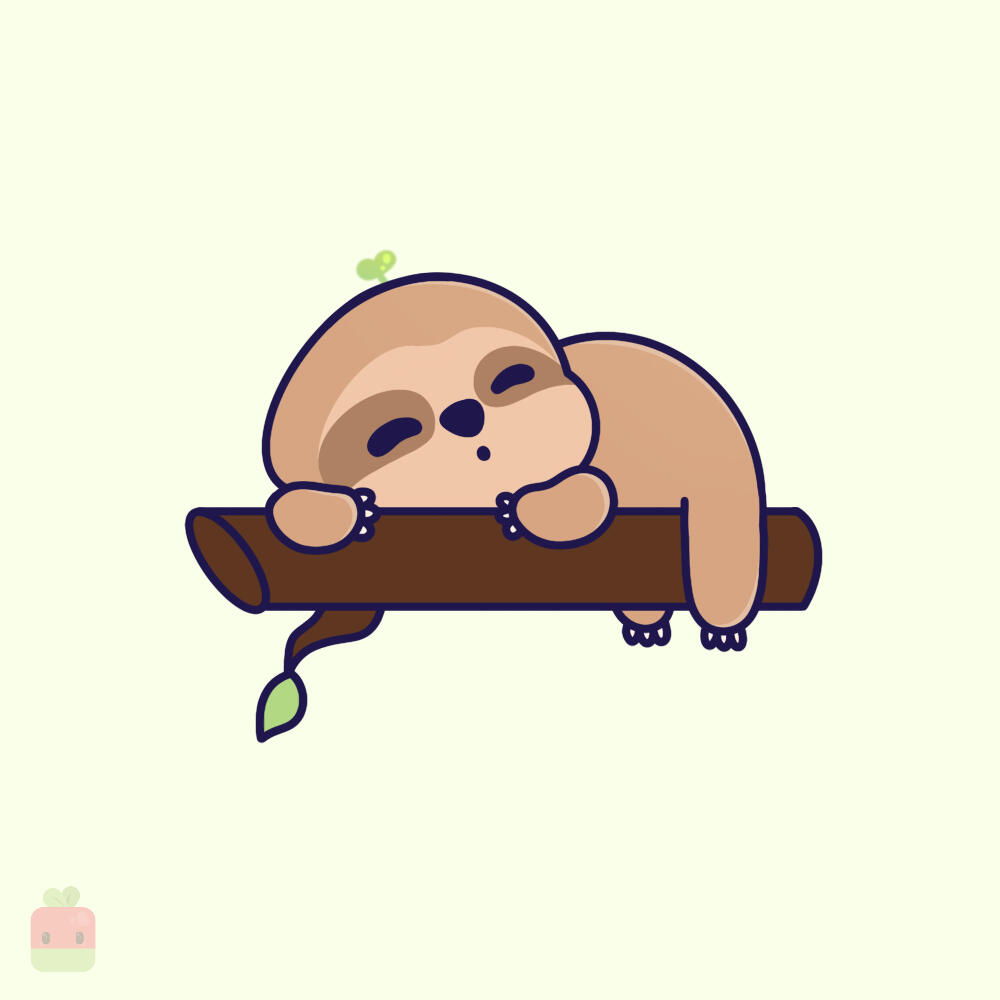
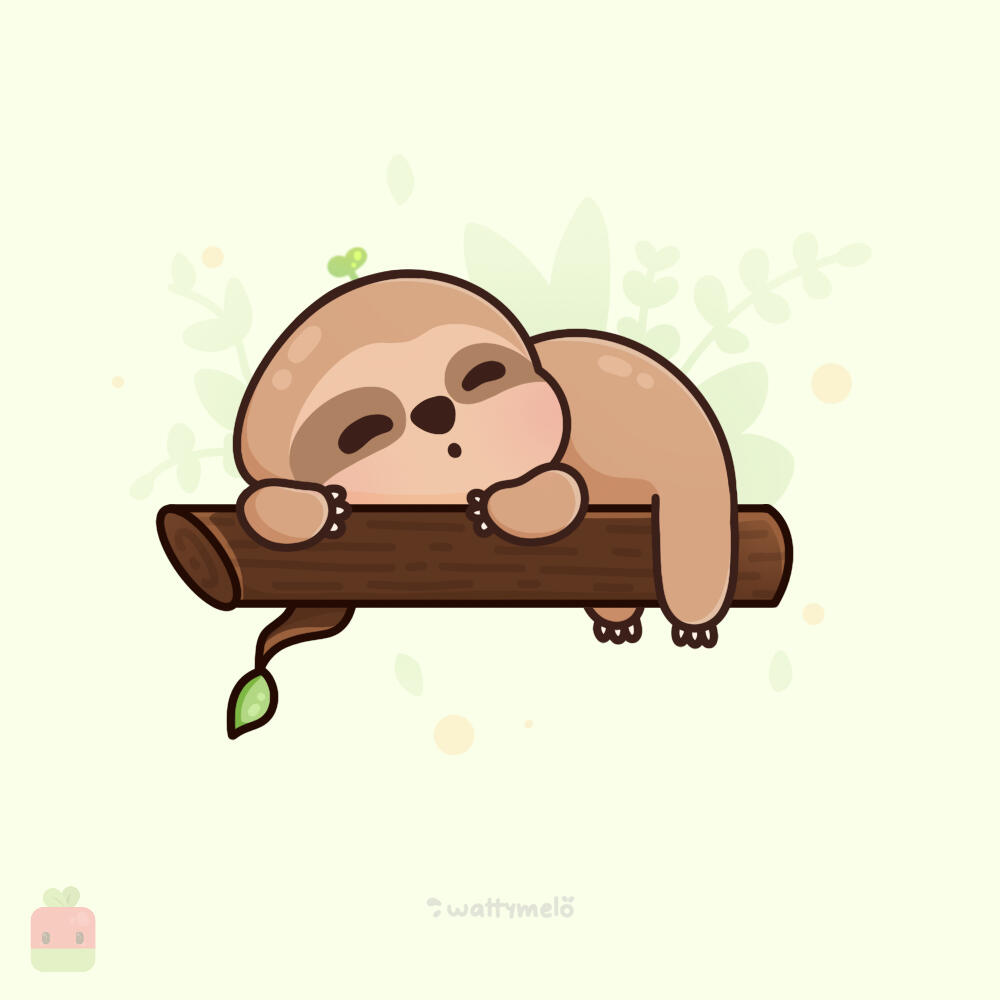
Sleepy Sloth
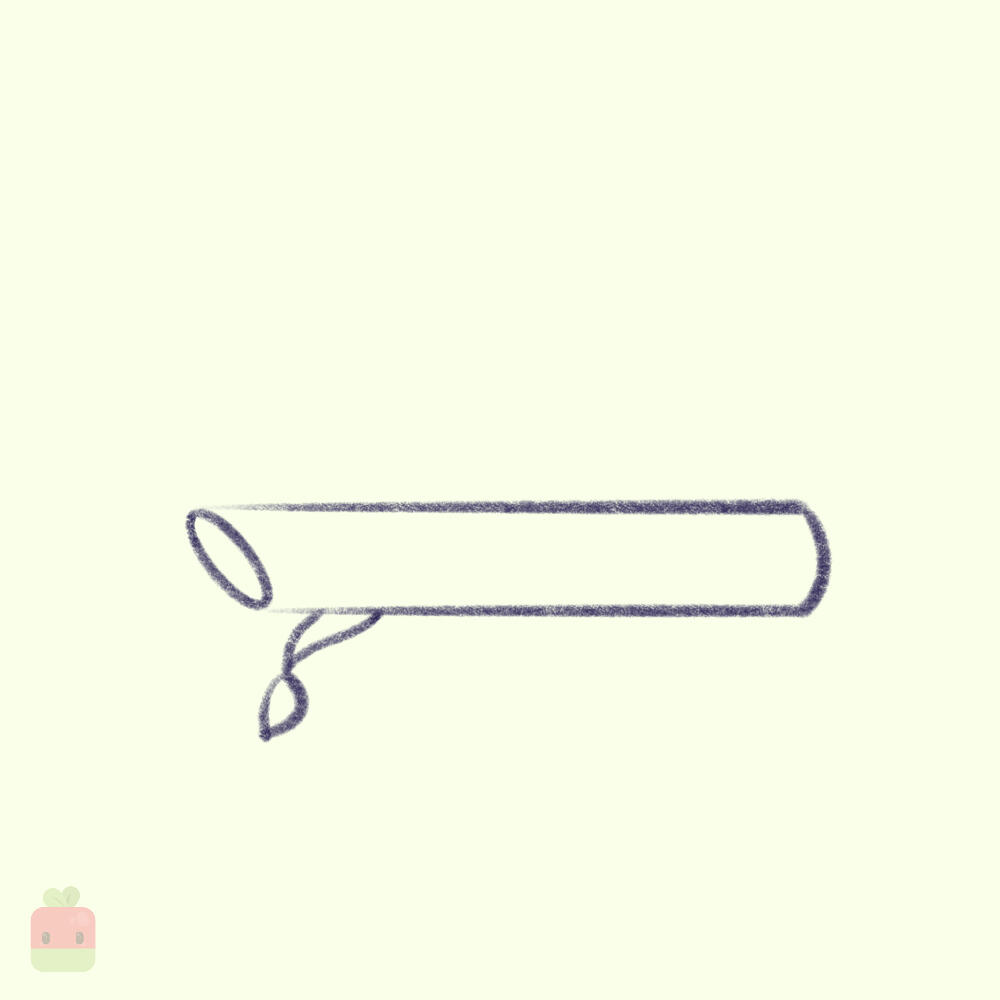
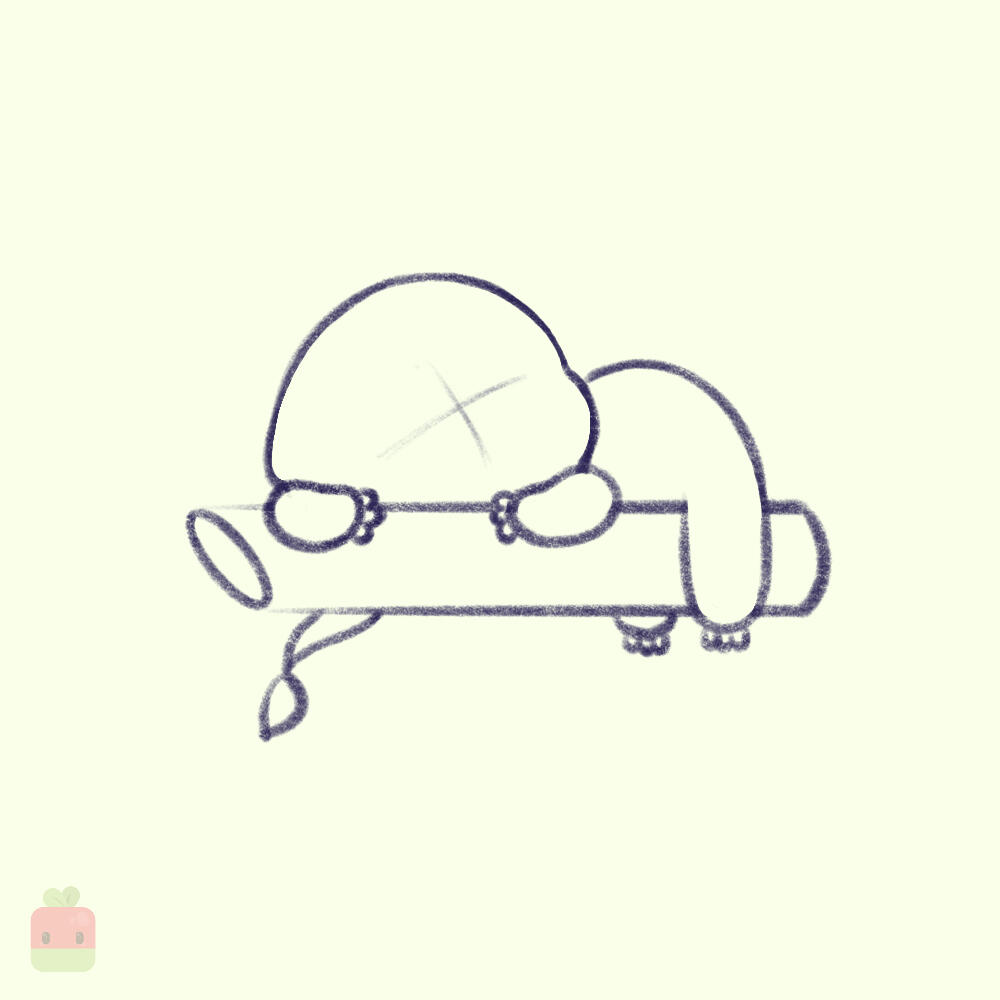
1. Draw the Branch ∙ Draw a small branch with a tiny sprout growing from it, topped with a single cute leaf.
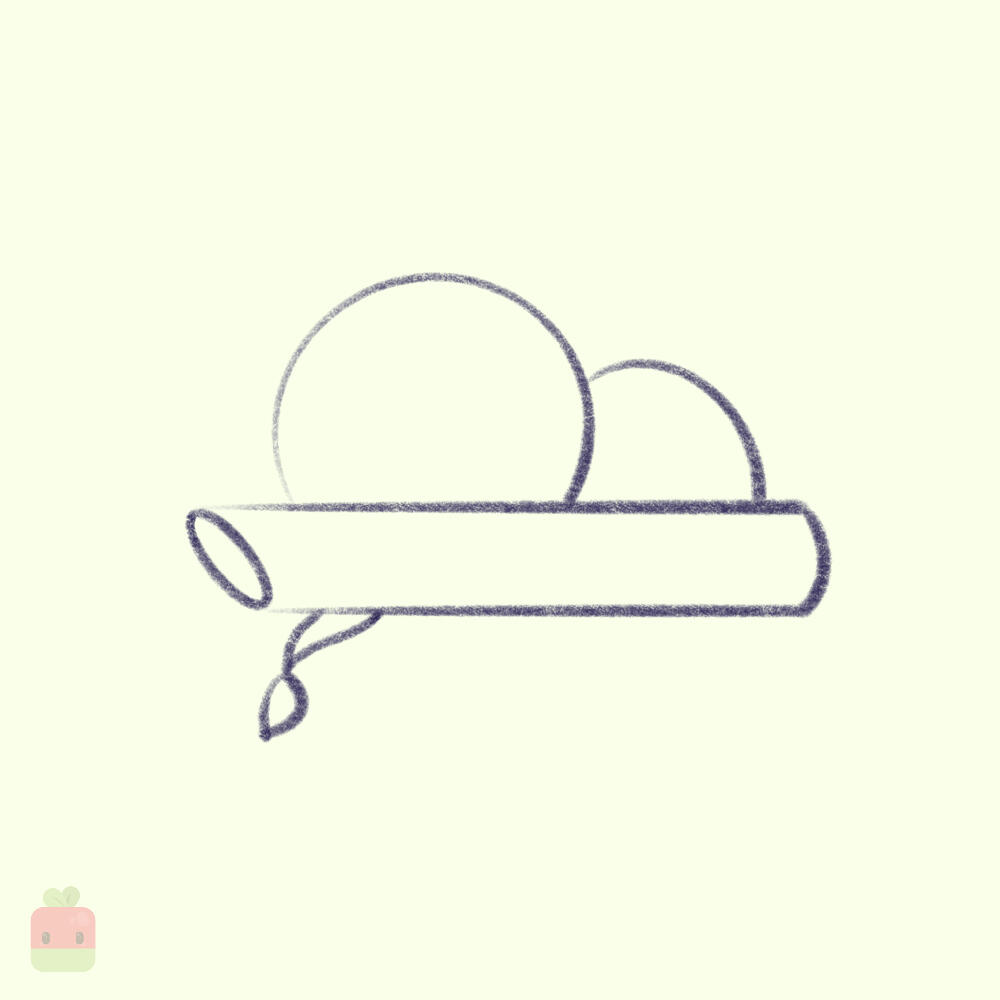
2. Draw the Head and Body ∙ Add two half circles on top of the branch - one bigger for the head and a smaller one below for the body, like a little character sitting on the branch.

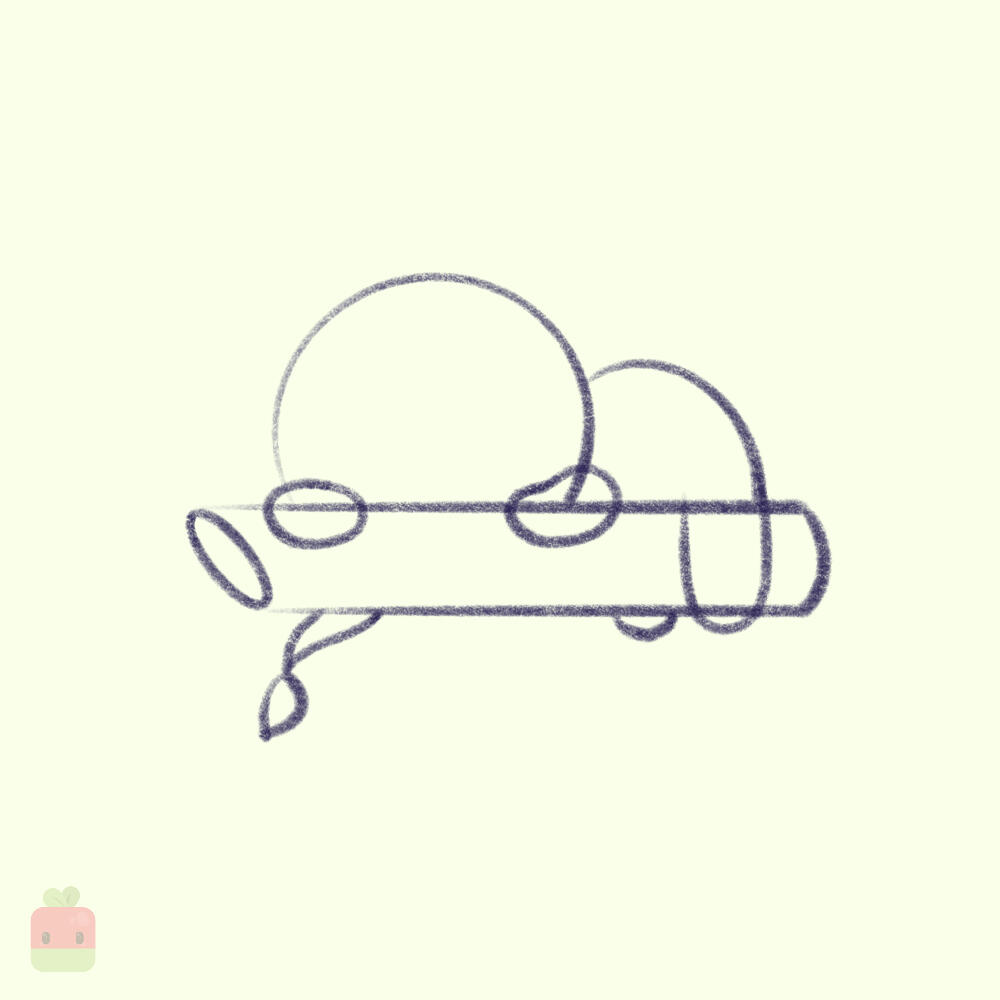
3. Draw the Limbs ∙ Sketch rough limb shapes - two small bean shapes in front of the big circle for hands, one long U-shape for the back leg, and a smaller U-shape behind the branch for the right leg.

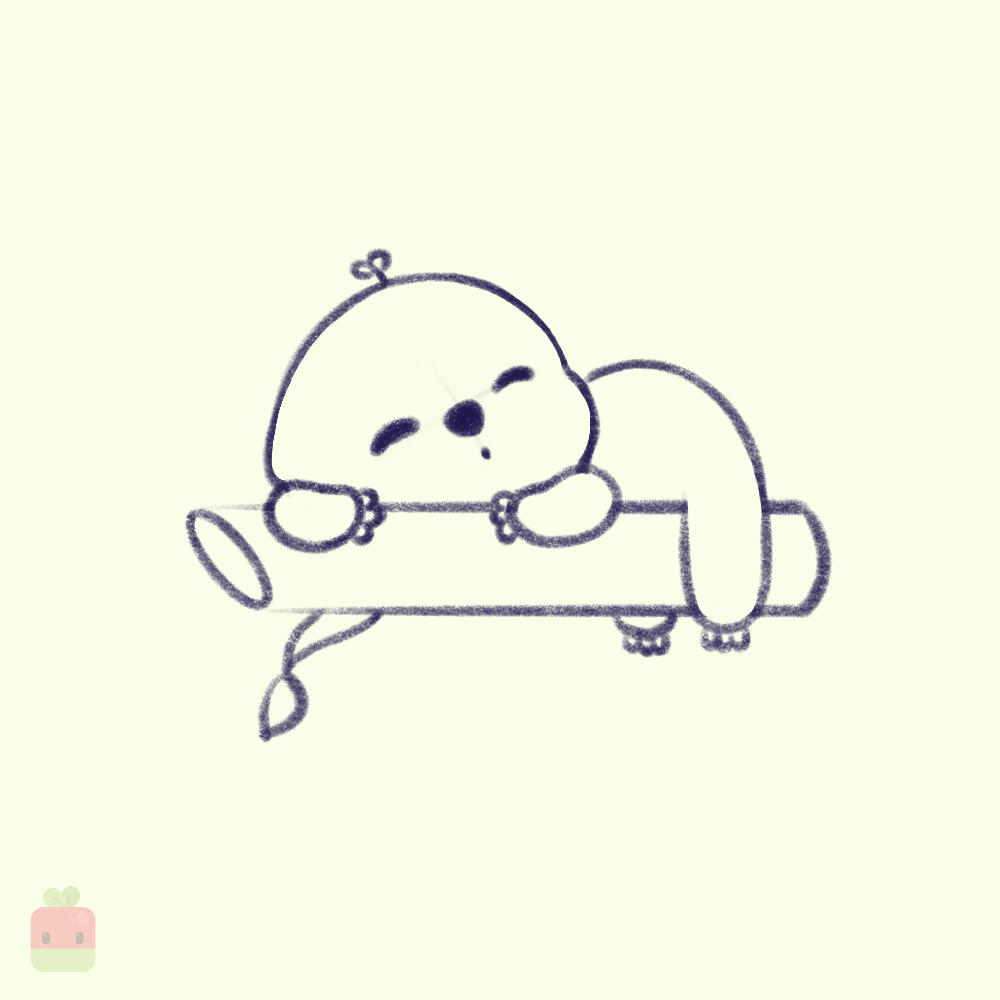
4. Refine the Body ∙ Refine the hands, legs and face by giving them more shape and definition. Add sets of long nails to the sloth's arms and legs.

5. Add the Face ∙ Draw two curved eyes. Add a big, rounded triangle nose near the center of the face and a simple dot for the mouth to give the sloth its sleepy look.

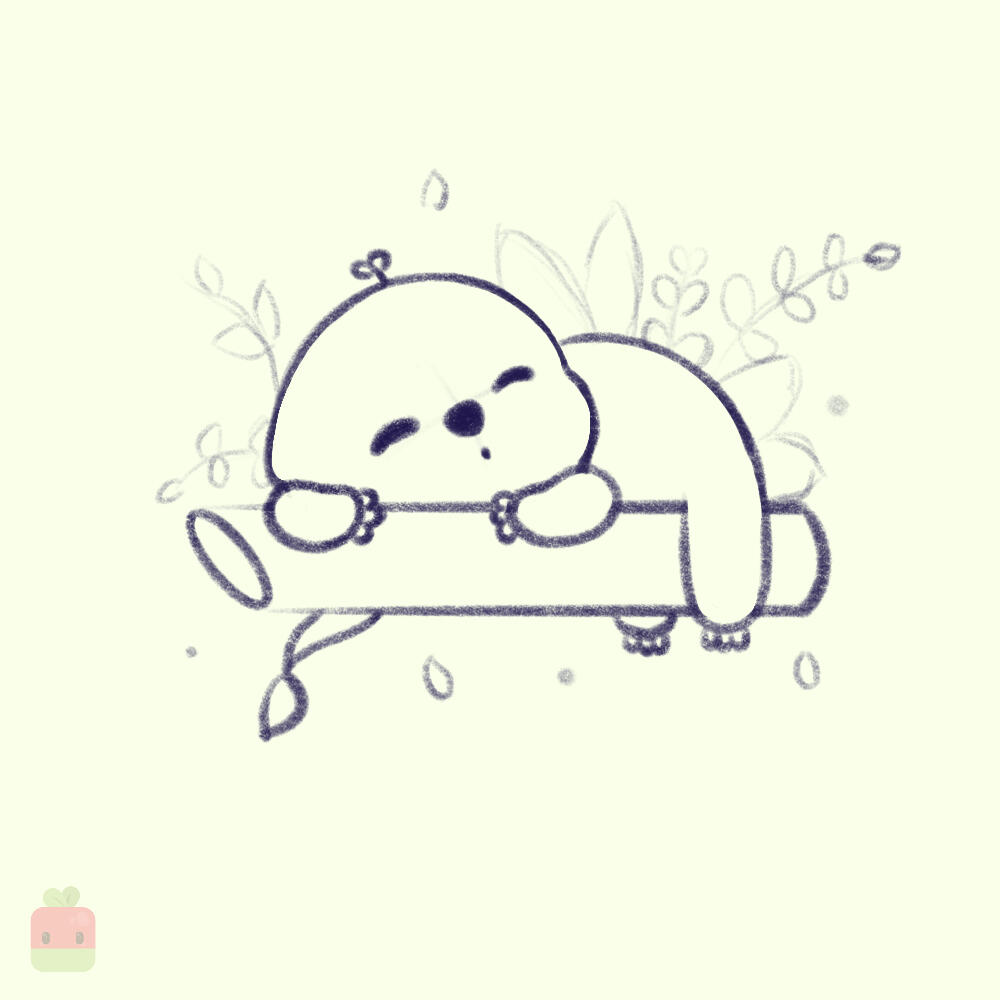
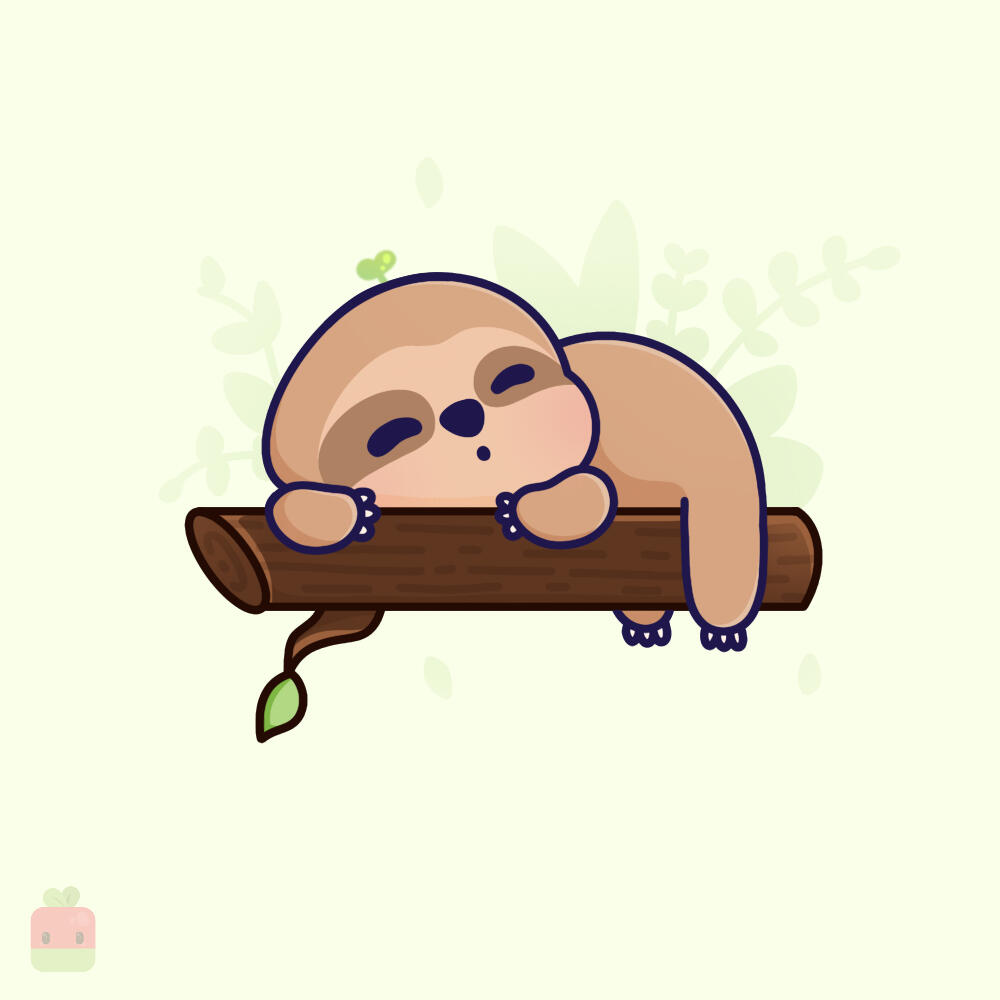
6. Draw the Background ∙ This part is optional. Feel free to add some leafy greens in the background using loose, flowing lines. Keep it simple and don’t stress over the details - just have fun with it!

7. Base Linework ∙ Use a monoline brush or your favorite tool to create clean and precise lines. We won’t outline the background to keep the focus on our sloth as the main character. We will add a soft and subtle background later.

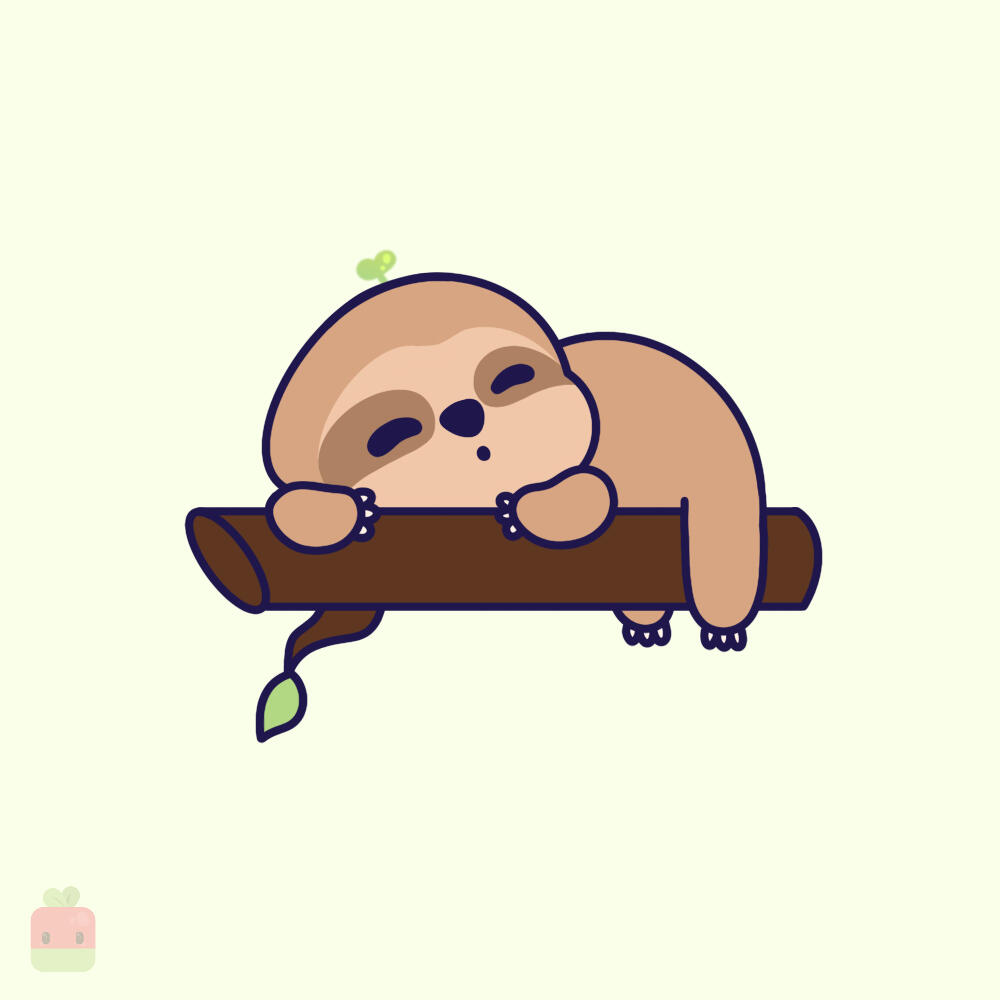
8. Base Color ∙ Use a warm light brown as the base color. Add a soft, light beige to highlight the face shape, and a darker brown for its two eye markings. Feel free to include any signature details to give your sloth extra charm!
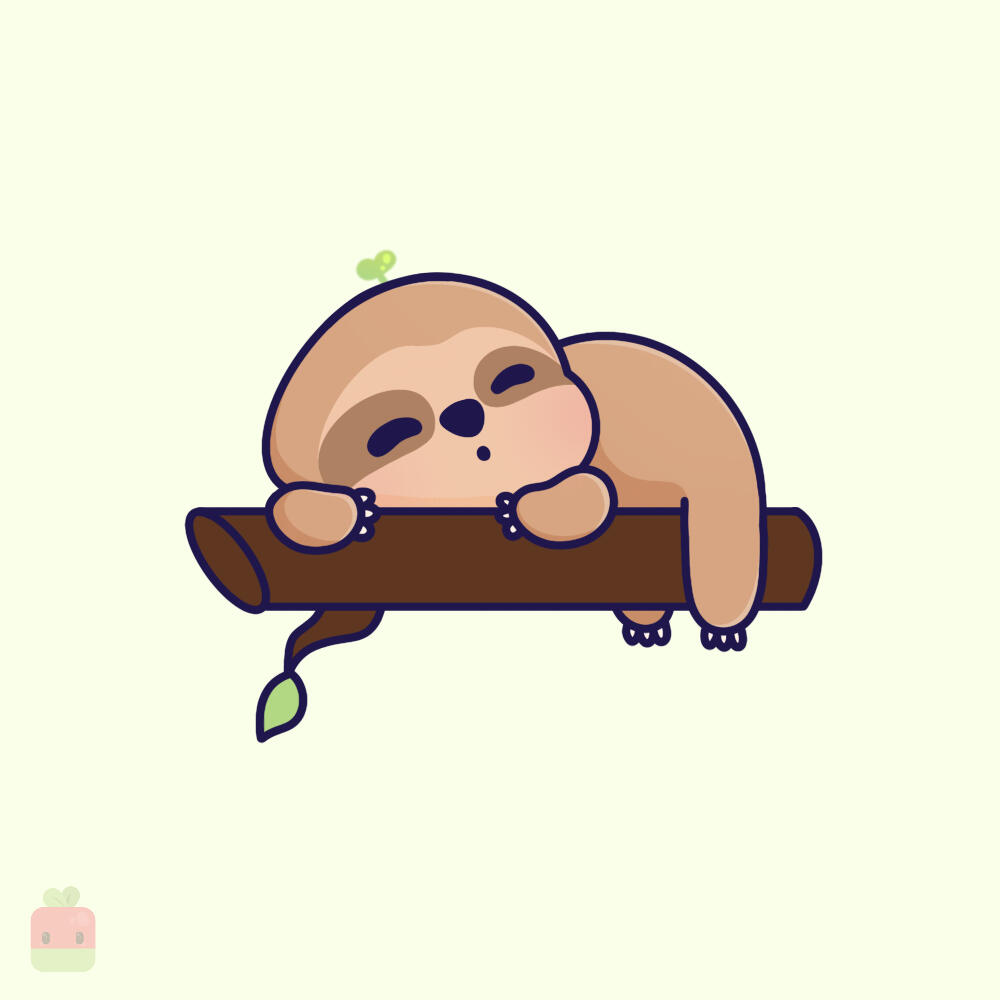
9. Highlights ∙ Use a soft brush to add gentle highlights on the head and buttocks. Then, switch to your usual linework brush to create more defined highlights along the edges of the sloth’s body for extra depth and dimension.
10. Shadows ∙ Apply shading to areas like the underside of the body and face. Don't forget about the little hanging leg in the back. At this stage I also went ahead and added some blushy cheeks. Sometimes I get too excited about it and do it faster.
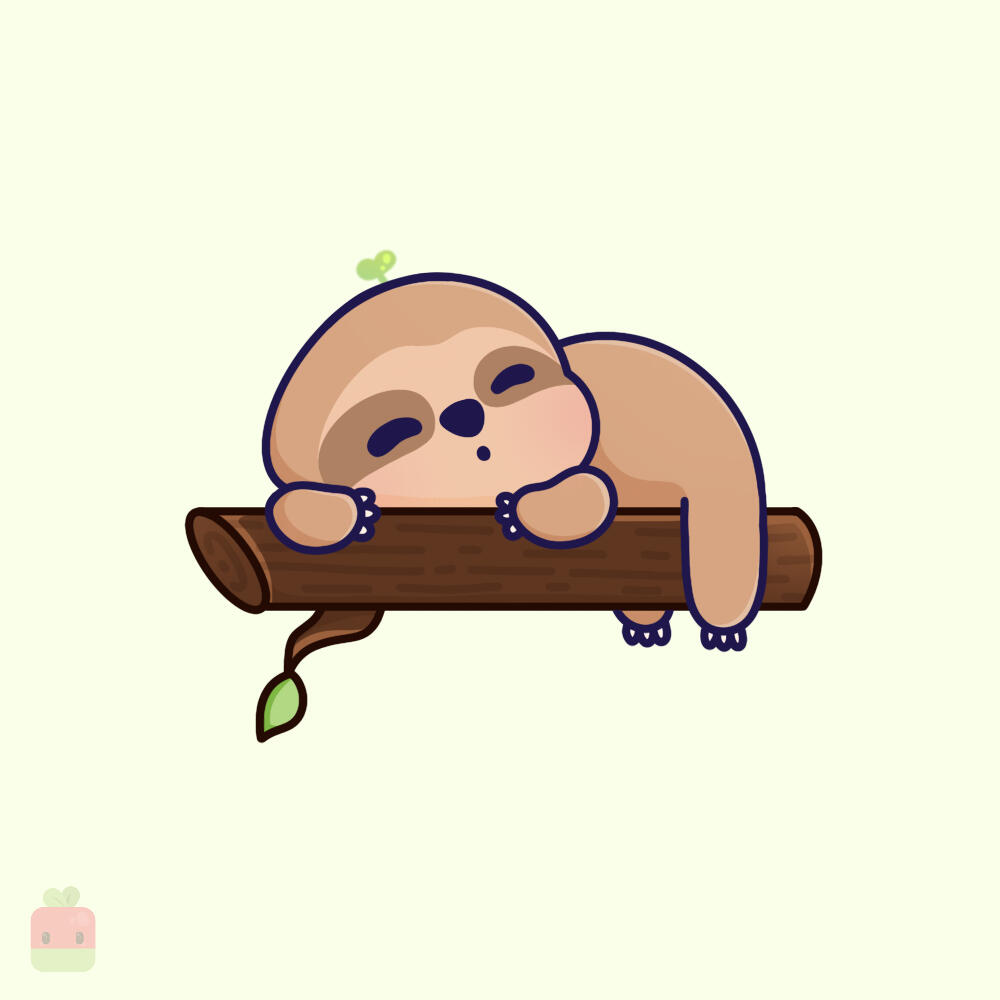
11. Render the Branch ∙ Use a warm brown as the base and a slightly darker shade to add texture with subtle strokes, following the natural flow of the wood. Add some sharp highlights on top and shadows on the bottom.

12. Background ∙ Fill the leaves and background greenery with a flat green color, then lower the opacity to keep them subtle. This ensures the sloth remains the star of the illustration while still having a nice, soft background touch.
CONGRATULATIONS! You just completed the "How to draw a cute sloth tutorial"! Don’t forget to add those cute highlight blobs on the head and body to make the sloth extra cute. This time I also chose to make all the linework dark brown to fit the theme.

HOW TO DRAW
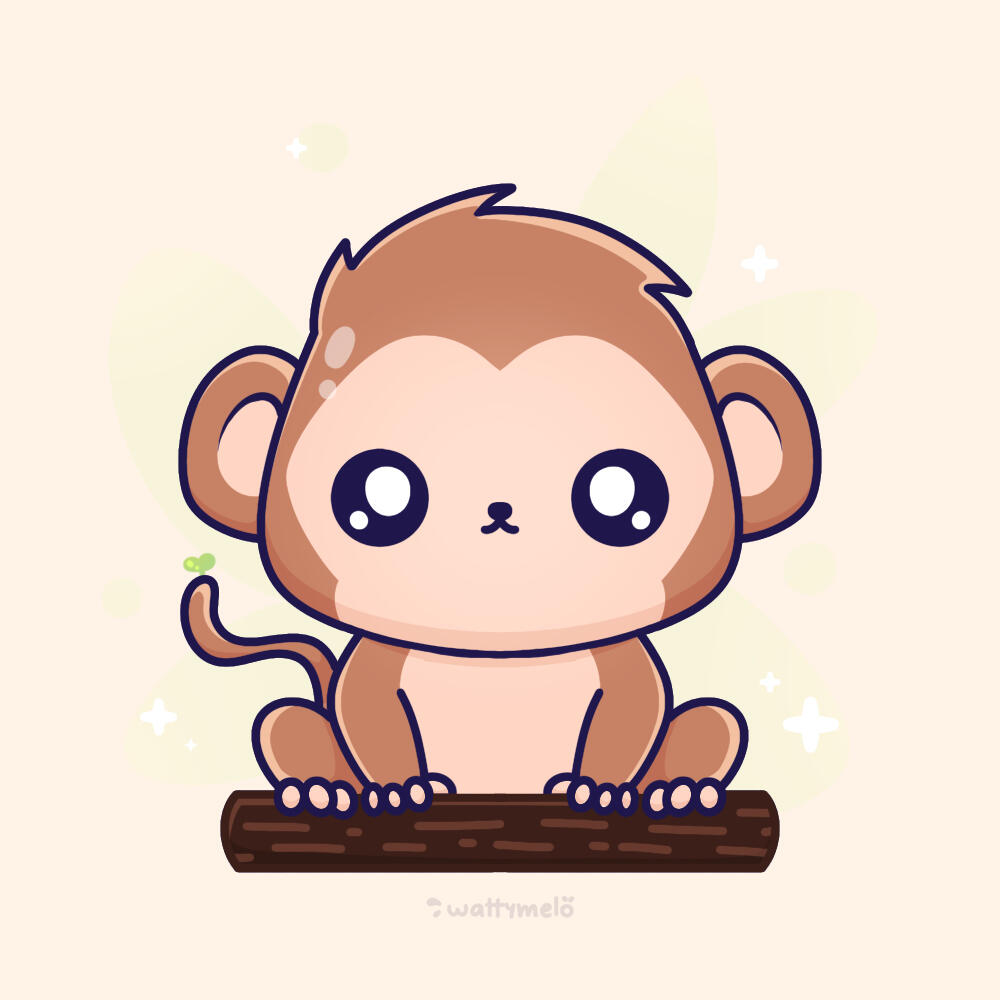
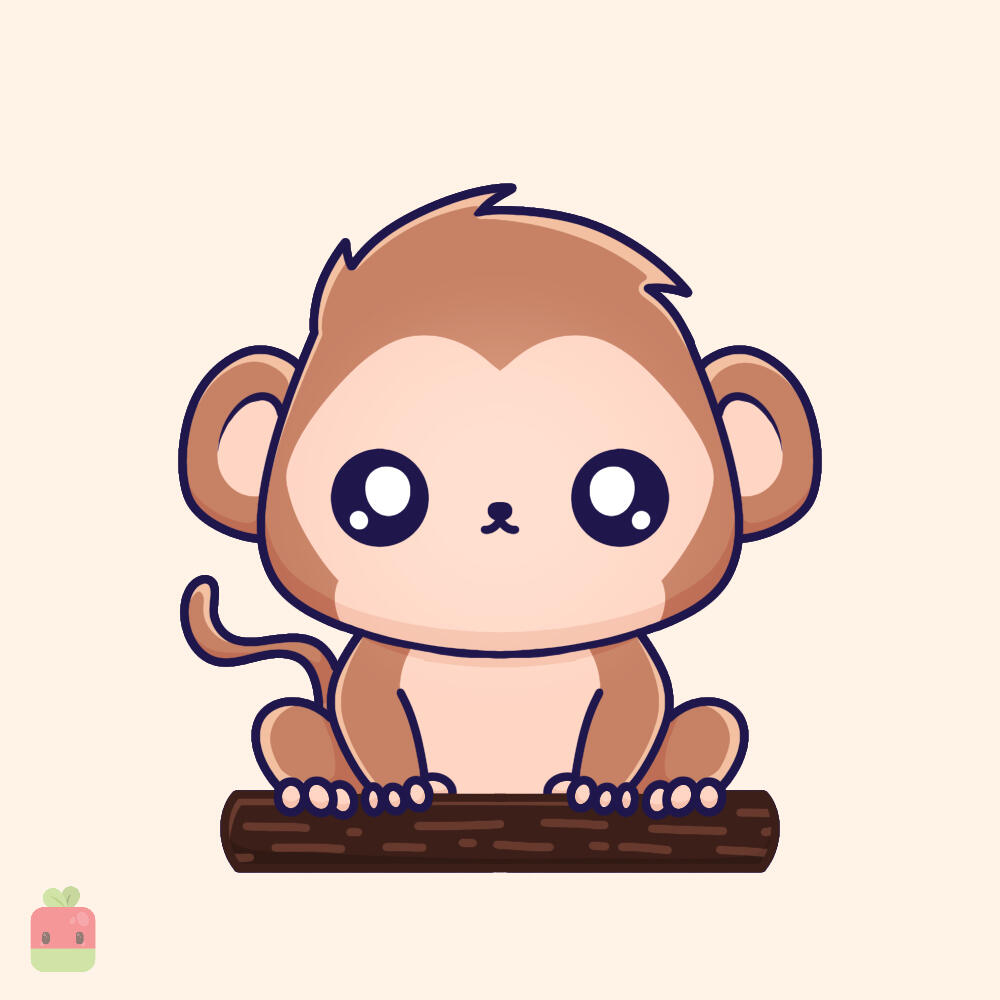
Cheeky Monkey
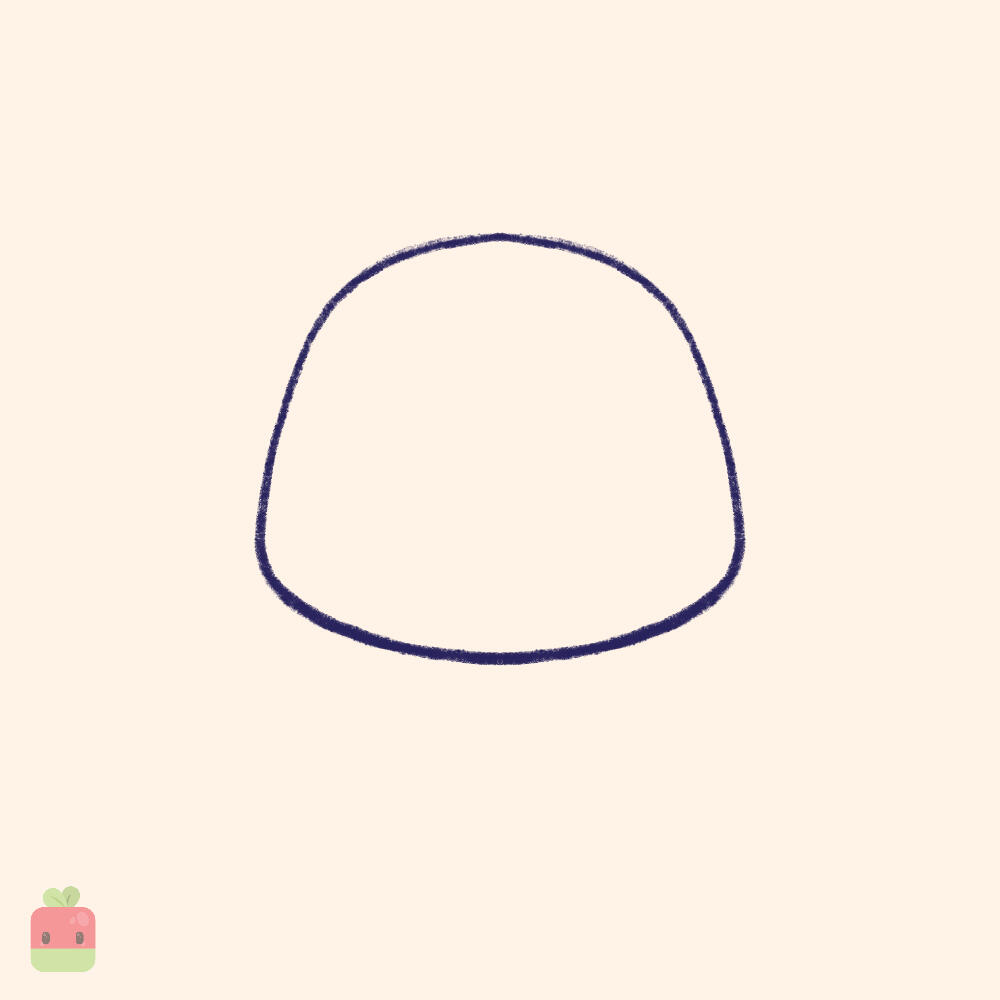
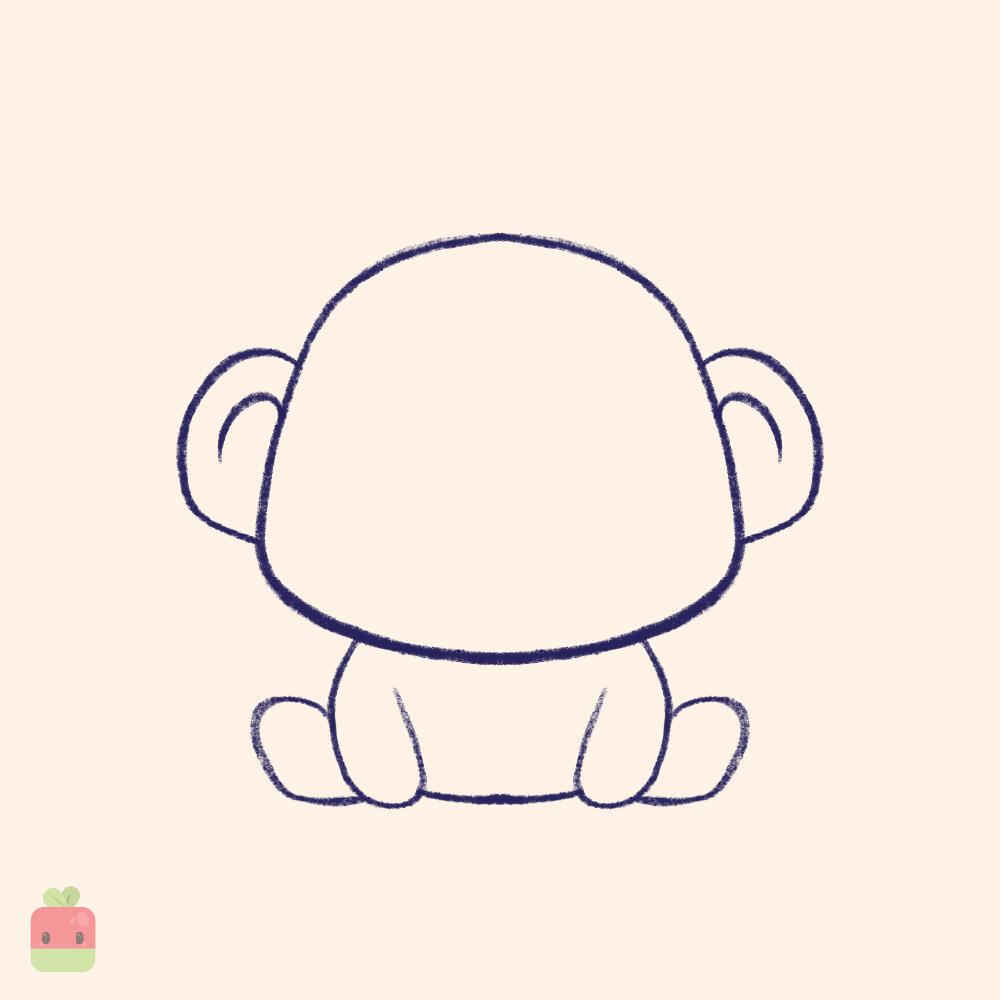
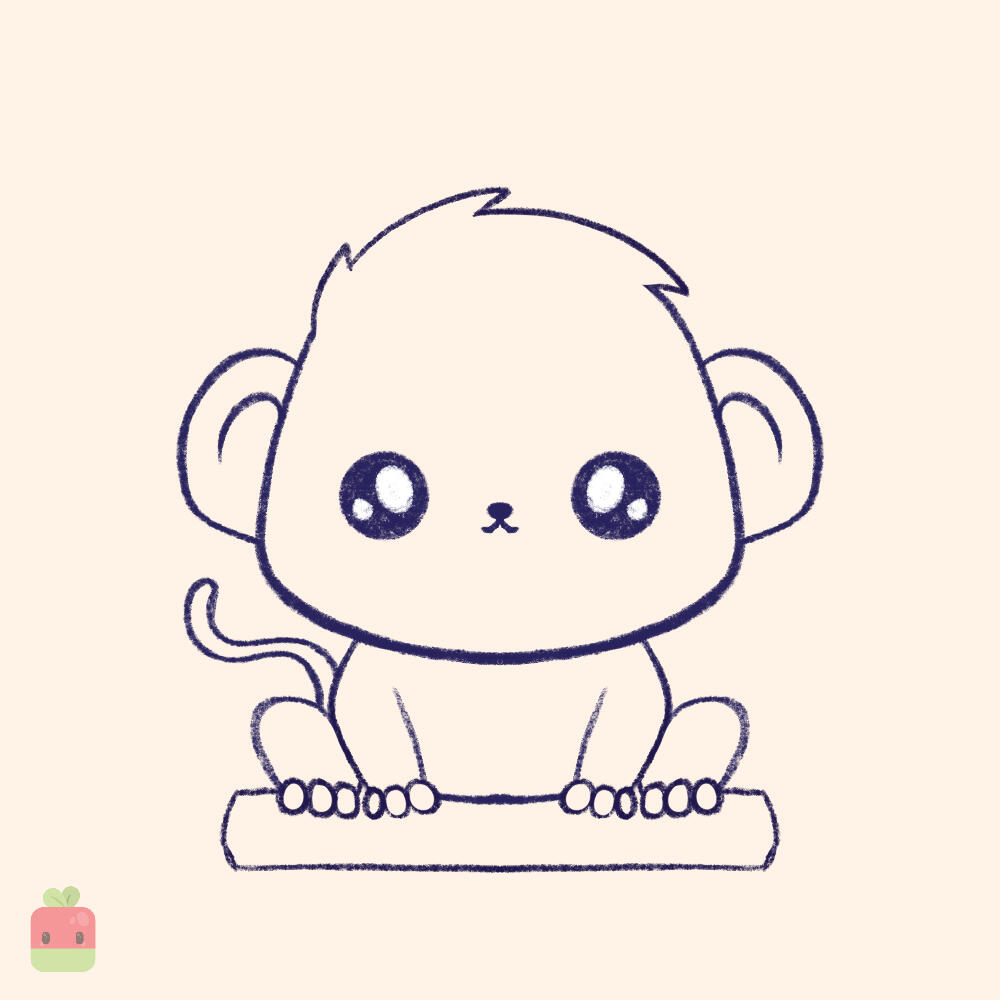
1. Draw the Head ∙ This time we begin by sketching a more square-ish oval shape to outline the size of your monkey's head.
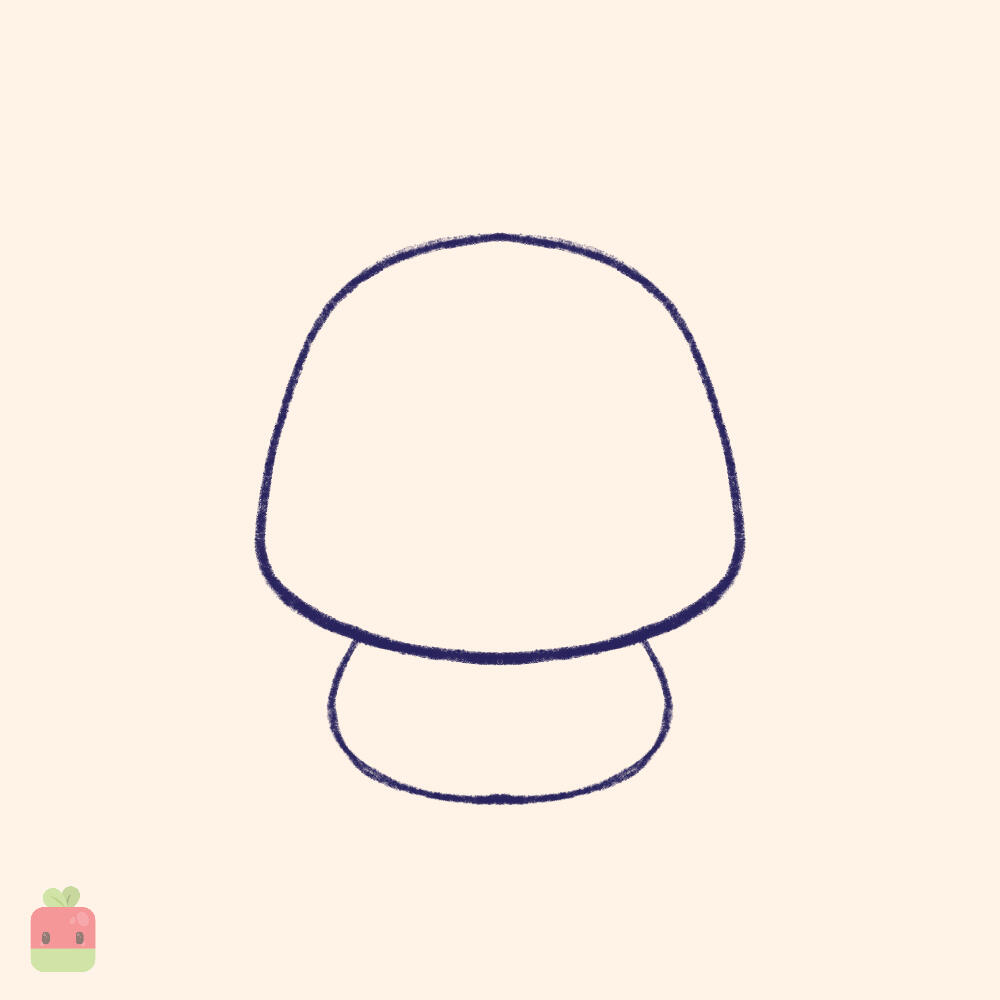
2. Draw the Body ∙ Draw a wide U shape below the head to create the monkey’s chibi body.
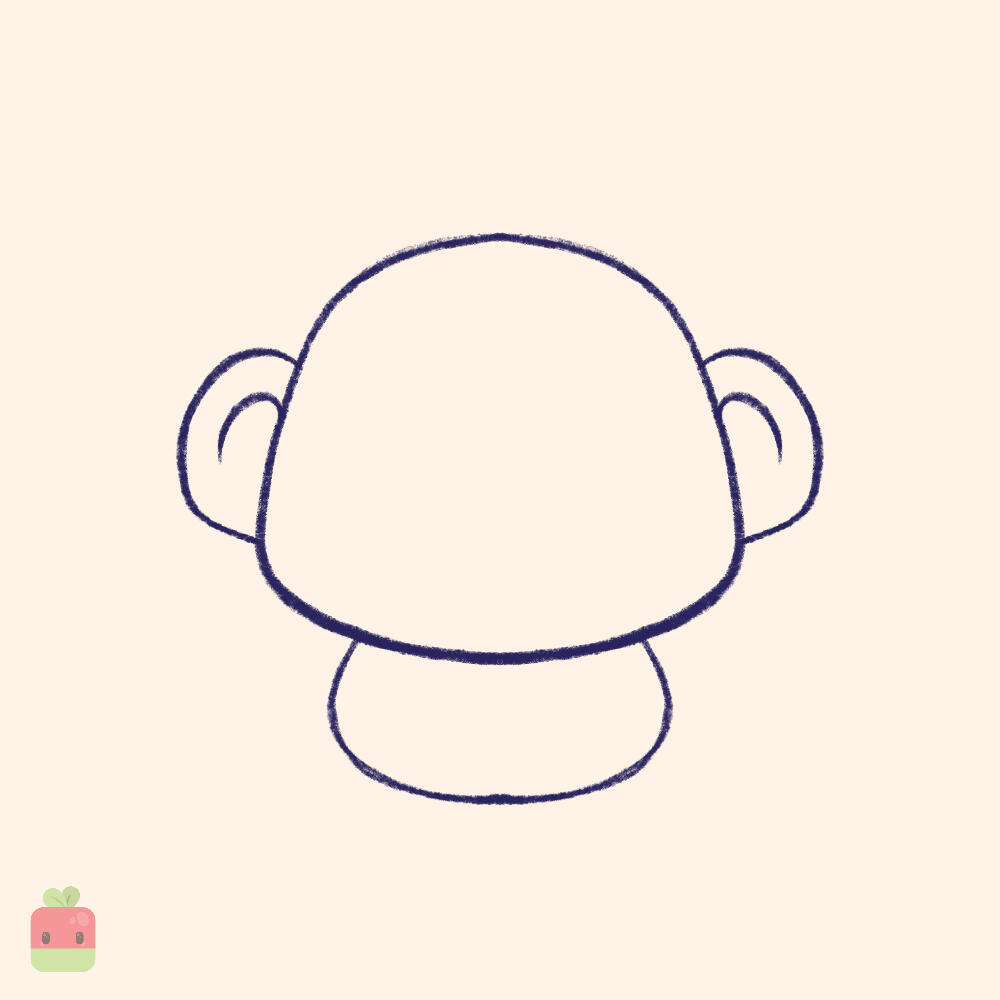
3. Add the Ears ∙ Draw two C shapes for the big ears. For this step, if you’re using Procreate, try the symmetry tool to ensure both ears match if that is the look you are going for.
4. Draw the Limbs ∙ Sketch rough limb shapes - two small U shapes in the front and a two smaller C shapes on the sides of the body.
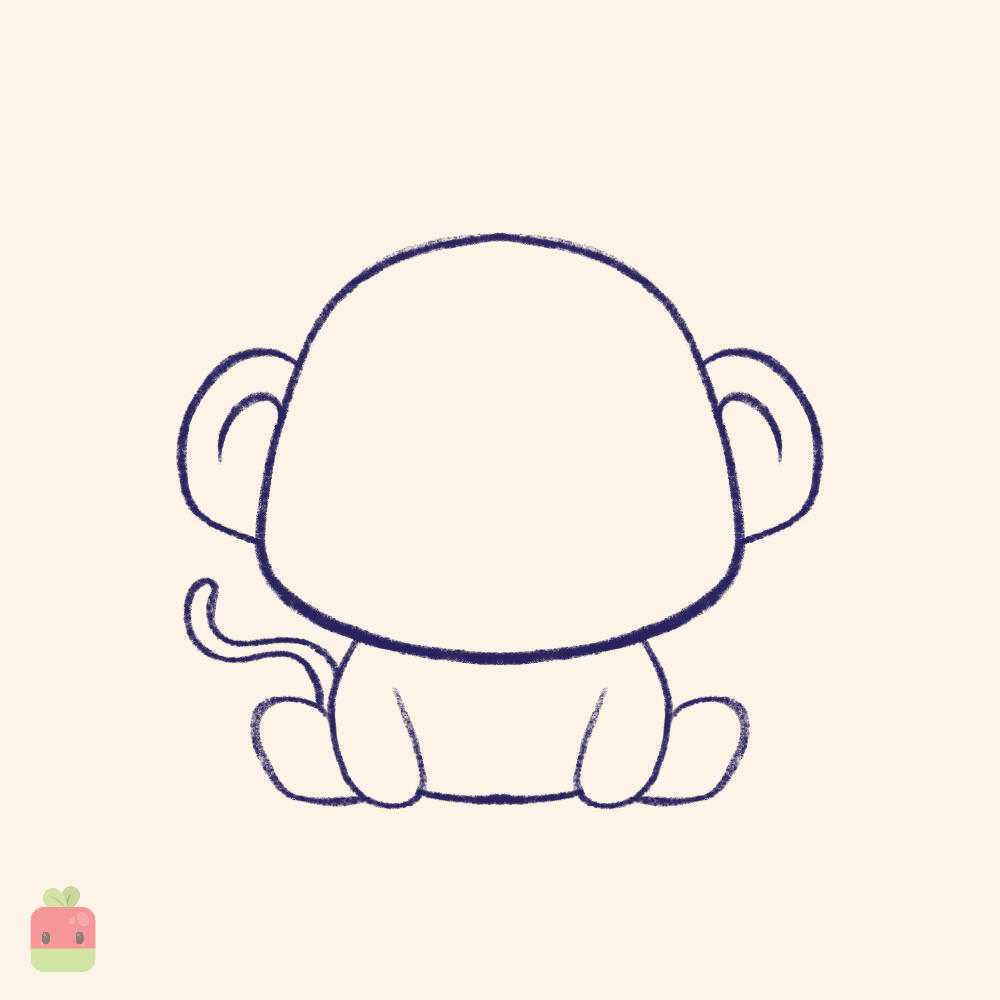
5. Add the Tail ∙ Add a curvy little tail on the side of the monkey.

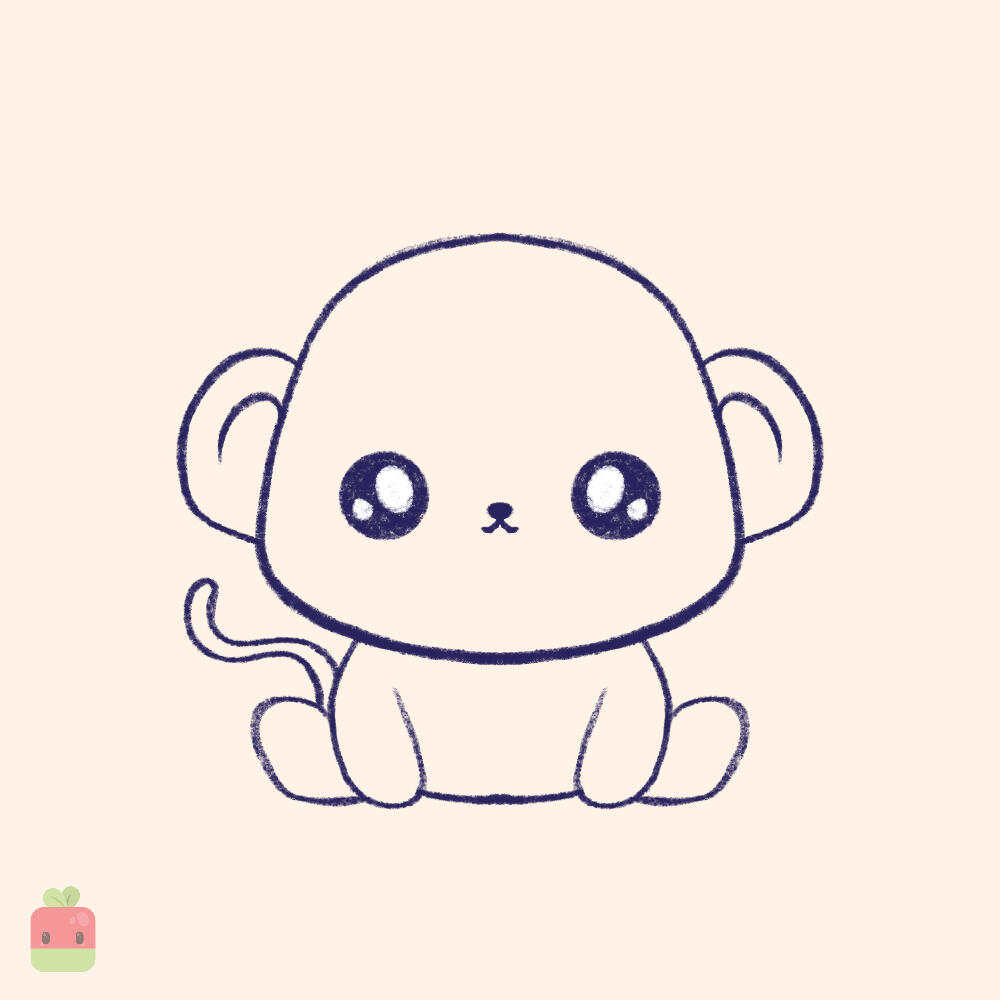
6. Add the Face ∙ Draw two round eyes. Add a tiny, round nose and a small happy mouth.
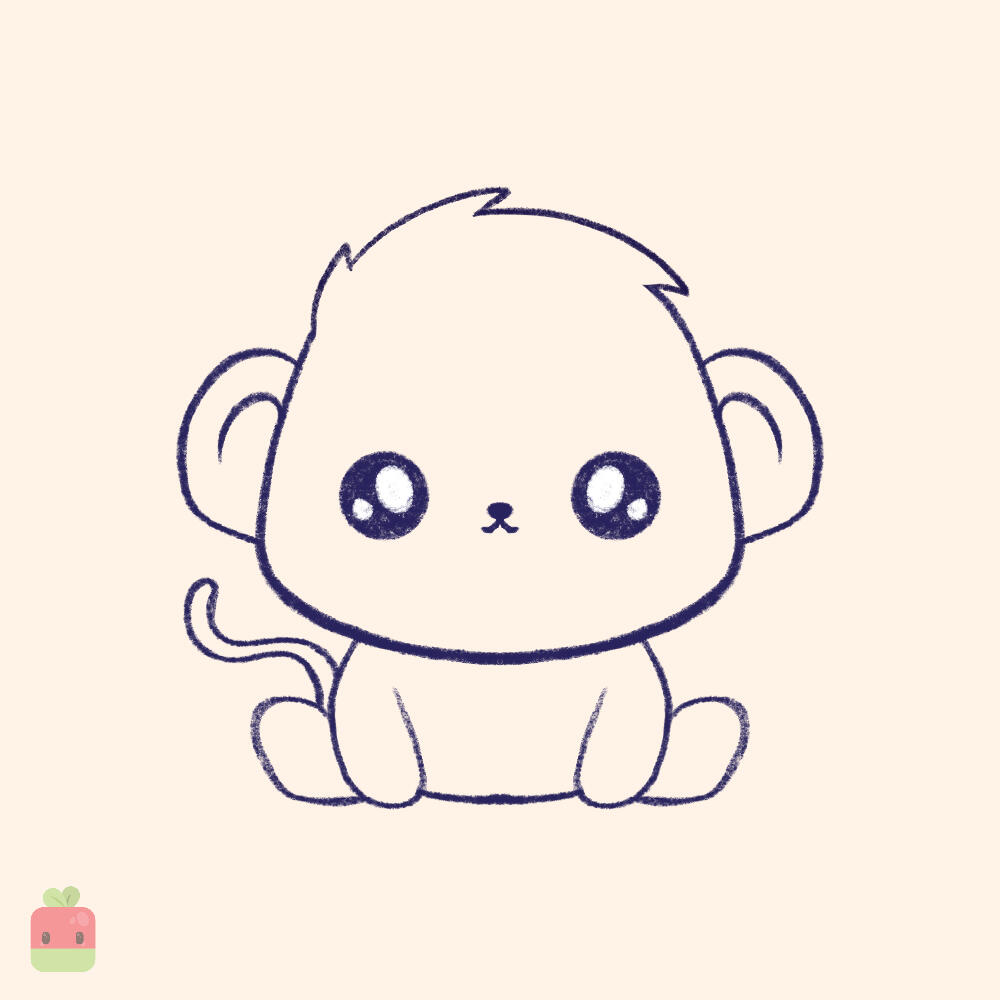
7. Adjust the head ∙ For this step you can leave the monkey as it is, or you can choose to add a cheeky hairstyle just like mine.

8. Add the branch ∙ Draw a branch under the monkey to make the illustration look more complete. While at this stage, also adjust the shape of the limbs and add the fingers.

9. Base Linework ∙ Use a monoline brush or your favorite tool to create clean and precise lines and adjust any other body parts that might need it.

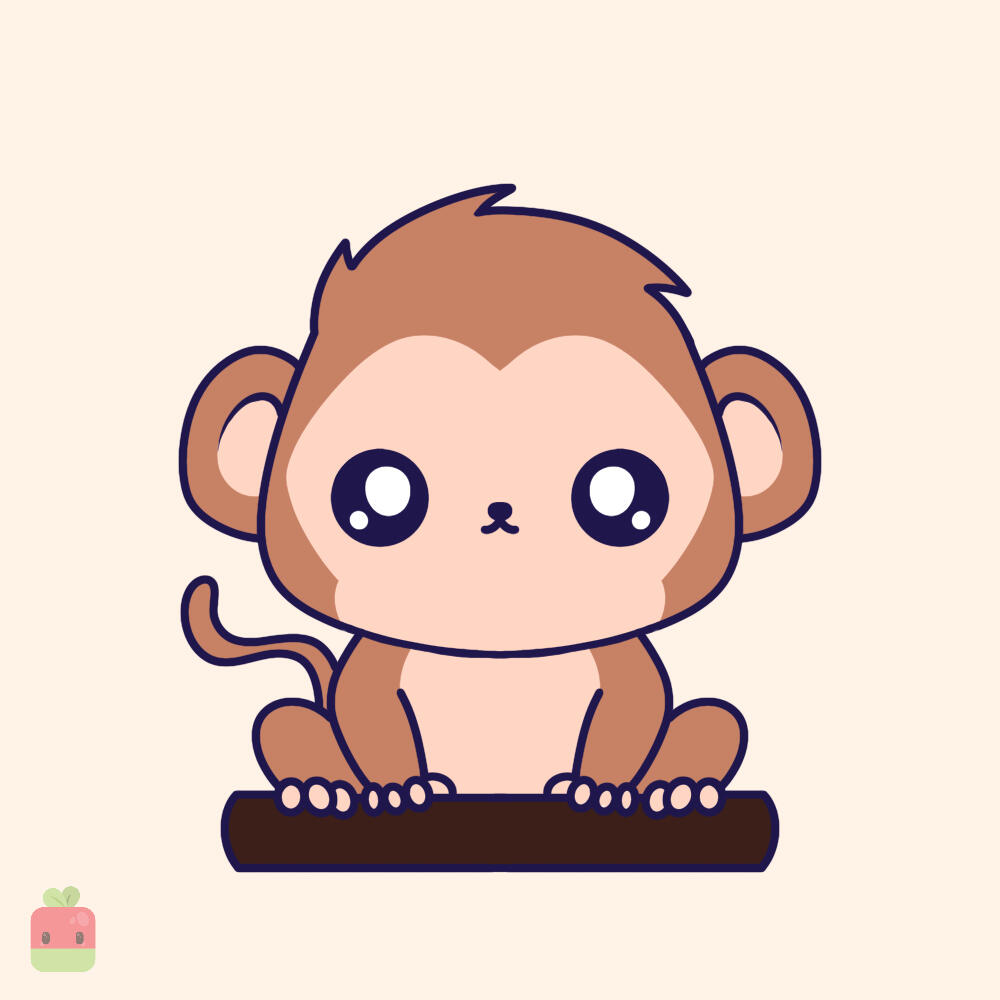
10. Base Color ∙ Use a warm light brown as the base color and a soft, light beige to highlight the face shape, belly and fingers.

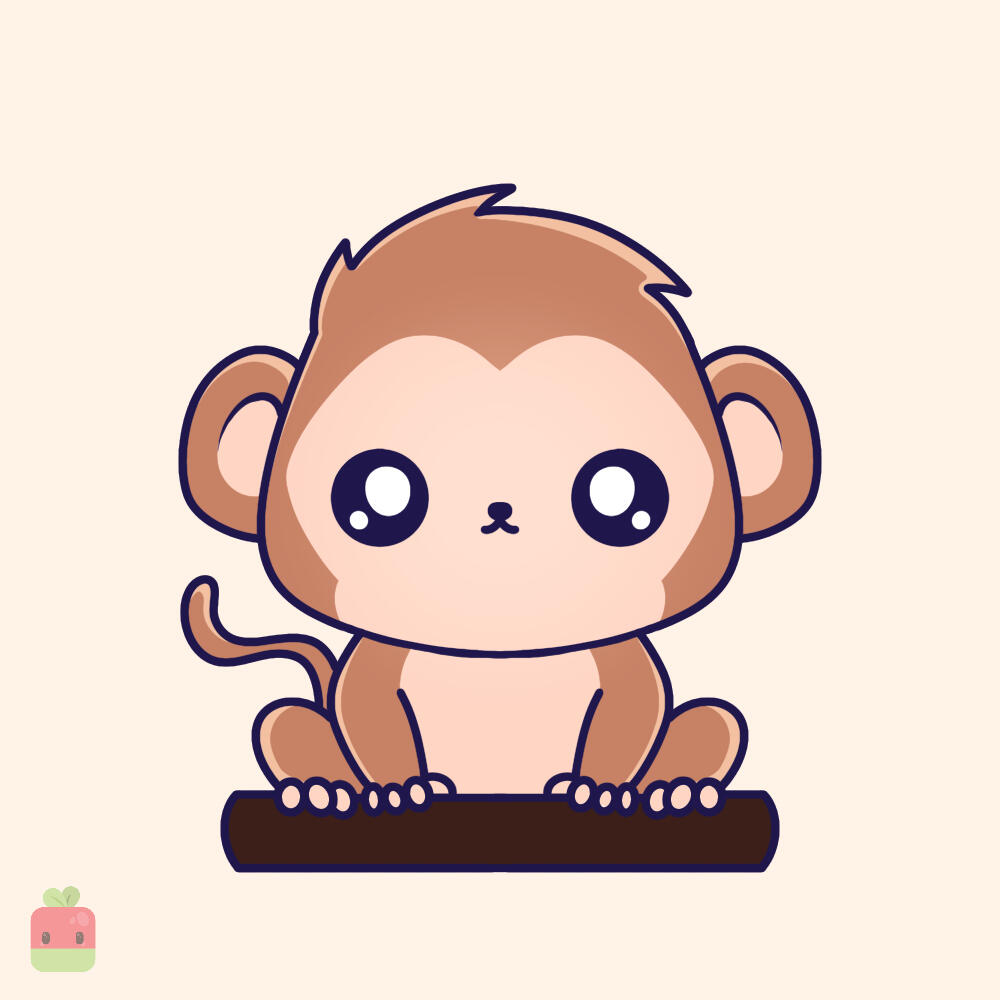
11. Highlights ∙ Use a soft brush to add gentle highlights in the middle of the face. Then, switch to your usual linework brush to create more defined highlights along the edges of the monkey’s head and body for extra depth and dimension.

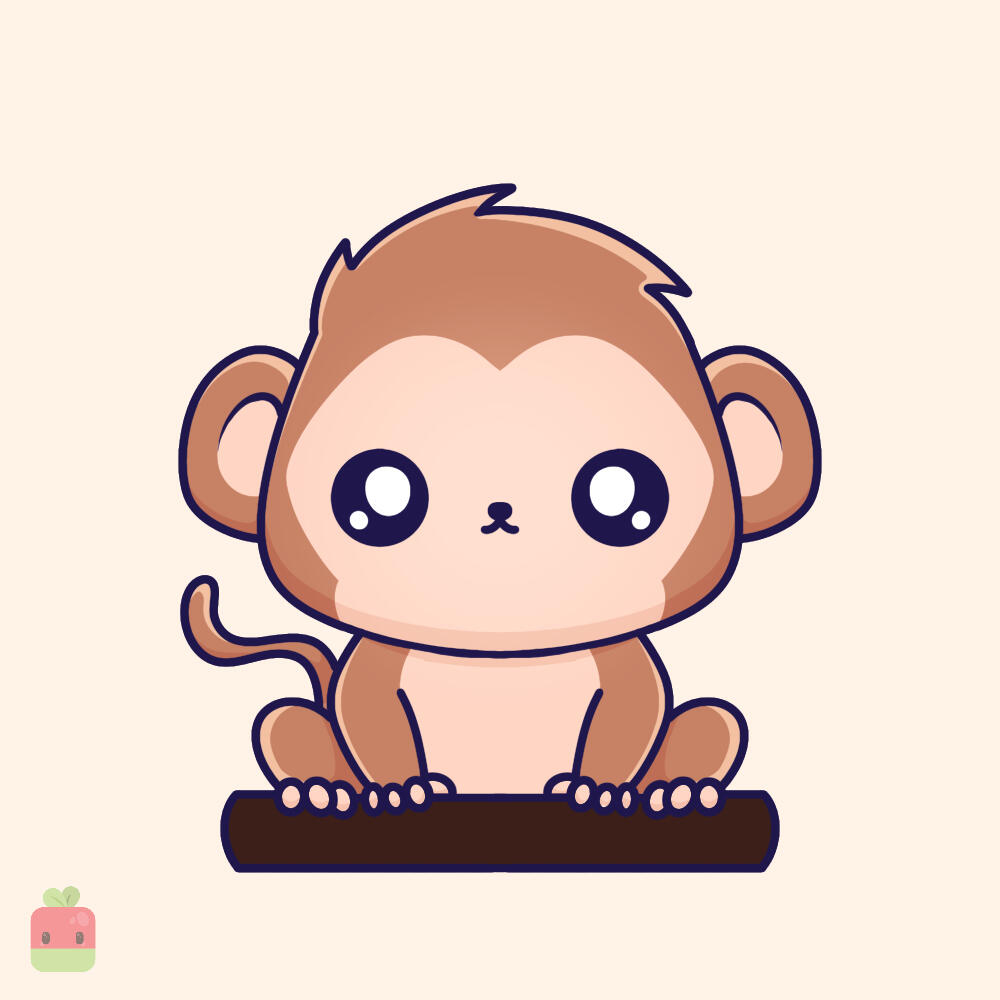
12. Shadows ∙ Apply shading to areas like the underside of the face, fingers, ears and tail.
13. Render the Branch ∙ Use a dark brown as the base of the branch and a slightly lighter shade to add texture with subtle strokes, following the natural flow of the wood. Add some sharp highlights on top and shadows on the bottom.

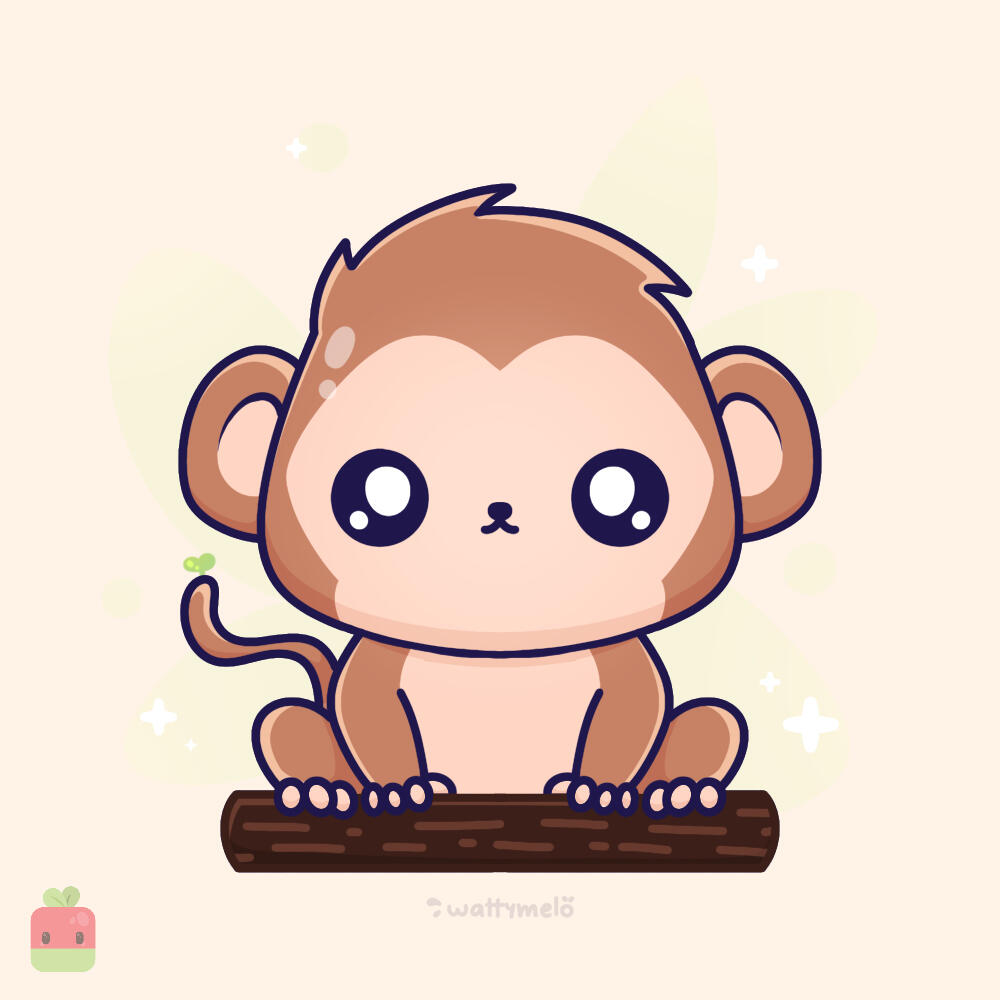
CONGRATULATIONS! You just completed the "How to draw a cheeky monkey tutorial"! Don’t forget to add your signature effects, a background, or those cute highlight blobs on the head to make it extra cute.

You can use the form below if you would like to contact me for collaborations or commissions